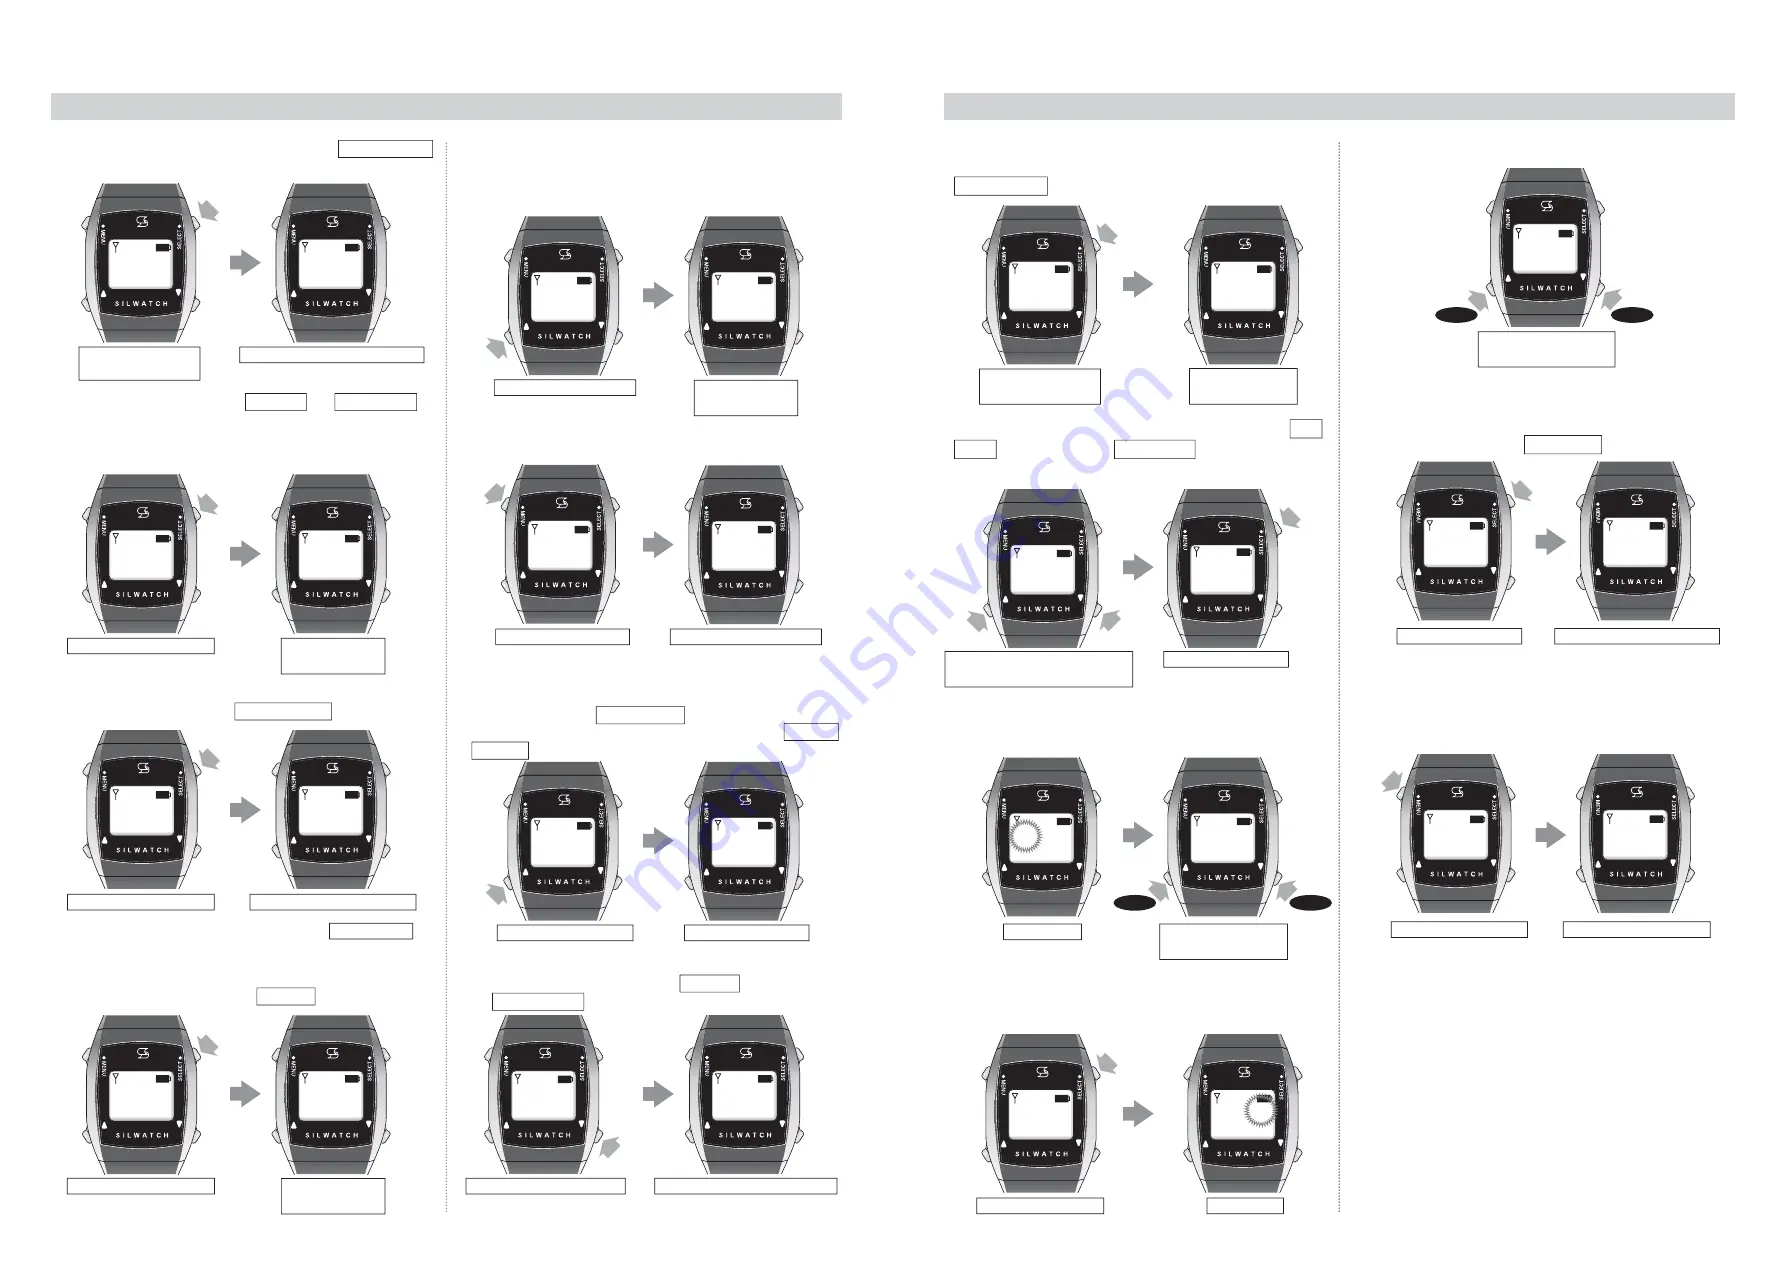
Received History
*You can confirm what content was notified (received) at what time.
①
Long press (about 2 seconds) the SELECT button. Received history
screen is displayed.
SELECT
button
Long press SELECT
(about 2 sec)
Received history screen appears
⑤
To see the next history, press the UP (
▲
) button, then the next
history is displayed.
* Beyond this point, operate from step
③
, then you can confirm the
Received content.
Press UP (
▲
) once
SELECT
button
Press SELECT once
History 01
The time appears
②
Press the SELECT button once History 01 and Received time is
displayed.
Example: History 01 19 : 00
(When there is no Received history, it is displayed as "-- : --".)
History 02
The time appears
SELECT
button
Press SELECT once
Example It means wanting to receive a signal of Guests coming
at 19:00.
The received content appears
③
Press the SELECT button once. Received content is displayed.
SELECT
button
Press SELECT once
History 01
The time appears
④
Press the SELECT button. Return to History 01 screen.
UP (
▲
)
button
Press MENU once
Normal screen is displayed
⑥
Press the MENU button to return to the Time display.
MENU
button
Press UP (
▲
) once
Next history appears
UP (
▲
)
button
Switch Display
* You can save up to 10 Received history , and when you press the UP
(
▲
) button (in step
②
), the screen displays are switched to History 01,
History 02 …in that order.
Press DOWN (
▼
) once
Received history screen appears
* Press the DOWN (
▼
) button from the History 01 screen to return to
the Received history screen
DOWN(
▼
)
button
11
12
Time Setting
*You can set the current time.
Example: When adjusting to 10:10 am * Time is displayed by 24-hour format.
①
Long press (about 2 seconds) the SELECT button.
Received history screen is displayed.
SELECT
button
Received history
screen appears
SELECT
button
Press SELECT
Time setting screen appears
MENU
button
SELECT
button
②
Press the UP (
▲
) or DOWN (
▼
) button to display the Time
setting screen. When the Time setting screen is displayed,
press the SELECT button once.
Press UP (
▲
) or DOWN (
▼
) until
Time setting screen appears
Press SELECT
UP(
▲
)
button
DOWN(
▼
)
button
④
Adjust the hour(s) and determine by pressing the SELECT
button once. The minute(s) blinks.
SELECT
button
Press SELECT
[Min.] blinks.
Adjust Hour(s) with UP
(
▲
) or DOWN (
▼
)
③
The hour(s) blinks. Adjust the hour(s) with the UP (
▲
) or
DOWN (
▼
) button.
[Hour] blinks.
Forward
Back
Adjust Hour(s) with UP
(
▲
) or DOWN (
▼
)
⑤
Adjust the minute(s) with the UP (
▲
) or DOWN (
▼
) button.
Forward
Back
⑥
Adjust the minute(s) and determine by pressing the SELECT
button once. Return to the Time setting screen.
MENU button once
Adjusted time appears
⑦
When you press the MENU button, the display is returned to
the Time display and the adjusted time is displayed.
Long press SELECT
(about 2 sec)
1 2 : 0 0
Received
history
Received
history
History 01
1 9 : 0 0
Guests
coming
History 01
1 9 : 0 0
Guests
coming
History 01
1 9 : 0 0
History 01
1 9 : 0 0
Received
history
History 02
1 8 : 5 0
History 01
1 9 : 0 0
1 2 : 0 0
History 02
1 8 : 5 0
History 01
1 9 : 0 0
History 01
1 8 : 5 0
1 0 : 0 0
1 0 : 0 0
1 0 : 0 0
1 2 : 0 0
Time
setting
Received
history
Received
history
1 2 : 0 0
1 0 : 0 0
Time
setting
1 0 : 1 0
1 0 : 1 0
Time
setting


