background image

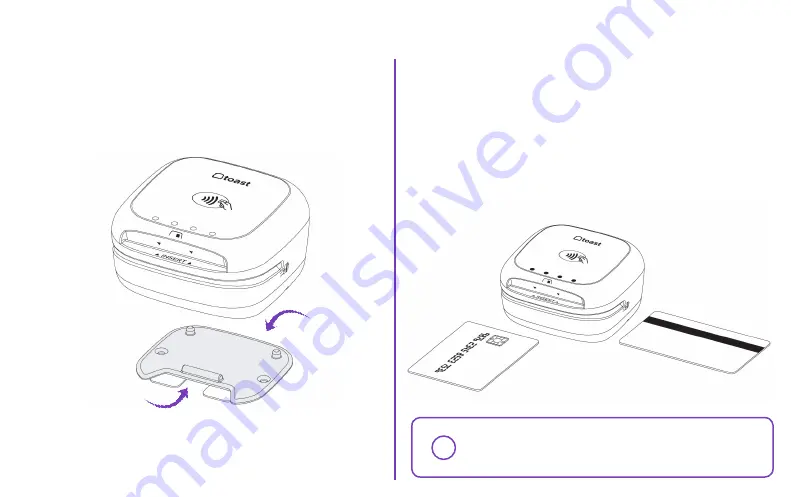
3.  Firmly press the plate down with the adhesive  

and hold for six seconds. The “insert” side should 
face toward your guests. 


The reader can sit on the plate, but can be removed to 
fit any scenario. 

This side up

“Insert” side

Back

FINISHING TOUCHES

Cards can be: 

• 

Tapped on the top of the puck. 

• 

Dipped into the front slot with the card chip facing up.

• 

Swiped across in any direction with the card stripe   


facing upwards. 

Note:

 If you were using a card reader with dip 

options prior, you’ll need to reconfigure your 

manager swipe cards. 

!

Summary of Contents for Contactless Pay

Page 1: ...Contactless Pay INSTALLATION CONFIGURATION INSTRUCTIONS...

Page 2: ...Contactless Reader Plate with adhesive Stickers for your door or windows to advertise the types of payments you can accept USB A to Micro USB cable Counter placement pad for your Contactless Puck Tool...

Page 3: ...t following these steps 1 Navigate to the main menu on your terminal then select Device Setup 2 Select the card reader then select the red Remove Card Reader option Reader ready Processing Success Err...

Page 4: ...A to Micro USB cable We recommend using this cable if you have an available port open on your Toast Hub USB Hub or Toast Printer PICK YOUR CABLE FOR INSTALLATION Micro USB to Micro USB cable This cabl...

Page 5: ...g the USB end of the cable into your Toast Printer USB A TO MICRO USB INSTALL STEPS 2 Plug in the remaining Micro USB side into the bottom of the puck Nice work Next turn to the EMV Configuration sect...

Page 6: ...ook 4 Plug in the remaining end into the bottom of the puck MICRO USB TO MICRO USB INSTALL STEPS 2 Plug in the end of the Micro USB cable paired with the cover and screws Then screw in the plate to th...

Page 7: ...he update If you have a second screen attached to your terminal also known as a guest facing display you may have an additional swipe only card reader If you have this make sure the BBPOS Chipper 2X U...

Page 8: ...he plate with adhesive and apply it to your counter surface FINISHING TOUCHES 1 Wrap your cable around the inside of your puck in a clockwise motion to reduce wire clutter Keep in mind the adhesive is...

Page 9: ...n be removed to fit any scenario This side up Insert side Back FINISHING TOUCHES Cards can be Tapped on the top of the puck Dipped into the front slot with the card chip facing up Swiped across in any...

Page 10: ...Scan the QR code with the camera app on your phone to access these documents for more info Let your customers know they can pay with contactless Find a visible clean spot on the counter to display th...

Page 11: ......

Page 12: ...User shall use the supplied USB cable if an available port open on the product...

Reviews: