Toa A-5006A Quick Manual Download Page 4

Page | 4 

PRESET 1 COMPLETE: Programming Layout 

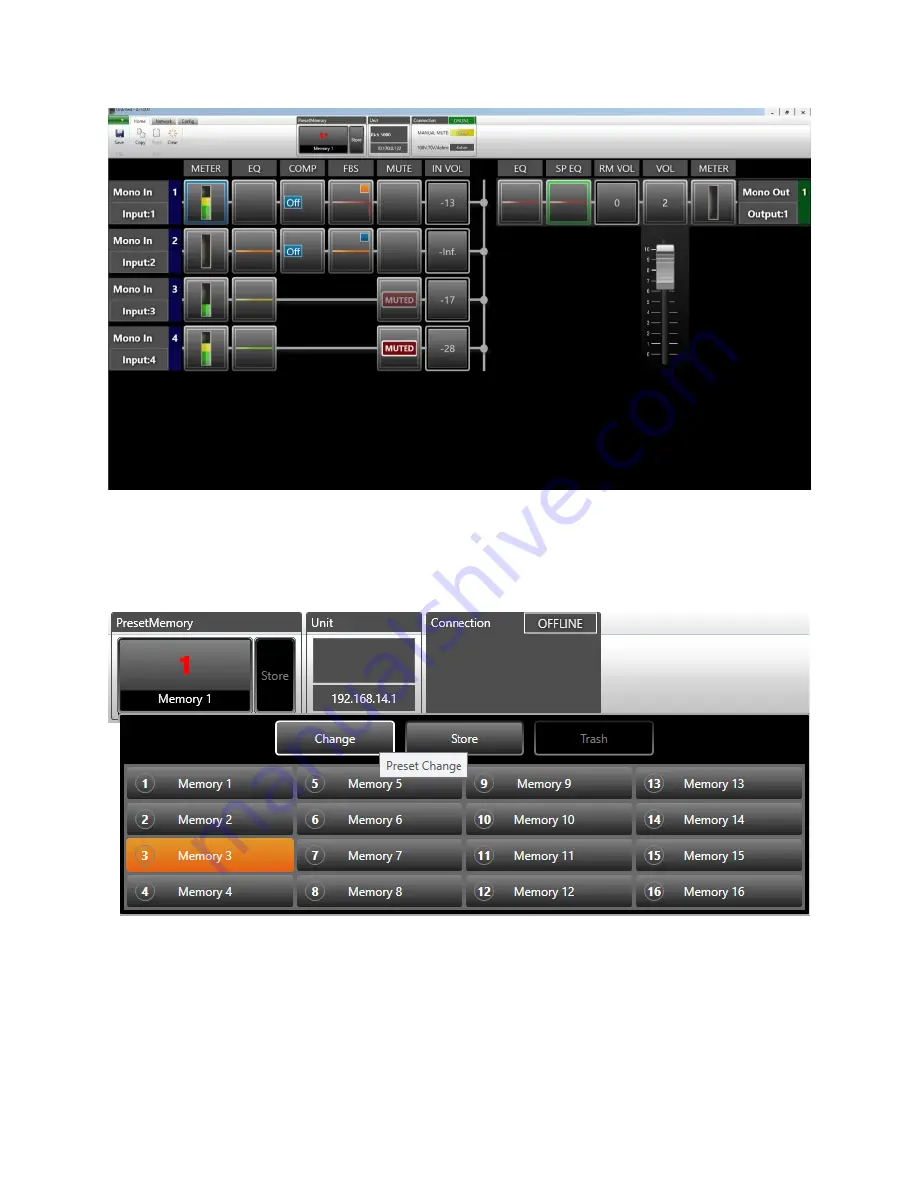
After completion of the PRESET 1, click on the 

MEMORY

 button above the signal path layout, 

click on 

MEMORY 3

, then click on the 

CHANGE

 button. 

CHANGE PRESET DISPLAY; Change Preset 3 

To program for INPUT 3 on/ INPUTS 1 & 4 off, repeat steps 1-4, the difference is in step 2, 
enable INPUT 1 & 4 as the targets. In step 3, click on 

PARAMETERS

/ INPUT 1 to adjust 

REDUCTION

HOLD TIME and FADE IN TIME

 parameters. Then click on 

PARAMETERS

/ INPUT 4 

to adjust 

REDUCTION

HOLD TIME and FADE IN TIME

 parameters. When completed, close the 

prompt. Save to the preset 3 to complete the edit. 

Summary of Contents for A-5006A

Page 1: ...SOLUTION Program a series of presets with single open channels and manual mute enabled for channels not wanted Example If using INPUTS 1 3 4 four presets would be considered Preset 1 Ch 1 ON Ch 3 4 O...

Page 2: ...L 1 ON click on MUTE for INPUT 3 and perform the following steps 1 Set MODE to MANUAL When enabled the MANUAL button will change color to GREEN 2 Set TARGET enable INPUT 3 and INPUT 4 When enabled the...

Page 3: ...f the display and click STORE or click Memory 1 and click store in the drop down menu as shown below TIP In this example the means there have been changes that have not been saved Once you successfull...

Page 4: ...PLAY Change Preset 3 To program for INPUT 3 on INPUTS 1 4 off repeat steps 1 4 the difference is in step 2 enable INPUT 1 4 as the targets In step 3 click on PARAMETERS INPUT 1 to adjust REDUCTION HOL...

Page 5: ...PLAY Change Preset 4 To program for INPUT 4 on INPUTS 1 3 off repeat steps 1 4 the difference is in step 2 enable INPUT 1 3 as the targets In step 3 click on PARAMETERS INPUT 1 to adjust REDUCTION HOL...

Page 6: ...SET 4 COMPLETE Programming Layout After completion of the PRESET 4 click on the MEMORY button above the signal path layout click on MEMORY 5 then click on the CHANGE button CHANGE PRESET DISPLAY Chang...

Page 7: ...1 button on the far right side then perform the following adjustments Set REDUCTION vertical axis to 60 dB Set HOLD TIME horizontal axis to 1 second Set FADE IN TIME to 0 When done on input 1 enable t...

Page 8: ...If all presets work as intended the last step is to save the program file Go to the upper left corner of the programming page click on SAVE A SAVE AS prompt will appear SAVE AS PROMPT Type a name for...

Reviews: