


Page | 1
A
-5006A/ A-5012A: How to Remotely Control Input Channels
PROBLEM:
The end user wants remotely controlled
input channels. The four input volumes can’t
be controlled by software since they are based on front panel potentiometers, not
programming.
SOLUTION:
Program a series of presets with single open channels and manual mute enabled for
channels not wanted.
Example: If using INPUTS 1, 3 & 4, four presets would be considered:
Preset 1: Ch 1 ON, Ch 3 & 4 OFF
Preset 2: Not used
Preset 3: Ch 3 ON, Ch 1 & 4 OFF
Preset 4: Ch 4 ON, Ch 1 & 3 OFF
Preset 5: All mute
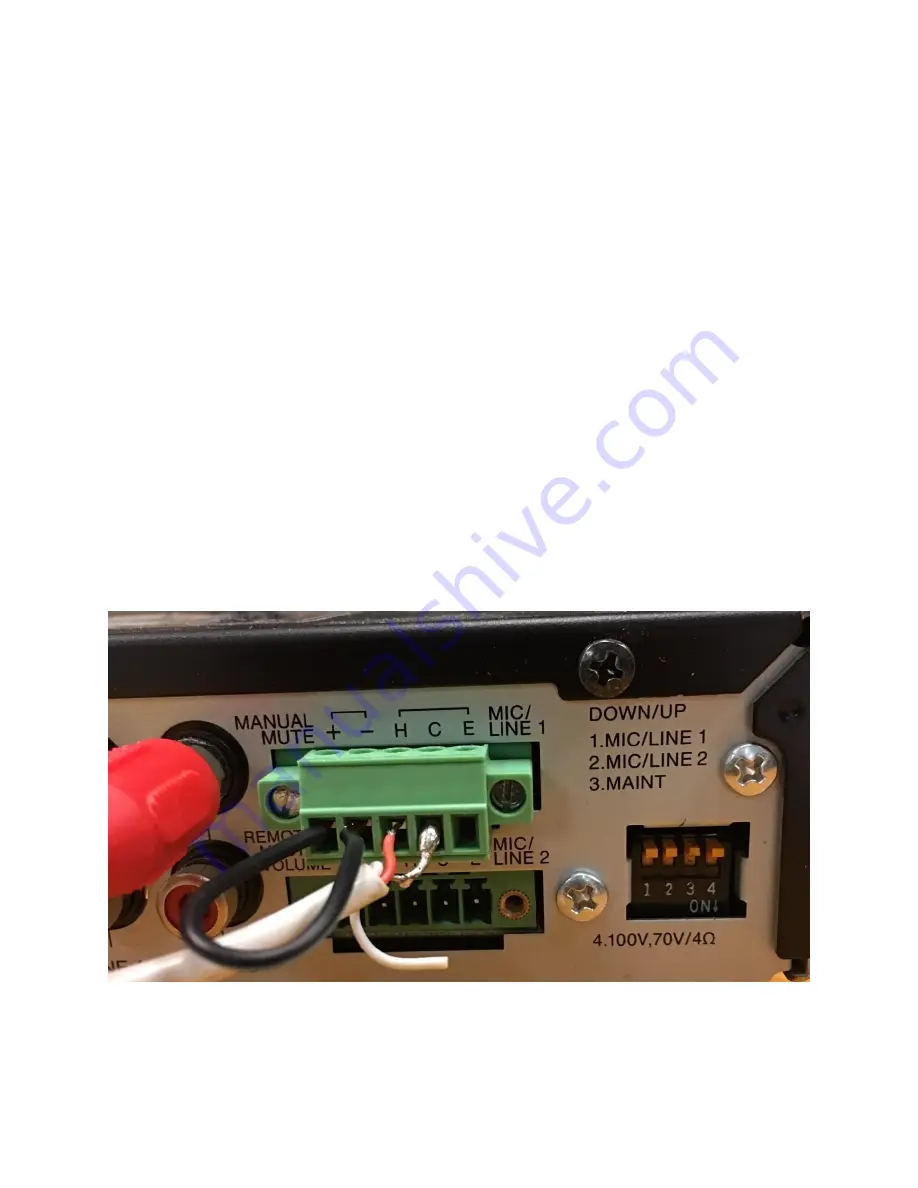
HARDWARE PROCEDURE:
The hardware requirement is to & - mute terminals to
enable the contact closure.
MANUAL MUTE JUMPER (Black wire to MANUAL MUTE + and -)


