background image

WWW.TMGINDUSTRIAL.COM

P20/27

Toll Free:1-877-761-2819

Squirt soapy water around joints during

compressor operation and watch for

bubbles. Developing bubbles indicate a

leak is present.

Tighten fittings if necessary.

Engine Maintenance

Perform engine maintenance as specified in the

engine Owner’s Manual. Items include:

Change oil after the first 20 operating hours,

and at least every 100 operating hours

thereafter and oil filter, as directed in

engine Owner’s Manual.

Failure to replace a rusted air receiver tank could

result in tank rupture or explosion, which could

cause substantial property damage, severe

personal injury, or death. Never modify or repair a

tank.

WARNING: Air tank hazards

Check Drive Belt for Tension and Alignment

WARNING: Burn hazard

Air filter check/replacement

Spark plug cleaning/replacement

Fuel filter check/replacement

Fuel tank cleaning

Change Pump Oil

After the first 50 hours of use then every 3

months or 500 hours, change pump oil while

crankcase is still warm. (See “Appendix A:

Lubricants” for suitable alternatives.)

1.

Remove the oil fill and drain plugs. Collect

the oil in a suitable container.

2.

Replace the oil drain plug and refill

compressor crankcase with clean oil.

3.

Replace the oil fill plug.

4.

Start the unit and run for several minutes.

Shut down the air compressor and

recheck the oil level. If necessary, add

more oil. (Figure 3)

Fill line

Figure 3

Drain Receiver Tank and Inspect Tank

Drain water from the receiver tank daily. Water left

in the tank can cause the tank to weaken and

corrode, increasing the risk of tank rupture. Badly

rested receiver tanks must be replaced.

Recommends a tank inspection after every 2

years of service. See “

Inspection of Unfired

Pressure Vessels

,” volumes 2-9, August 2001, Bill

McStraw (available on-line at NTIS).”

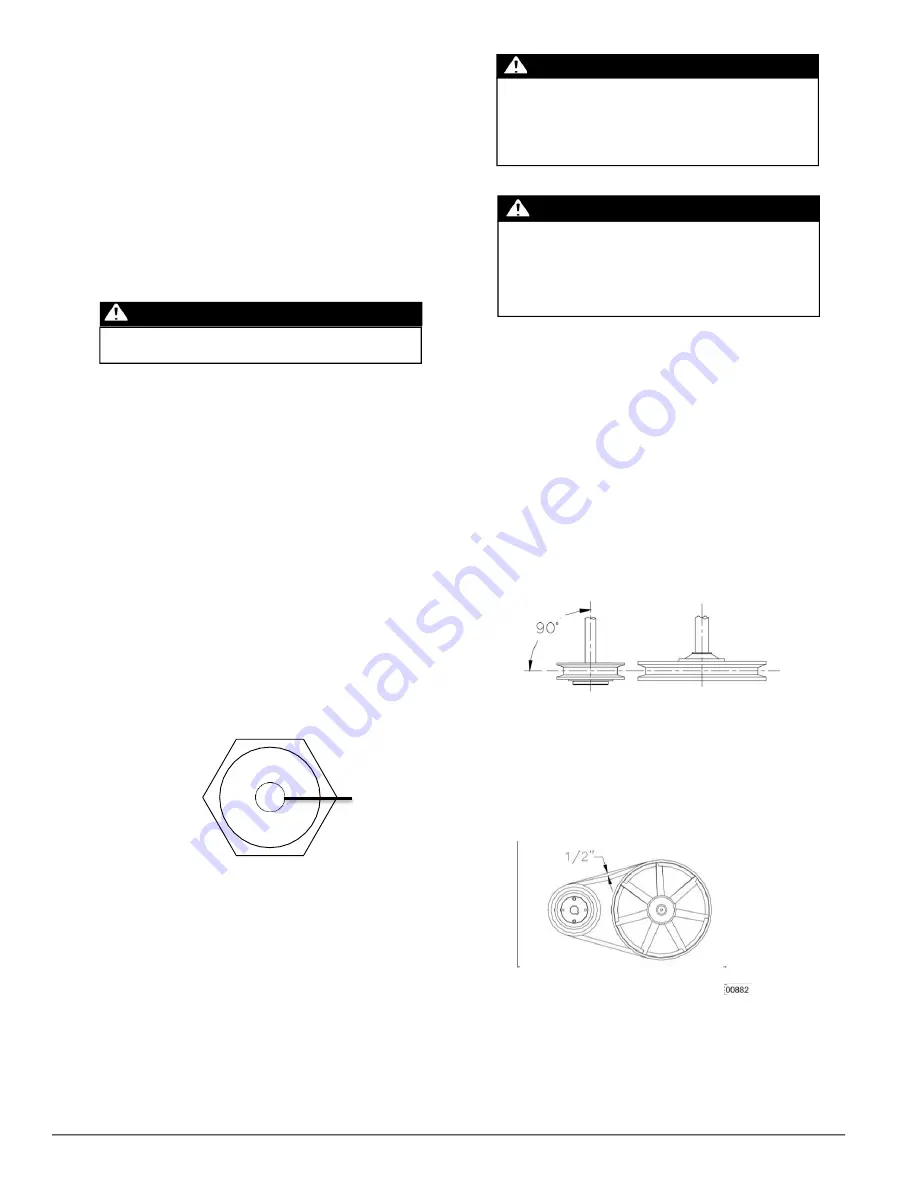
To align and adjust drive belt tension:

1.

Remove the belt guard cover.

2.

Loosen the four fasteners holding the

engine to the compressor.

3.

Shift the engine in the proper direction

The belt must be properly aligned when

adjustment is made.

4.

To align belt, lay a straight edge against

the face of the flywheel touching the rim at

two places. (Figure 4)

Figure 4

5.

Adjust flywheel or engine pulley so that

the belt runs parallel to the straight edge.

6.

If necessary, use a gear puller to move the

pulley on the motor shaft. Tighten set screw

after pulley is positioned.

7.

Check for proper belt tension. (Figure 5)

Figure 5

8.

Tighten the four fasteners holding the

engine to the top plate while tension and

alignment is maintained.

Improper pulley/sheave alignment and belt tension

can result in motor overload, excessive vibration,

and premature belt and/or bearing failure. To

prevent this from happening, check the

pulley/sheave alignmen

t

and belt tension on a

regular basis.

CAUTION: Pulley/sheave hazard

Never open oil port while engine is running. Hot

oil can spray over face and body.

Belts will stretch from normal use. When properly

ajdusted, a 5 lb. force applied to the belt between

the engine pulley and the pump will deflect the

about 1/2”.

Summary of Contents for TMG-GAC40

Page 1: ...re all parts are received Wear proper safety goggles or other protective gears while in assembly Missing parts or questions on assembly Please call 1 877 761 2819 or email cs tmgindustrial com Do not...

Page 2: ...pressor For Outdoor Use only This belt driven compressor has a 2 stage 2 cylinder pump an engine with cast iron cylinders for long life and a compact design rated for 175 maximum PSI Its continuous du...

Page 3: ...ping 12 Step 4 Electrical Starting Battery Procedure 12 Battery Connection 12 Battery Disconnection 13 Install Spark Arrestor if Required 13 OPERATION 14 Follow Safety Rules for Operation 14 Preparing...

Page 4: ...nspect Air Filter 19 Inspect Compressor for Air Leaks 19 Engine Maintenance 20 Change Pump Oil 20 Drain Receiver Tank and Inspect Tank 20 Check Drive Belt for Tension and Alignment 20 Inspect Clean Sp...

Page 5: ...including safety glasses with side and top protection Ear protection is also recommended if working near any operating engine Adult control only Only trained adults should set up and operate the air...

Page 6: ...ement cc 302 cc DIMENSIONS COMPONENTS Length 41 Width 18 Height 40 Weight 420 lbs Mounting Hole Diameter 0 5 Suggested Mounting Bolt Diameter 7 16 SUPPLIES REQUIRED not included Engine Oil Refer to en...

Page 7: ...ck valve and then to the storage tank It becomes very hot during use and can cause severe burns Never touch 9 Tank Drain Valve Used to remove moisture from air after compressor is shut off and air emp...

Page 8: ...WARNING orange indicates a hazardous situation which if not avoided could result in death or serious injury CAUTION yellow used with the safety alert symbol indicates a hazardous situation which if no...

Page 9: ...Safety Decal Locations On Product Warning Labels Location Description 1 Air Compressor Instructions 2 Poisonous Gas 3 Burn Hazard Hot Muffler 4 Fuel Fire Explosion Hazard 5 Engine Electric Start Batt...

Page 10: ...Safety Decals 6 1 2 3 5 4 WWW TMGINDUSTRIAL COM P10 27 Toll Free 1 877 761 2819...

Page 11: ...operly charged Be familiar with its use Provide battery operated or battery back up type carbon monoxide alarms in any structure that is in close proximity to the running compressor Do not install in...

Page 12: ...ecoil starter the engine is capable of electric starting which if used will require the purchaser to provide a hook up to an external 12 volt size battery Battery should have a minimum rating of 18 am...

Page 13: ...quence to the above connection sequence 1 First disconnect the black cable from the battery negative terminal 2 Next disconnect the red cable from the battery positive terminal 3 Disconnect the black...

Page 14: ...eyes Small objects can become airborne as the air spray contacts them Respirator Always wear a respirator when spraying and spray in a well ventilated area to prevent health and fire hazards Preparing...

Page 15: ...cap make sure compressor has been off and allowed to cool for at least 2 minutes If gas is spilled on your skin or clothes change clothes and wash skin immediately 6 Store extra gas in a cool dry plac...

Page 16: ...verheating Do not operate this unit with any components rated less than the maximum operating pressure of the unit 175 PSI unless a regulator limiting pressure is used Note Many tools are rated for on...

Page 17: ...use for an extended period of time this moisture will collect in the tank When using a paint spray or sandblast gun this water will be carried from the tank through the hose and out of the gun as drop...

Page 18: ...essure from the tank 2 Drain moisture from tank by opening the drain valve located at the bottom of the tank Choose a storage location An appropriate storage location is Clean and dry Away from source...

Page 19: ...afety Relief Valve This valve should be inspected on a weekly basis if used regularly or the first time it is being used after a prolonged period of storage The safety valve automatically releases air...

Page 20: ...and Inspect Tank Drain water from the receiver tank daily Water left in the tank can cause the tank to weaken and corrode increasing the risk of tank rupture Badly rested receiver tanks must be repla...

Page 21: ...Do not allow air intakes to become blocked If dust or debris accumulates in the compressor clean the compressor with a damp cloth or soft bristle brush Note Do not spray compressor with a garden hose...

Page 22: ...ricant G Belt tension too tight or sheaves not aligned Check tension alignment H Air leaks in discharge piping Check tubing connections Tighten joints or replace as required I Compressor components le...

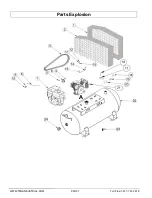
Page 23: ...WWW TMGINDUSTRIAL COM P23 27 Toll Free 1 877 761 2819 Parts Explosion A...

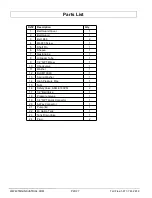
Page 24: ...lbow 1 10 Check valve 1 11 Washer 1 12 Bolt M10X60 1 13 Spring Washer 1 14 High Pressure Pipe 1 15 Nuts 1 16 Safety Valve ASME 180PSI 2 17 1 2 Ball Valve 1 18 Pressure Gauge 1 19 1 4 NPT Quick Connect...

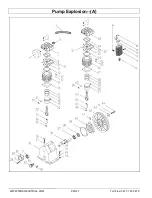
Page 25: ...WWW TMGINDUSTRIAL COM P25 27 Toll Free 1 877 761 2819 Pump Explosion A...

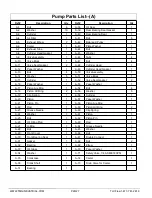
Page 26: ...A 53 Paper Washer 1 A 17 Piston Aie Ring 1 A 54 Bolt 4 A 18 Piston Oil Ring 2 A 55 Washer 5 A 19 Clip Spring 1 A 56 Cylinder 1 A 20 Piston 1 A 57 Paper Washer 1 A 21 Piston Pin 1 A 58 Piston Aie Ring...

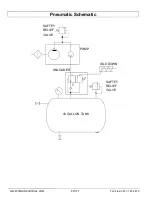
Page 27: ...WWW TMGINDUSTRIAL COM P27 27 Toll Free 1 877 761 2819 Pneumatic Schematic SAFTEY RELIEF VALVE PUMP IDLE DOWN UNLOADER SAFTEY RELIEF VALVE 40 GALLON TANK...

Page 28: ......

Reviews: