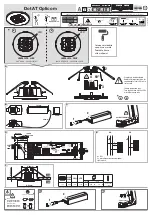
For maximum detection range (12m) the control
cover should be in the fully up position.
FIGURE 11
11
0°
FIGURE 11
For mid detection range (8m) the control cover
should be in the mid position. FIGURE 12
11
0°
FIGURE 12
For minimum detection range (4m) the control
cover should be in the fully down position.
FIGURE 13
11
0°
FIGURE 13
TESTING
For testing purposes move the control cover to the fully
down position (FIGURE 13) to allow access to the PIR
controls. Turn the power to the unit on and allow the
unit to 'warm up' for approximately one minute.
Put the unit into test mode by turning the Time and Lux
controls inside the control cover fully anticlockwise.
Walk through the detection area. The main lamp will
turn on when you move and turn off when you stop.
Wait for the lantern to turn off before moving again to
test the sensor and to establish the best position for
the control cover for your requirements. Once you
have established the best position for the control cover,
maximum range, mid range or minimum range move
the control cover to the fully down position (FIGURE 13)
to finally set the Time and Lux control levels to your
requirements.
SETTING TIME / LUX CONTROLS
(1) TIME ADJUSTMENT
The TIME adjustment controls how long the main lamp
will stay on after motion has been detected.
Turn the TIME control clockwise to increase the time
that the main lamp stays on. FIGURE 14
ABOUT 8 SECONDS
ABOUT 12 MINUTES
FIGURE 14
(2) LUX ADJUSTMENT
The LUX adjustment determines what light level the
main lamp light will start to operate when the sensor is
activated.
The recommended setting is fully clockwise to the
moon (dusk) position. FIGURE 15. At this setting the
motion sensor will remain inactive during daytime
hours. When daylight fades at dusk the sensor will
become active.
FIGURE 15
The comfort LED at the base of the unit also depends
on the LUX setting. Using the recommended setting
the comfort LED will come on at dusk and go off at
dawn.
When you have completed the TIME and LUX settings
return the control cover to the position you require
established during the previous SETTING UP section.
Installation, testing and setting up is now completed
and your unit is ready for normal use.


