4
Fig
. 3
19
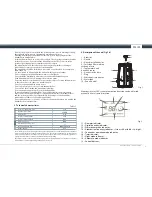
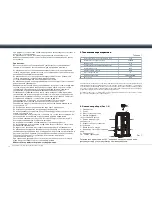
Increase the humidity level (+)
2
0
Set the steam atomization frequency
2
1
Set the timer (+)
2
2
Set the warm steam mode
2
3
Decrease the humidity level ( )
2
4
Select operation modes
2
5
Set the timer ( )
2
6
Unit s on/off button
2
7
Base of device under the water tank
2
8
Ultrasonic membrane
29
Water level sensor (float)
3
0
Water valve axis
3
1
Water receiver
3
2
Air vent
3
3
Cleaning brush (not included in
the mandatory scope of delivery)
Fig
. 4
5. Scope of delivery
1. Humidifier 1 pc.
2. Operation manual 1 pc.
3. Guarantee card 1 pc.
4. Packing 1 pc.
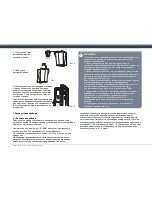
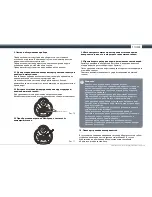
6. Filling tank with water (Fig. 5-8)
Prior to filling the tank remove the atomizer from the tank. If you fail to do
so, then upon turning over the tank the atomizer will fall down. The device
must not be operated without the atomizer.
When moving the humidifier do not grab the water tank handle. You
should hold the humidifier by the base.
Fig
.
5
1. Remove the atomizer and then the water tank from the device.
2. Grab the tank handle and pull it upwards.
3. Unscrew the tank cap
counterclockwise.
Fig
.
6
4. Fill the tank with
water.
Fig
.
7
5. Screw the tank cap clockwise.
Make sure the tank cap is securely tightened. Be
sure that the rubber gasket is installed to the tank
cap. Securely tighten the cap clockwise.
Incomplete fulfillment of the abovementioned
measures causes the air coming into the water tank
and, as a result, a failure.
6. Install the tank and the atomizer to the device.
Fig
.
8
www.timberk.com
electric humidifier
20
22
26
24
19
25
21
23
27
31
29
33
28
32
30
Summary of Contents for THU UL 05
Page 12: ...12 www timberk com 3 6 4 7 5 6 8 7 7 1 POWER AUTO 1 2 3 40 4 5 6 10 25 10 20...
Page 14: ...14 www timberk com 7 6 40 7 7 1 8 1 7 8 8 9 400 180 6 L M H 60 30 20 11 40 80 5...
Page 15: ...15 www timberk com 9 9 1 9 2 10 9 3 11 9 4 9 5 10 5...
Page 16: ...16 www timberk com 5 STEAM 10 HEAT 1 2 11 2...


