Step 1:
Download and install TIGERSECU CMS on your computer.
Download Link: http://www.tigersecu.com/cms-win.zip
Step 2:
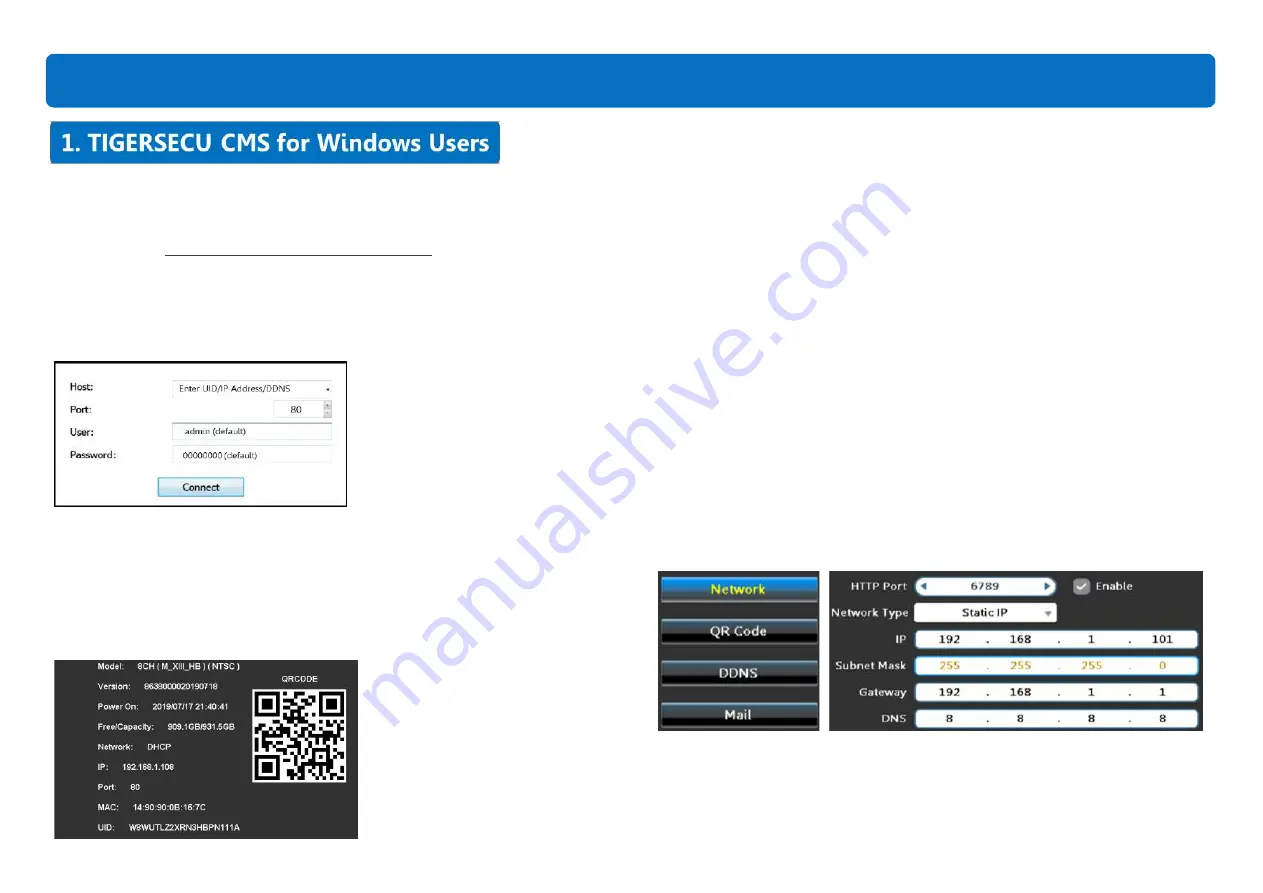
Open the software, and you will see the login page like the one below:
*You may click the drop-down menu to avoid entering the information repetitively.
Step 3:
Type your Login information.
①
P2P(UID) Login (Highly Recommended)
a) Go to
DVR Menu bar > Information > UID
. Enter the UID in the
Host
field.
b)
Default Port
: 80
c)
Default User
: admin.
d)
Default Password
: 00000000 (eight zeros)
e) Click
Connect
.
(You may change the Port, User, Password in the DVR settings. Please revise
accordingly on your computer after changes are made on the DVR side.)
Tip
: If you’ve successfully logged into the system by following the instructions
above, please ignore the instructions below regarding
IP Login
&
DDNS Login
.
②
IP Login (
Port forwarding required)
a)
Assign a Port for your DVR.
Go to
Network Menu > Network.
Choose
Static IP
, then
Assign a port
(> 80)
to the DVR, for example, 6789, then check
Enable
and click Apply.
b) Log into your router.
Look for the
Default Gateway
: It should look something like 192.168.1.1, but,
35
View DVR Remotely on your Computer


