Scientific Grade Digital Video Camera
Chapter 4: Setup & Installation
ITN000089-D02, Rev H
Page 10
4.2.
Installing the Software
Although similar, the installation sequence for the GigE and Camera Link systems vary. Please see the steps
below to install your system properly.
4.2.1. Getting Started
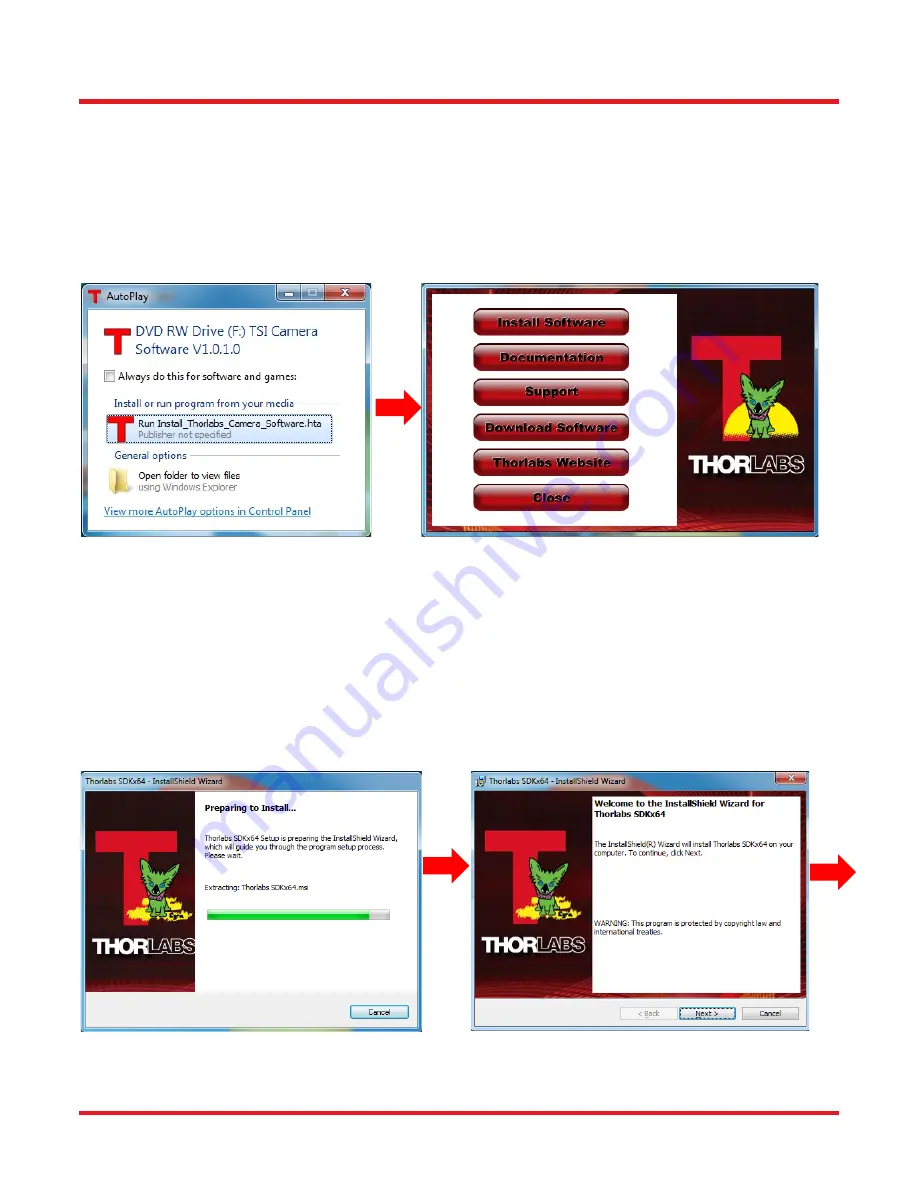
If installing the software from a downloaded copy from our website please go to section 4.2.2, otherwise insert the
CD-ROM included with your camera accessories into a suitable CD-ROM drive on your computer. The disk will
automatically start and the installation process will begin with the following screens:
Select the “Run Install_Thorlabs_Camera_Software.hta” option, then press the “Install Software” button.
Note: Once the “Install Software” button is pressed, it may take a few minutes for the installer to
determine your computer’s configuration. We thank you for your patience.
4.2.2. Typical Installation
The information provided in this section is meant to describe the steps required for a typical system, involving a
single camera (either Gigabit Ethernet or Camera Link), in which the user picks certain options. Some steps that
typically require an affirmative response are not detailed, for the sake of clarity. Multiple camera systems and
other “advanced” options are described in the following chapter. The InstallShield Wizard will guide you through
the program setup process and driver installation as shown on the following pages.


