THOMSON SpeedTouch 500 Series Setup And User Manual Download Page 56

3 SpeedTouch™ Web Interface

E-SIT-CTC-20030306-0003 v2.0

52

5

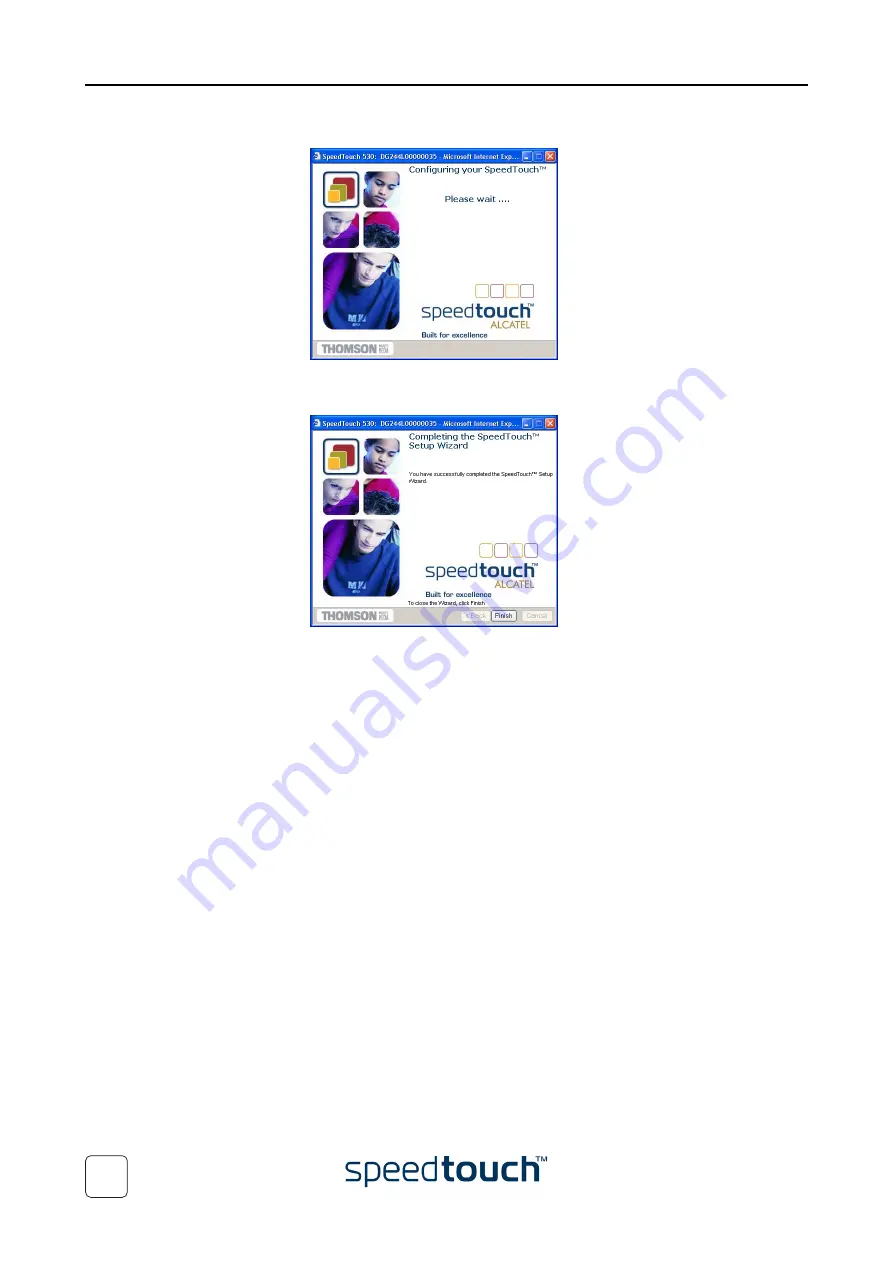
In a final step all configurations are applied to the SpeedTouch™:

6

The SpeedTouch™ Setup Wizard appears again to announce that the configura-
tion has been successful:

Click Finish to close the wizard.

Most configuration profiles will enable SpeedTouch™’s DHCP server - and a PC’s 
Ethernet port is configured as DHCP client by default. Therefore, in most cases, no 
additional configuration of your PCs must be done if you want to enable multiple PCs 
on your local network for accessing the Internet via the SpeedTouch™.

Summary of Contents for SpeedTouch 500 Series

Page 1: ...SpeedTouch 500Series Multi User ADSL Gateways Setup and User s Guide 500 SERIES...

Page 2: ......

Page 3: ...E SIT CTC 20030306 0003 v2 0 SpeedTouch 500Series Setup and User s Guide Release R4 2...

Page 4: ...of this document use and communication of its contents is not permitted without written authorization from THOMSON The content of this document is furnished for informational use only may be subject t...

Page 5: ...Windows Operating Systems 20 1 3 2 Configuration Setup for other Operating Systems 26 1 4 Dr SpeedTouch Installation 29 2 SpeedTouch Internet Connectivity 33 2 1 Surfing the Internet 34 2 2 Connect to...

Page 6: ...SpeedTouch System Software Upgrade 67 4 1 The SpeedTouch Upgrade Wizard 68 4 2 Manual System Software Management via BOOTP Server 72 5 Troubleshooting 73 5 1 General 74 5 2 SpeedTouch Default Configu...

Page 7: ...peedTouch in this Setup and User s Guide unless specifically indicated Safety instructions Prior to connecting the SpeedTouch read the SpeedTouch Quick Installation Guide and Safety Instructions UPnP...

Page 8: ...package In the event of damaged or missing items please contact your local product dealer for further information The SpeedTouch Your SpeedTouch is presented in a slim line box Power on power off The...

Page 9: ...escribed in the table below LED logo Description Power System LED DSL WAN LED LAN LED USB LED Indicator Description Name Color Status Power System Off Power off Green On Power on normal operation DSL...

Page 10: ...f Test POST SpeedTouch back panel layout Depending on the variant you purchased your SpeedTouch is equipped with A single 10 100Base T Ethernet port Indicator Description Name Color Status Power Syste...

Page 11: ...SpeedTouch variant you are using a second LED may be provided to indicate the 10 100Base T selection A Power inlet B 10 100Base T Ethernet switch C DSL line port A Power inlet C USB port B 10 100Base...

Page 12: ...splitter or distributed filters for decoupling ADSL and telephone signals Always contact your Service Provider when installing splitters filters Public telephone lines carry voltages that can cause el...

Page 13: ...d Mac OS X 10 1 10 2 Before being able to connect to the SpeedTouch through the USB connection you must first install USB drivers See 1 2 2 SpeedTouch USB Connection Setup for Microsoft Windows Oper a...

Page 14: ...ature 10 100Base T auto sensing MDI MDI X Ethernet ports you can use any type of full wired LAN cable to connect your equipment Standard wiring procedure Use the LAN cable provided to wire your comput...

Page 15: ...h USB or SpeedTouch 330 installation that may reside on your PC before you install the USB drivers from the Speed Touch Setup CD ROM Installing the SpeedTouch USB connection The installation is Plug a...

Page 16: ...will notify that it found drivers for the SpeedTouch on the CD ROM Click Next to continue 7 The installation procedure continues with the installation of the SpeedTouch USB drivers The installation wi...

Page 17: ...appears Click Finish to complete the installation As a result your SpeedTouch USB connection is installed and ready for use Option ally you can connect another computer using its Ethernet port before...

Page 18: ...ore you install the USB drivers from the Speed Touch Setup CD ROM Make sure not to plug in the SpeedTouch USB interface to your computer as long as installation of the USB drivers is not completed and...

Page 19: ...dTouch USB drivers are fully installed and ready for use Insert the USB cable provided into the SpeedTouch USB port marked with the USB logo The other end of the USB cable fits in one of the USB port...

Page 20: ...st cases your computer s USB port is marked with the same USB symbol 3 Insert the SpeedTouch Setup CD ROM 4 Open the OSX folder and double click SpeedTouchUSB to start the installation procedure Note...

Page 21: ...your OS X partition Click the destination volume of your choice and click Continue 8 In the following windows you can follow the installation procedure Click Continue whenever requested to proceed 9...

Page 22: ...intend to use the other interfaces clear the corre sponding check boxes Click Apply Now to confirm the modifications to the network settings As a result your SpeedTouch USB connection is installed and...

Page 23: ...nfiguration of the SpeedTouch Depending on your computer s Operating System OS the configuration of your Internet connectivity can be done automatically or manually If your computer runs A Microsoft W...

Page 24: ...ndows operating systems must already be installed on your PC s Windows 98 Windows 98SE Windows ME Windows NT4 0 SP6 Ethernet only Windows 2000 Windows XP You may need the Windows installation CD ROM d...

Page 25: ...rowser window does not appear automati cally open a Run window via Start Run from the Start menu and enter the following path D Menu exe where D stands for the drive letter of your CD ROM drive 2 The...

Page 26: ...tware License Agreement window appears You must accept before continuing Therefor click Yes to accept Note If you have already accepted this License Agreement in a previous configuration setup this wi...

Page 27: ...Touch is turned on and fully initialized Whether your PC is correctly connected to the SpeedTouch Ethernet or USB Whether no dedicated firewall device or router is placed between your PC and the Speed...

Page 28: ...l Area Network configuration Select the Reconfigure the SpeedTouch option and click Next 2 The following window invites you to select the appropriate connection profile for your Internet connectivity...

Page 29: ...s Ethernet port is configured as DHCP client by default Therefore in most cases no additional configuration of your PCs must be done if you want to enable multiple PCs on your local network for access...

Page 30: ...IP address of the SpeedTouch To ensure that IP connectivity exists you can ping the SpeedTouch Procedure The configuration setup proceeds as follows 1 To ensure that the SpeedTouch is in its factory...

Page 31: ...See Templates on page 61 for more information on uploading templates 6 Subsequent screens guide you through the configuration setup of both your SpeedTouch and or your PC Follow the instructions and e...

Page 32: ...uch some additional configura tion of your computer system may be necessary Note The required settings for your computer should be provided by your Service Provider if applicable 10 To check whether t...

Page 33: ...on procedure proceeds as follows 1 Insert the SpeedTouch Setup CD ROM in your PC s CD ROM drive The SpeedTouch CD Browser will start automatically Note If the SpeedTouch CD Browser window does not app...

Page 34: ...and Installation window appears To start the Dr SpeedTouch Setup wizard click Install Dr SpeedTouch 5 The Dr SpeedTouch Setup wizard appears Click Next to continue 6 The Software License Agreement ap...

Page 35: ...ks you to select a destination folder Click Next to install Dr SpeedTouch to the default folder To select a different folder click Browse 8 The following screen appears Click Next to continue 9 At the...

Page 36: ...ailable devices will be provided If this is the case select the SpeedTouch of your choice and click OK 3 The Dr SpeedTouch window appears Dr SpeedTouch features Dr SpeedTouch allows you to View the Sp...

Page 37: ...Panel window appears Double click the Add or Remove Programs icon 3 The Add or Remove Programs window appears Click Add Remove Windows Com ponents 4 The Windows Components wizard appears Select Networ...

Page 38: ...sed to configure the SpeedTouch and the Service Provider s requirements Dial in access Depending on the SpeedTouch configuration dial in access is provided via The SpeedTouch s Routed PPPoA or Routed...

Page 39: ...connection methods Routed PPP over ATM PPPoA and PPP over Ethernet PPPoE The connection method to use depends on the preferences of your ISP hence the configuration profile you must apply to the Speed...

Page 40: ...nnections 3 The Network Connections window appears Double click the Internet Connection icon 4 Your computer connects to the Internet Terminating an Internet Session session via Windows XP s UPnP To c...

Page 41: ...isconnected 5 If not provided yet enter your user name and password in the appropriate fields If you want the SpeedTouch to remember your credentials select the Save this password check box 6 Click Co...

Page 42: ...T CTC 20030306 0003 v2 0 38 2 3 Connect to the Internet via a Host PPPoE Dial in Client Introduction This section explains how you can connect to the Internet using a dial in application on a computer...

Page 43: ...l 2 The Control Panel window appears Double click Network Connections 3 The Network Connections window appears Click Create a new connection in the Network Tasks menu 4 The New Connection wizard appea...

Page 44: ...uctions and enter the required information where needed This information should be pro vided by your Service Provider 9 At the end of the configuration the following window appears Click Finish to com...

Page 45: ...con 3 The Network window appears In the Show list select Ethernet Adaptor enx and click the PPPoE tab 4 Enter the Account Name and Password provided by your Service Provider and Click Apply now Starti...

Page 46: ...2 SpeedTouch Internet Connectivity E SIT CTC 20030306 0003 v2 0 42...

Page 47: ...disable the proxy server for the time you want to access the Speed Touch web pages For more information on how to disable your web browser s proxying please consult the web browser s user s guide Use...

Page 48: ...ouble click the SpeedTouch icon 3 If a system password has been set an authentication window will be displayed Enter user name and system password in the appropriate fields Result As a result the Syst...

Page 49: ...Basic topic menu lead you to pages for basic SpeedTouch configuration and maintenance i e the pages for every day use The Advanced topic menu contains the links which allow advanced configuration of...

Page 50: ...backing up the SpeedTouch configuration see System on page 60 ADVANCED topic menu Click To Diagnostics View SpeedTouch diagnostics Easy Setup Configure the SpeedTouch IP Addresses View configure the S...

Page 51: ...test Click the Service Info tab to view the current physical status of the ADSL line The DSL Statistics allow you to view Line Status this shows wether the DSL link is synchronized Enabled or not Init...

Page 52: ...eedTouch This MAC address can be used to identify your SpeedTouch The SpeedTouch Software Release The SpeedTouch Board Name The SpeedTouch Serial Number The SpeedTouch Product Code Connections Click t...

Page 53: ...3 SpeedTouch Web Interface E SIT CTC 20030306 0003 v2 0 49 System Log Click this link to view the System Log page This page allows you to view the activity on the SpeedTouch since power on...

Page 54: ...cs page This page consists of three expandable sections Expand the System section to view some important system information Expand the Wan section to view the current DSL state and connection informa...

Page 55: ...ropriate connection profile for your internet connectivity In the Service list click the connection profile of your choice Note You can add services to the Services list by uploading templates See Tem...

Page 56: ...at the configura tion has been successful Click Finish to close the wizard Most configuration profiles will enable SpeedTouch s DHCP server and a PC s Ethernet port is configured as DHCP client by def...

Page 57: ...faces 1 Click New 2 Select the interface to which the IP address applies use eth0 for assigning to the SpeedTouch Ethernet interface 3 Provide IP address and sub netmask in IP prefix notation e g 192...

Page 58: ...uting can be useful when subnetting your local network To add a static IP route proceed as follows 1 Click New 2 Specify the destination IP address use the prefix notation to apply a subnetmask Gatewa...

Page 59: ...side address for the entry as well as the protocol and port to which the entry applies Note If the NAPT entry is applied to a connection s dynamically assigned local peer IP address you should specify...

Page 60: ...T entries Configure UPnP The three UPnP configurations are Full The SpeedTouch is UPnP enabled all local hosts are able to detect the SpeedTouch Any local host is able to create port mappings for any...

Page 61: ...ture are enabled and a concurrent DHCP server was found during probing thus causing its own DHCP server to be stopped and a DHCP client on the Speed Touch Ethernet interface eth0 be created and activa...

Page 62: ...its Ethernet interface instead If no concurrent DHCP server is found the SpeedTouch DHCP server is started No DHCP To disable the SpeedTouch DHCP server If it was running it will be stopped immediatel...

Page 63: ...s table you can also manually add static SpeedTouch DHCP relay entries for specific interfaces if applicable Click the Relay Interfaces tab to view the SpeedTouch DHCP relay interfaces Click the DHCP...

Page 64: ...o enable disable the SpeedTouch DNS server Note The use of DNS subdomains is supported e g dsl office lan System Click this link to display the Configuration page This page allows you to Back up the c...

Page 65: ...owever never use an obvious password such as your name date of birth etc Enter User id and System password of your choice and re enter your password in the appropriate field Click Apply to apply the S...

Page 66: ...3 SpeedTouch Web Interface E SIT CTC 20030306 0003 v2 0 62 Language Click this link to view the Language page This page allows you to select the SpeedTouch web page language...

Page 67: ...SpeedTouch NAPT Manager 1 Insert the SpeedTouch Setup CD ROM in your computer s CD ROM drive The SpeedTouch CD Browser will start automatically Note If the SpeedTouch CD Browser window does not appea...

Page 68: ...ment appears You must accept before continuing Therefor click Yes to accept Note If you have already accepted this Software License Agreement in a previous session of NAPT Manager this window will not...

Page 69: ...Click Add to enter a new application host 9 The Add Port Mapping window appears If you want to Enter a port mapping for a specific application click the Basic tab Select an application in the Applica...

Page 70: ...v2 0 66 10 NAPT Manager adds the NAPT entry to the list Click Next to save the new entries 11 NAPT Manager saves the new NAPT entries to persistent memory 12 At the end of the procedure the following...

Page 71: ...open a Run window via Start Run from the Start menu and enter the following path D Menu exe where D stands for the drive letter of your CD ROM drive 2 Choose a language in the Choose Language window...

Page 72: ...Upgrade wizard from a PC running a MS Windows OS For computers running Mac OS10 the behavior of the wizard is identical Proceed as follows 1 Insert the SpeedTouch Setup CD ROM in your computer s CD RO...

Page 73: ...The SpeedTouch Software License Agreement window appears You must accept before continuing Therefor click Yes to accept Note If you have already accepted this License Agreement in a previous upgrade t...

Page 74: ...irewall software is running on your PC in case of Ethernet connectivity Whether the SpeedTouch USB drivers are correctly and fully installed in case of USB connectivity To repeat the search for the Sp...

Page 75: ...ledge your decision before being able to proceed 8 The following window allows you to overview your selection Click Next to continue 9 You can follow the configuration progress in following window 10...

Page 76: ...Access Control MAC address of your SpeedTouch device To retrieve this address see System Information on page 47 Make sure a valid SpeedTouch system software image file is available on your local disk...

Page 77: ...s chapter provides information on how to identify and correct some common prob lems you may encounter when using and configuring the SpeedTouch If the following troubleshooting tips do not resolve the...

Page 78: ...see 1 4 Dr SpeedTouch Installation on page 29 Startup problems and alert indications Via the LEDs you can check the status of the SpeedTouch Following table may help you in case of problems starting u...

Page 79: ...e sure that you are using the correct cable type for your Ethernet equipment Make sure the computer s Ethernet port is configured for auto negotiation SpeedTouch USB driver installa tion failed Verify...

Page 80: ...ed off in the SpeedTouch web pages No Line synchronization achieved DSL WAN LED off or flashing amber Make sure that ADSL service is enabled on the telephone line the SpeedTouch is connected to Make s...

Page 81: ...er button once more shortly 5 The Power System LED stops flashing to become solid green After six seconds it starts flashing green again Press the power button once more shortly 6 All LEDs flash green...

Page 82: ...he SpeedTouch CD Browser will start automatically Note If the SpeedTouch CD Browser window does not appear automati cally open a Run window via Start Run from the Start menu and enter the following pa...

Page 83: ...indow appears Select Remove and click Next 6 In the following windows you can follow the removal procedure Click Next when ever requested to continue the installation 7 At the end of the procedure the...

Page 84: ...2 Open the OS9 folder on your CD ROM drive and double click Installer 3 The Installer window appears Click Custom Remove in the drop down list box select the Drivers and Software check box and click S...

Page 85: ...D ROM in your computer s CD ROM drive 2 Open the OSX folder on your CD ROM drive and double click SpeedTouchUSBUninstaller 3 The Uninstaller window appears Click Uninstall to continue 4 The Uninstalle...

Page 86: ...5 Troubleshooting E SIT CTC 20030306 0003 v2 0 82...

Page 87: ......

Page 88: ...2003 THOMSON All rights reserved E SIT CTC 20030306 0003 v2 0 500 SERIES www speedtouch com Built for excellence...

Reviews: