8
3.
GETTING STARTED
Switching on
Follow the instructions on this page on how to switch on your TV set and the remote control before going on to following
pages describing how to use the remote control and the channel set-up procedure.
1.
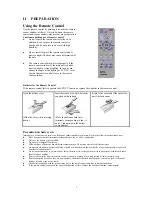
Connect the female plug to the AC socket on AC
adaptor.
2.
Connect the AC adaptor to the DC power input of
the set.
The LCD TV shown in the illustration is the 15 " model one.
The location of DC power input may differ on 20" model.
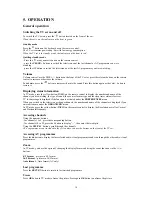
3.
Connect the male plug to the wall outlet as
illustrated.
Equipment for the UK is supplied with a mains cable
fitted with a moulded plug.
This plug contains safety components and must not be
replaced b
y one sold by
general retailers. It is fitted
with a fuse that protects your television
.
If your set has stopped working, the fuse may have
blown. If it has, replace it with an identical ASTA or
BSI certified (BS1362) 5-amp fuse
.
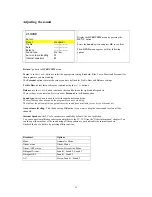
4.
Connect the outside aeri
al
or cable network to the
socket at the back of the TV set.
The LCD TV shown in the illustration is the 15 " model.
20 " model is different.
The aerial socket (75 Ohms - VHF / UHF / cable) can
be used for connecting an external aerial or other
equipment fitted with a modulator (video recorder,
satellite receiver, etc.).
We recommend that you do not connect other
equipment (video recorder, satellite receiver, etc.) to
your TV set to begin with, so as not to complicate the
set-up procedure with the additional steps involved.
Connect them when you have finished setting up the
channels by referring to page 20 of this manual
.
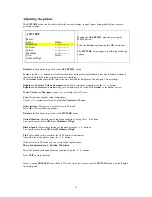
5.
Switch the TV on by pressing the on/off button on
the front.
The LCD TV shown in the illustration is the 15 " model.
The location of the On/off button is different
on 20" model.
You will find a description of how to use the remote
control on page 9. Then go to page 11 for
information on the initial set-up, or to page13 for
information on manual set-up (if the channels have
already been set up on your TV).


