background image


V2.2  

10 


5.


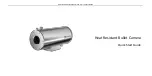
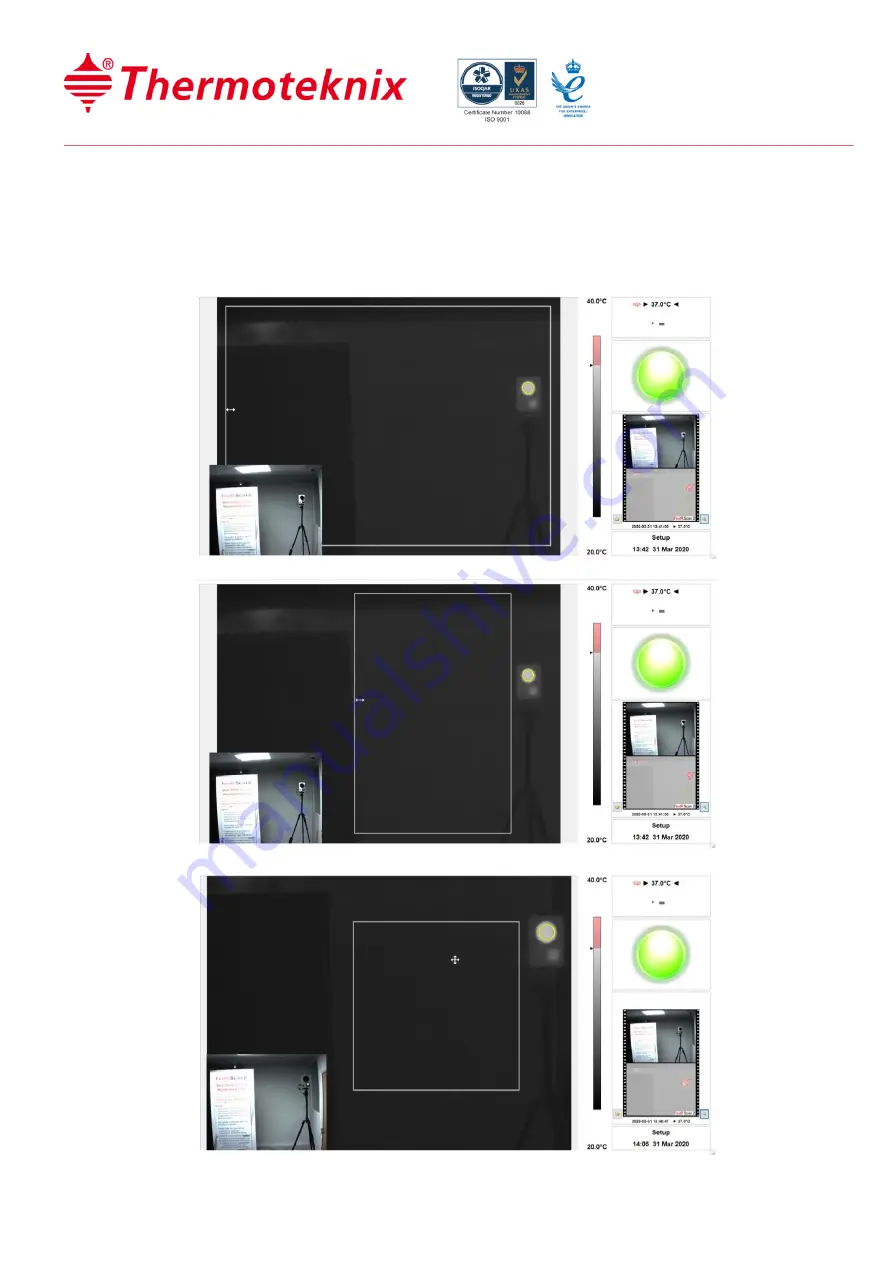
On  screen  you  will  see  a  white  rectangle.  This  is  the  active  scan  area.  
Move  and  resize  it  with  the  mouse  so  it  does  not  include  the  reference 
source. There is no limit to the area within the field of view and will cover 
people entering the view of the camera.  You should not include hot objects, 
eg radiators or motors within this rectangle. 


Summary of Contents for FevIR Scan 2

Page 1: ...not insert any object into the opening or attempt to clean the thermal lens with any material Do not interrupt the movement of the shutter Do not force the shutter with your finger or any other item...

Page 2: ...SB lead d Network Cable e ThermaRef 35B1 blackbody temperature reference f 24V Power Supply Unit g Laptop Power Supply Unit h Laptop with FevIR Scan 2 software program f e e h a Remove protective cove...

Page 3: ...ct the ThermaRef 35B1 f to its power supply e and SWITCH ON The ThermaRef is factory set at 35 C and will need approx 20 minutes to stabilise 3 Connect the FSD01 camera b to its power source a DO NOT...

Page 4: ...m behind the FevIR Scan 2 FSD01 camera the ThermaRef 35B1 blackbody should be offset to the left or right and not viewed directly in line with the front of the field of view 4 For optimum system perfo...

Page 5: ...witch on and Set Up 1 Power on the FevIR Scan 2 FSD01 camera 2 On the Laptop start the software application Thermoteknix FevIR Scan 2 3 Once running press F7 to enter the Set Up menu 4 Select Setup an...

Page 6: ...hese can be changed under the various tabs shown below 7 Select the third tab Display 8 Set the Palette to Monochrome for the set up process It can be altered later once everything is up and running 9...

Page 7: ...to the condition of the system 2 There are three traffic light signals System operating normally Blackbody temperature stable Camera operating normally High temperature detected System NOT operating...

Page 8: ...l Please also watch video in the manuals folder on desktop Blackbody Thermal Reference Yellow Circle Resizing mp4 1 On Screen you will see a yellow circle Use the laptop mouse pad to grab hold down th...

Page 9: ...ing on the edge of the circle and changing reducing the shape of the circle 3 Reposition the circle on the image so that it is entirely within the circular hot area of the blackbody 4 The FevIRScan 2...

Page 10: ...n area Move and resize it with the mouse so it does not include the reference source There is no limit to the area within the field of view and will cover people entering the view of the camera You sh...

Page 11: ...use to fit inside the hot circular area of the blackbody press F7 to select the setup menu On the Reference Tab change the Diameter number of pixels If necessary then repeat step 3 to reposition the y...

Page 12: ...V2 2 12 7 Example circle positioning Yellow circle correctly sized and positioned Yellow circle too big Yellow circle too small Yellow circle not aligned and too big...

Page 13: ...r manual is included on the PC desktop and also on the USB memory stick provided For Technical Support please email support thermoteknix com 1 The Setup menu allows for certain parameters to be change...

Reviews: