background image


pg. 10

5.4   OPERA

5.4   OPERA

5.4   OPERA

5.4   OPERA

5.4   OPERATING LEVEL SETTING

TING LEVEL SETTING

TING LEVEL SETTING

TING LEVEL SETTING

TING LEVEL SETTING

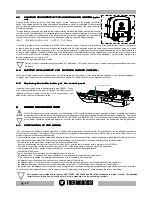
The heater must be fed with the rear switch in position "1". Display (7) may show the inscriptions On , OFF or Start. ".

Your appliance is delivered with an excellent program installed that favours combustion yield; the program is called P 1.
If you are using pellets with an out-of-standard incidence of residues after combustion in the brazier, alternative levels may be selected:
P 2  :

this program increases the smoke suction unit speed acceleration.
(program P2 increases air delivery to the burner which promotes the combustion of tightly compacted pellets: this program reduces

combustion efficiency).

P 0  :

when using too long pellets and/or flue outlets with very high vacuum, over  2 mm water column.

The pellet consumption value is not affected by the operating level settings.
Select the required level by acting as follows:
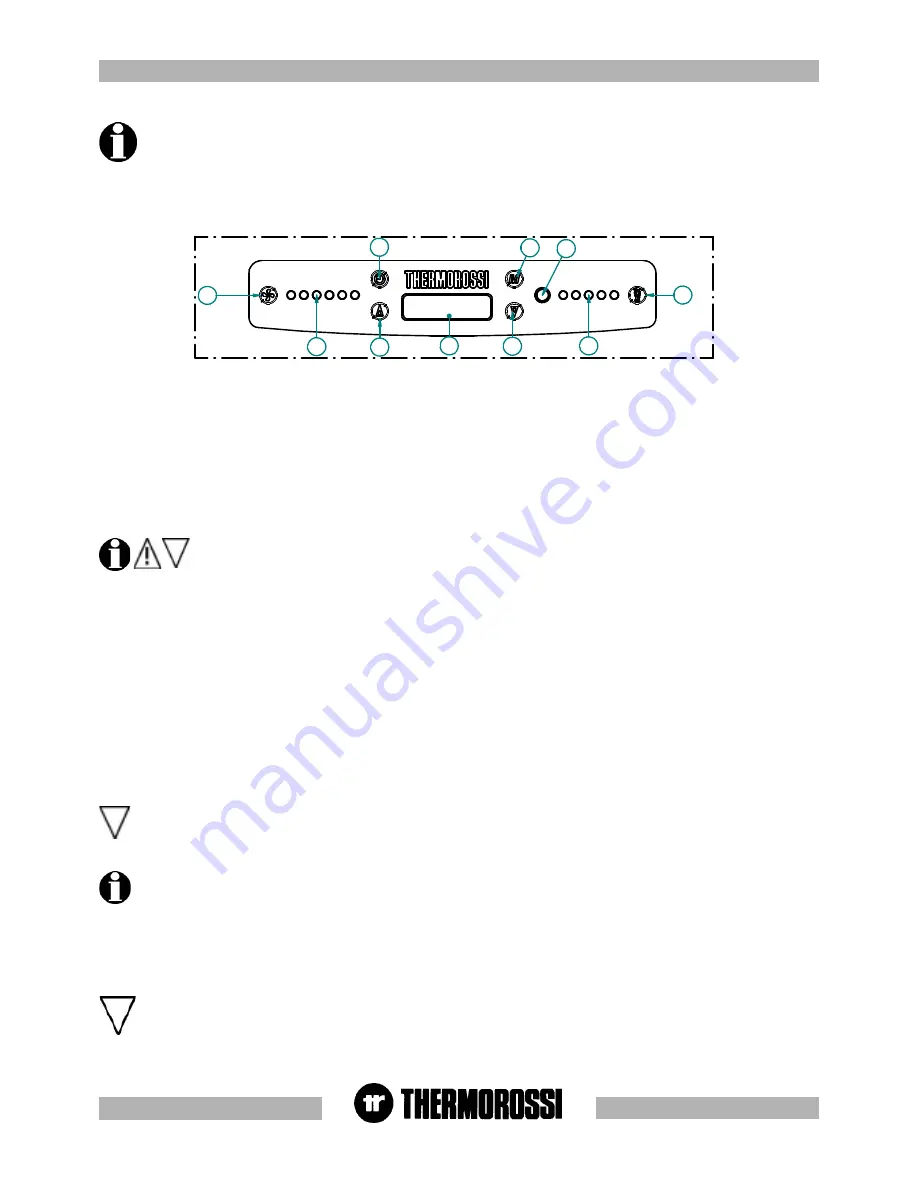
Repeatedly press three times the key (6) until the inscription LIV flashes on the display and, then, the corresponding level set on the heater
will show ( P1 o P2 o P0) In order to change the operating level as key (4) is kept pressed, press the key (3).
By holding down button (4) and pressing button (3) repeatedly the level changes in the following sequence: P2... ...P0  ...  P1.

If the change is made while the insert is running the difference in the flame will be apparent.  It is mandatory to pay
particular care when selecting the most appropriate operating cycle for your installation. After the selection of the
operating cycle a thorough cleaning of the brazier is mandatory.

For an overall confirmation and to return to the status display of the heater, repeatedly press the key (6) until the operating status is
displayed.

When the programming is enabled (temporary inscription on cr on the display and, at the same time, a fixed point is present on the
right side at the bottom of the display) any additional chronothermostat (see para. 7.2) is deactivated.

1

2

3

4

5

6

7

8

9

10

6

6

6

6

6

USE OF 

USE OF 

USE OF 

USE OF 

USE OF THE HEA

THE HEA

THE HEA

THE HEA

THE HEATER

TER

TER

TER

TER

6 . 1

6 . 1

6 . 1

6 . 1

6 . 1

5 . 1

5 . 1

5 . 1

5 . 1

5 . 1 SWIT

SWIT

SWIT

SWIT

SWITCHING ON 

CHING ON 

CHING ON 

CHING ON 

CHING ON  THE HEA

THE HEA

THE HEA

THE HEA

THE HEAT E R

T E R

T E R

T E R

T E R

Before using the appliance check that all the movable parts are in place; also remove any labels and stickers from the glass to avoid having
permanent traces remain on the surfaces.
Turn the switch installed on the back of the heater to position "1" (= ON). Press button (1) to start the start up phase. When key (1) is
repeatedly pressed, the desired combustion level can be  set and it will be active at the end of the ignition stage.
The electrical heater will start to overheat and after a few minutes the first lot of pellets will start dropping into the brazier. This occurs
because the screw feeder has to fill up because it is completely empty. The first time the heater is started up the start up phase will have to
be carried out twice for this very reason.

CAUTION  : The start up phase (word Start appearing on the display) takes 20 minutes during which the heater ignores any
commands transmitted to it. After this time has elapsed the word ON appears on the display. The fan starts as soon as the heater
body exceeds 42°C. During the work stage it is then possible to adjust  combustion and the ventilation:
Combustion is adjusted by 5 leds (through key (1)) , while the ventilation adjustment is distributed over 6 levels shown by the leds
that turn on in succession (through key (2)).

To turn the heater on it is necessary for the inscription OFF to be present on the display; if it is not present, the key (6) must be
repeatedly pressed until the inscription OFF appears.

The heating capacity is adjusted by pressing key (1) or on the remote control provided . Act on this command to adjust the quantity of pellets
fed to the firebox. Maximum combustion power is achieved when all 5 leds are lit.

Caution: The fan starts as soon as the heater body exceeds 42°C. The fan setting is expressed visually by means of 6 different
positions represented by 6 bars: press button (2) repeatedly to regulate it.
A slight vibration of the heater is quite normal when it is running.

6.2 HEA

6.2 HEA

6.2 HEA

6.2 HEA

6.2 HEATER COMB

TER COMB

TER COMB

TER COMB

TER COMBUSTION 

USTION 

USTION 

USTION 

USTION AND 

AND 

AND 

AND 

AND VENTILA

VENTILA

VENTILA

VENTILA

VENTILATION 

TION 

TION 

TION 

TION  ADJUSTMENTS

ADJUSTMENTS

ADJUSTMENTS

ADJUSTMENTS

ADJUSTMENTS

Summary of Contents for ECOTHERM 5000

Page 1: ...HEATING TECHNOLOGY AND INNOVATION 36011 Arsiero VI ITALY Via Grumolo 4 www thermorossi com INSTALLATION USE AND MAINTENANCE GUIDE ECOTHERM 5000 ...

Page 2: ...ombustion 6 3 Infrared remote control 6 4 Operation of white thermocomfort handheld radio control optional 6 5 Filter 6 6 Channelling 7 ADDITIONAL ROOM TEMPERATURE THERMOSTAT not supplied ADDITIONAL CHRONOTHERMOSTAT not supplied 7 1 Operating with the additional room temperature thermostat not supplied 7 2 Operating with the additional chronothermostat not supplied 8 CLEANING AND MAINTENANCE 8 1 F...

Page 3: ...allation or poor maintenance could injure or damage people animals or things in this case the manufacturer shall be relieved of all responsibility Before commencing any cleaning or maintenance operation ensure that the appliance has been disconnected from the mains power supply by means of the main system switch or some other disconnecting device installed upstream from the appliance The product m...

Page 4: ...ction of the electric panel must be carried out by expert personnel no responsibility will be accepted for damages even to third parties if the instructions for installation use and maintenance of the appliance are not followed scrupulously Modifications made to the appliance by the user or on his behalf must be considered to be under his complete responsibility The user is responsible for all the...

Page 5: ...e flame without having to manually stoke the combustion The pellets are cylinders of compressed sawdust having a 6 mm diameter and a maximum length of 15 mm They have a maximum moisture content of 8 a thermal value 4000 4500 Kcal Kg and a density of approx 620 630 Kg m The use of fuel which does not comply with the description given above immediately voids the heater warranty Do not use the applia...

Page 6: ... 1 4 1 1 INST INST INST INST INSTALLA ALLA ALLA ALLA ALLATION OF MET TION OF MET TION OF MET TION OF MET TION OF METAL AL AL AL ALCOL COL COL COL COLOR CASING OR CASING OR CASING OR CASING OR CASING Once the heater has been positioned the next step is to install the side panels and the top ceramic panel as shown in the image below on the left Carry out the following operations Unscrew and remove t...

Page 7: ... to the bent tabs Next mount the left ceramic panel supports using the same procedure as described above for the right ceramic panel supports Figure 2 Next attach the side ceramic panels to the supports Fix the lower front ceramic panel to its support Figure 3 with the silicone provided degrease and clean the ceramic panel support before gluing the parts to ensure optimal adhesion Leave the cerami...

Page 8: ...emove the cause unscrew the protective cap and press the button 13 14 Feed motor test indicator light When the pellet screw feeder is set in motion the light must come on 15 Reset thermostat tripped indicator light This LED comes on when the reset thermostat is activated 16 Power outlet for additional chronothermostat connection additional chronothermostat not supplied 17 Power outlet for addition...

Page 9: ...nfirm the selection press the button 1 The two digits representing the minutes will be turn on By pressing the key 3 and or 4 the minutes for the first off cycle will be entered To confirm the selection press the button 1 At this point the first on off cycle for Monday has been entered Later it is possible to set the Monday s second on off cycle shown with the display of On2 and OFF2 and the third...

Page 10: ...5 1 5 1 5 1 5 1 SWIT SWIT SWIT SWIT SWITCHING ON CHING ON CHING ON CHING ON CHING ON THE HEA THE HEA THE HEA THE HEA THE HEATER TER TER TER TER Before using the appliance check that all the movable parts are in place also remove any labels and stickers from the glass to avoid having permanent traces remain on the surfaces Turn the switch installed on the back of the heater to position 1 ON Press b...

Page 11: ...the display Economy ECONOMY appears in area 9 of the display To change the operating program turn the switch 11 to 1 Press and hold down button 3 until the set program begins to blink on the display 9 Now release button 3 and press button 3 and or 4 repeatedly until you select the desired operating program Caution to guarantee optimal data transmission it is advisable to always place the radio con...

Page 12: ...ated in area 8 The remote control will set the maximum combustion and ventilation levels and modulate them both as the room temperature 5 approaches the target temperature 8 When the target temperature 8 in the room 5 is reached the combustion level will stabilise on a bar as will the ventilation level Caution it is possible that due to radio interference the commands sent to the heater will not b...

Page 13: ...he strictest standards and must be handled with great care If you observe the guidelines set out below the radio control will provide a long trouble free performance Protect the radio control against humidity Precipitation humidity and liquids corrode the electronic circuits If the radio control is wet disconnect it immediately from a power source remove the battery open it and allow it to dry at ...

Page 14: ...ust never be fed with 220 V If the board is energised with 220V or voltages exceeding 6 V the control board will be permanently damaged and will not be covered by the GUARANTEE 7 1 OPERATING WITH THE ADDITIONAL ROOM TEMPERATURE THERMOSTAT NOT SUPPLIED An additional room temperature thermostat can be installed by connecting it to the cable gland marked THERMOSTAT at the back of the heater The opera...

Page 15: ...as indicated in Figures 3 and 4 In the Easy model press the 2 side folds of the lower cover inwards to extract it EVERY MONTH check that the smoke exhaust is free from fly ash deposits particularly in the initial sections EVERY MONTH vacuum the ash deposited on the bottom of the tank when the tank is empty AT THE END OF THE WINTER SEASON OR WHENEVER NECESSARY we recommend thoroughly cleaning the E...

Page 16: ...pg 16 ...

Page 17: ...pg 17 ...

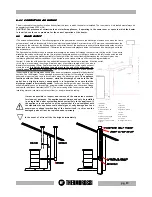
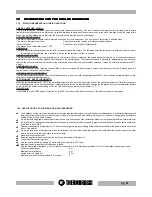
Page 18: ...n the rear of the control panel The dead battery must be disposed of safely 9 9 9 9 9 SMOKE DISCHARGE TUBE SMOKE DISCHARGE TUBE SMOKE DISCHARGE TUBE SMOKE DISCHARGE TUBE SMOKE DISCHARGE TUBE Due to the frequent accidents caused by poor functioning of flue outlets installed in private dwellings we have prepared the following paragraph to assist the installer in his inspection of the parts concerned...

Page 19: ...tial to allow for the removal of ash and unburned products which tend to accumulate along the discharge path The appliance functions with the firebox in a vacuum while the discharge of smoke to the flue outlet has a slight pressure consequently it is imperative to ensure that the discharge system is hermetically sealed The smoke discharge tube must be made from suitable materials such as for examp...

Page 20: ... 0 ALARMS ALARMS ALARMS ALARMS ALARMS The heater is programmed to communicate 3 fundamental alarms The alarms are listed below AL PE is communicated when the temperature during the On mode drops below 42 C This indicates that the heater is switching off due to lack of pellets AL AC is communicated if after the start up phase the temperature does not rise above 42 C AL OP this occurs when the smoke...

Page 21: ...let hopper approaches 85 C and sends an immediate signal to the room fan to operate at maximum power 125 C MANUAL RESET THERMOSTAT When the temperature exceeds 125 C the pellet feed screw shut s down A red light at the back of the appliance remains lit Once the causes for the overtemperature have been identified and remedied the heater can be reactivated by unscrewing the plastic cover of the ther...

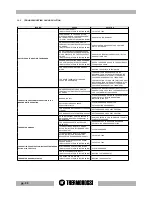
Page 22: ... EXHAUST NOT FREE OR WITH TERMINAL THAT OBSTRUCTS THE PASSAGE OF SMOKE REMOVE THE TERMINAL AND REPLACE IT WITH A MORE SUITABLE ONE CHECK THE SMOKE EXHAUST AS IT COULD BE DIRTY ORCLOGGED BURNER IS DIRTY CLEAN THE BURNER ONA MORE FREQUENT BASIS CARRY OUT ALL CLEANING OPERATIONS INDICATEDIN PARA 8 2 PELLETS WITH DEPOSIT ABOVE PERMISSIBLE LIMITS CLEAN THE BURNER MORE OFTEN SET OPERATING PROGRAMS P2 TH...

Page 23: ...D SEPARATE THE SPACES THE HEATER SHOULD OPERATE FOR MORE HOURS ANDWITH MORE POWER IT DOES NOT WARM UP CEILINGS TOO HIGH OR PRESENCE OF STAIRS THAT DISPERSE THE HEAT ELSEWHERE SEPARATE THE SPACES THE HEATER SHOULD OPERATE FOR MORE HOURS ANDWITH MORE POWER THE APPLIANCE IS OFF BUT THERE ARE UNBURNT PELLETS IN THE BRAZIER THE TANK IS EMPTY EMPTY THE BURNER AND FILL UP THE TANK THE PROGRAMMING AND OR ...

Page 24: ...pg 24 1 3 1 3 1 3 1 3 1 3 SP SP SP SP SPARE P ARE P ARE P ARE P ARE PAR AR AR AR ARTS TS TS TS TS 13 1 SPARE PARTS ...

Page 25: ... M IG U S C IO A N T E R IO R E 6001 1 5 28 S E M IG U S C IO P O S T E R IO R E 7001 23 4 2 T E R M 42 C T E R M 95 C 13 2 SPARE PARTS KEY Stainless steel Beige Red Leather Black Complete door Cast door Glass Gaskets Steel handle Front handle cover Back handle cover Therm 42 95 C LEGENDA Inox Beige Rosso a Cuoio Nero a Porta completa Porta ghisa Vetro Guarnizioni Maniglia acciaio Semiguscio anter...

Page 26: ...01 1 4 28 7001 03 25 6 0 0 1 0 1 8 5 60004241 6001 1 63 0 C O N D E N S A T O R E 6001 3 1 3 9 E C O 3 001 T H E R M O C O M F O R T 6001 3 1 49 6001 1 796 C O N D E N S A T 7001 245 0 7001 23 89 KEY Condenser Thermocomfort Riddling tool Leather Beige Red Top Bottom LH RH LEGENDA Condensatore Thermocomfort Attizzatoio Cuoio Beige Rosso a Alto Basso Sx Dx ...

Page 27: ...006470 A T T IZZA T O IO 7001 2867 B asso S x 7001 2866A lto S x 7001 2863 A lto D x 7001 2864B asso D x 6001 2907 R osso 6001 2908 B eige 6001 2909C uoio 6001 1 768 B eige 6001 1 766C uoio 6001 2907 R o s s o 6001 2909 C u o io 6001 2908 B e ig e 6001 2908 B e ig e 6001 2909 C u o io 6001 2907 R o s s o ...

Page 28: ... p letadi su pp orto 6001 3 1 3 3T argh etta 7001 3 61 0P an n ello 6001 2787B atteriaC R 203 2 7001 3 61 2 7001 3 807 13 5 SPARE PARTS KEY Panel Tag Battery CR2032 Reset thermostat Switch 0 1 Board with support Complete radio control Rechargeable battery Battery charger Wall mount Battery cover LEGENDA Pannello Targhetta Batteria CR2032 Termostato Riarmo Interruttore 0 1 Scheda completa di suppor...

Reviews: