M 780672000203022015
THERMEX
WASTEMINATOR
67
EN
GL
IS
H
»
IN
STA
LL
AT
IO
N
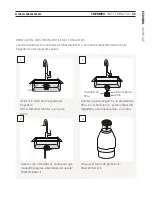
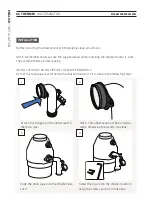
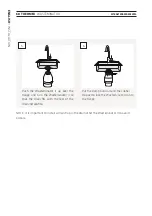
Insert the flange through the hole in the
sink.
NOTE: Remember to install the rubber
seal.
Place the rubber seal and fibre disc on the
flange at the underside of the sink and
tighten the nut on the flange.
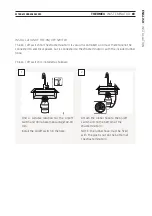
Tighten the three screws on the nut so
that the nut does not loosen due to vibra-
tions during use of the Wasteminator II.
Push the rubber stopper down on the
edge of the Wasteminator II.
3
2
1
4
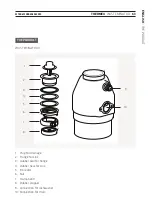
Rubber seal
Flange
Fibre disc
Rubber seal
Nut
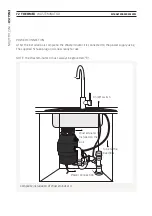
INSTALLING THE WASTEMINATOR II ON THE SINK
When the drain pipe is mounted on the Wasteminator II, the Wasteminator II is installed in the
sink as follows:
Summary of Contents for WASTEMINATOR II
Page 2: ......
Page 17: ...M 780672000203022015 THERMEX WASTEMINATOR 17 DANSK MONTERING ...
Page 31: ...M 780672000203022015 THERMEX WASTEMINATOR 31 NORSK MONTERING ...
Page 45: ...M 780672000203022015 THERMEX WASTEMINATOR 45 SVENSKA MONTERING ...
Page 59: ...M 780672000203022015 THERMEX WASTEMINATOR 59 ESPAÑOL MONTAJE ...
Page 73: ...M 780672000203022015 THERMEX WASTEMINATOR 73 ENGLISH INSTALLATION ...

