17
cab - Produkttechnik GmbH / Tharo Systems, Inc.
5. Connecting the Printer
4
3
2
1
6
5
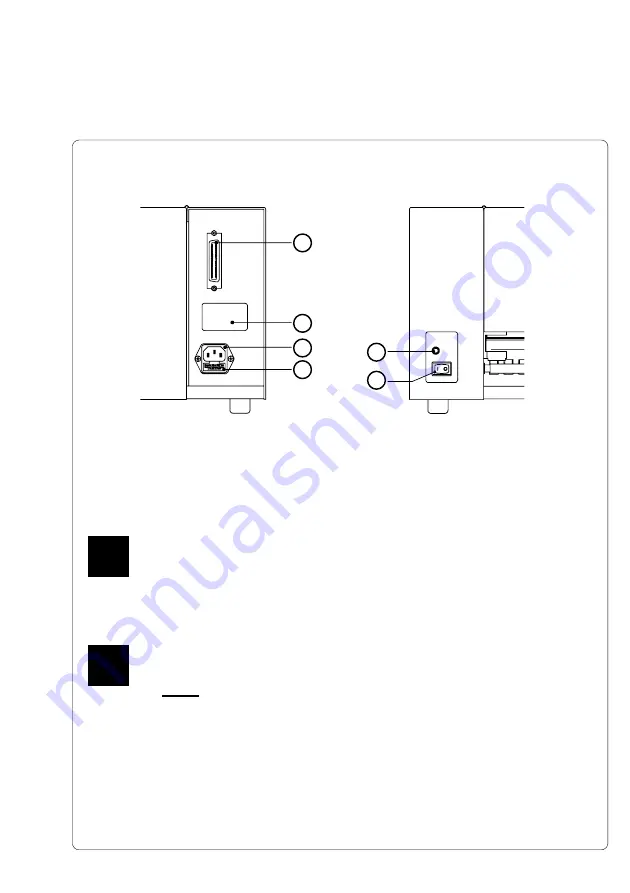
Figure 5 Connecting the Printer
Connection to a Computer
The
Gemini
is fitted with a Centronics parallel interface which uses a 36-pin
port (
1
).
Obtain a standard parallel cable in a length suited to your needs (not exceed 10
feet in the length) and use it to connect the printer to your computer.
Ensure that the interface cable is correctly grounded.
Connection to Power Supply
Check that your available power supply voltage corresponds with the
voltage shown on the printer's specification label (2). The voltage
requirement shown will designate either 230 V/50 Hz order 115 V/60 Hz.
Do not connect the printer to the power supply until the voltage has been
verified.
After inserting the power cord into the power supply socket (
3
) at the rear of the
printer, connect the power cord to a
grounded
power outlet.
Switch the printer ON with the power switch (
6
). If the status LED (
5
) does not light
up, check the fuse inserted in the power supply module (
3
) by removing the fuse-
holder (
4
). Ensure that a fuse of the correct rating is installed :
800 mAT for 230 V
1,6 AT for 115 V
F
F


