Texmate, Inc. Tel. (760) 598-9899 • www.texmate.com
FX-B101Q-DCA_DCV manual (d0103)
Page 5
STeP A ReVIeW THe INPuT mODule STATuS
1) See pages 10 – 15 for information on input modules that may be used with this meter.
2) Confirm that the correct range and input is selected on the input signal conditioning
module.
Note: When undertaking an initial set up and primary scaling and calibration of the meter it is
best to start with a reset of the scaling.
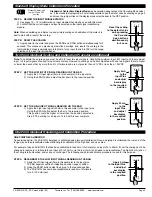
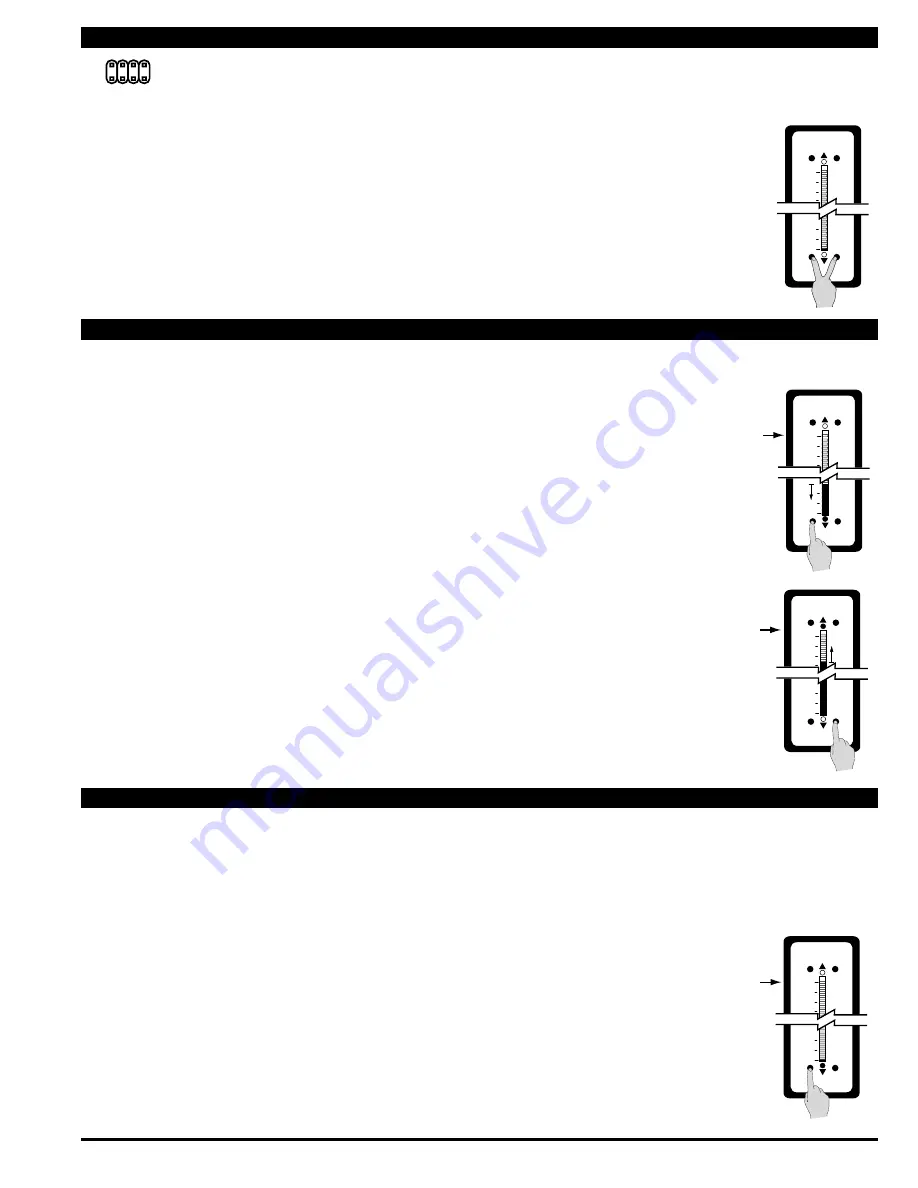
STeP B ReSeT THe SCAlINg
1) Apply power to the meter and press the ZERO and SPAN buttons simultaneously for 2
seconds. This erases any previously memorized scalings, and resets the scaling to the
factory default, of approximately zero to full scale, for an input, that is 0 to 100% of the range
selected on the input signal conditioner.
Standard or Center Zero Display mode may be selected, depending on the Operating Mode select-
ed. If the standard display mode is not already selected open the meter case as showing on page 4
and move the jumper clips on the display mode select header to the OFF position.
Standard Display with
Jumper Clips in OFF
position
Standard Display Mode Calibration Procedure
100
0
Zero
Span
Lo
Hi
ANALOG OUTPUT
Reset the scaling
to the default value
on by pressing
the Zero and
Span buttons
simultaneously
for 2 secs.
1
Z
C
3
2
4
Note: To calibrate the bargraph you must be able to input two input signals. Usually the minimum input (LO Input) and the maximum
input (HI Input) signals are used for optimum accuracy. However a scaling can be accomplished with any two signals that are higher
or lower than each other by more than 5% of fullscale and are not greater than +2.1VDC or less than -1.05VDC
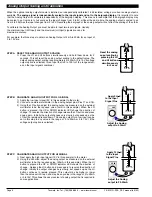
STeP C SeT THe lOW INPuT SIgNAl ReADINg ON THe BAR
1) Apply the LO input signal (4ma in this example) to the input pins.
2) Using the ZERO button adjust the bar down to the required position.
STeP D SeT THe HIgH INPuT SIgNAl ReADINg ON THe BAR
1) Apply the high input signal (20mA in this example) to the input pins.
Using the SPAN button adjust the bar to the required position.
This position could be higher or lower than the position adjusted in
Step 2. The scaling for an input of 4 to 20mA is now complete.
Apply 4 mA
to the
Input Pins
and adjust
bar display
to the required
position
100
0
Zero
Span
Lo
Hi
ANALOG OUTPUT
Apply 20 mA
to the
Input Pins
and adjust
bar display
to the required
position
100
0
Zero
Span
Lo
Hi
ANALOG OUTPUT
Apply 0 mA
to the Input Pins
and adjust
bar display
to the required
position
100
0
Zero
Span
Lo
Hi
ANALOG OUTPUT
One Point Quickset Rescaling and Calibration Procedure
ONe POINT ReCAlIBRATION
As explained earlier, the FX-B101Q bargraph is calibrated using two point calibration. Once a bargraph is calibrated, the low end of the
range may be then recalibrated without affecting the calibration of the high end, and vice versa.
For example, take an FX-B101Q that has been calibrated to read zero to full scale for an input of 4 to 20mA. If now the scaling has to be
changed to read zero to full scale for an input of 0 to 20mA, only the low (4 mA) end needs to be recalibrated. The high (20 mA) end of
the scaling is left untouched, and so does not change. The following one point recalibration procedure is used for this purpose.
STeP A ReCAlIBRATe THe lOW INPuT SIgNAl ReADINg ON THe BAR
1) Apply the LO input signal (0ma in this example) to the input pins.
The first segment will flash, indicating an under range condition.
2) Using the ZERO button adjust the bar up to the required position.
3) The FX-B101Q has now been recalibrated to read zero to fullscale
for a 0 to 20 mA input.
Standard Display Mode Calibration Procedure
Standard Display Mode Calibration Procedure
Two Point Quickset Scaling and Calibration Procedure (continued)


