5
Preparation
Unpacking
• Carefully open the box and lift out the speakers with the EPE
foam parts without reaching into the diaphragms.
Setup notes
Note
Our website contains comprehensive notes for correct setup.
• Select a stable, level base.
• Make sure that the environment is clean and free from dust.
• Avoid placing the unit close to sources of heat or in direct
sunlight.
• Do not place any heavy objects on the cables or the speak-
ers.
• The location of the subwoofer can be freely selected and
does not influence the other speakers. However, do not place
it in the corner of the room as this may result in irregular
frequency overloads. A location between the front speakers
is often ideal.
• Make sure that the speaker has a stable position to prevent
vibrations.
Connecting
Danger
Danger of injury/damage!
Arrange the cables so that they do not pose a
trip hazard.
• Disconnect the power plug of your amplifier/AV receiver
or preamplifier (DecoderStation/ControlStation) from the
socket.
• Ideally, the subwoofer is connected to the subwoofer output
of the amplifier/AV receiver or preamplifier (DecoderStation/
ControlStation) using a mono RCA cable.
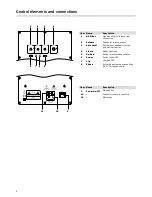
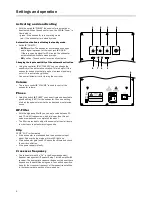
• The RCA jack
4
“Line In” on the back side of the subwoofer is
intended for this purpose.
• For additional information please review the operating
instructions of your amplifier/AV receiver or DecoderStation/
ControlStation.
• If you amplifier/AV receiver doesn’t feature a subwoofer
connection, connect an unoccupied speaker output to the
RCA jack
4
of the subwoofer using a voltage reducer and a
RCA cable. We offer voltage reducers on our website in the
“Accessories” area.
Connection to the grid
• Ensure that the mains switch
9
“Power” on the subwoofer is
switched off (“0 OFF” position).
• Connect the mains connector jack
10
with a mains socket
using the power cord.
• In addition, reconnect the power plug of your AV receiver or
DecoderStation/ControlStation to the socket.
TV
Stereo triangle
Center
US 8112/1 SW
Front
Center
Front
Rear
Rear
4
9
10

