OPERATION
2Ć7
1186E MM268 (6–94)
CLUTCH HANDLES
The clutch handles control the wheel drive clutch.
To move the machine forward, pull the clutch
handle until the desired speed is reached. To stop
the machine, release the handle.
To move the machine backward, press the clutch
reverse handle. To stop the machine, release the
handle.
SOLUTION FLOW SWITCH
The solution flow switch
controls the solution
flow to the floor. To start solution flow to the floor,
flip the switch toggle up. To stop the solution flow
to the floor, flip the switch toggle down.
FILTER SHAKER BY-PASS SWITCH
The filter shaker by-pass switch
controls the
automatic filter shaker. When the switch is in the
“on” position, the filter shaker motor will shake the
dust from the filter for 20 seconds when the
machine is turned off. When the switch is in the
“off” position, the filter shaker motor will not shake
the dust from the filter when the machine is turned
off. The switch should be in the “off” position when
servicing the machine or when scrubbing.
BATTERY CONDITION GAUGE
The battery condition gauge is an option on
machines below serial number 020916. It
indicates the present state of charge of the
batteries. The display should be on the F mark of
the gauge when the batteries are fully charged.
As the batteries discharge, the display will move
down near the E mark and flash. The batteries
should be recharged when the display gets to the
1/4 mark.
VOLTMETER
The voltmeter indicates the present state of
charge of the batteries. The needle should be in
the white zone when the batteries are fully
charged. As the batteries discharge, the needle
will move into the green zone. The batteries
should be recharged when the needle consistently
stays in the red zone.
NOTE: Do not charge the batteries more often
than is necessary. This will prolong the life of the
batteries. Do not allow the batteries to become
fully discharged as this will also damage the
batteries. See BATTERIES in the
MAINTENANCE section.
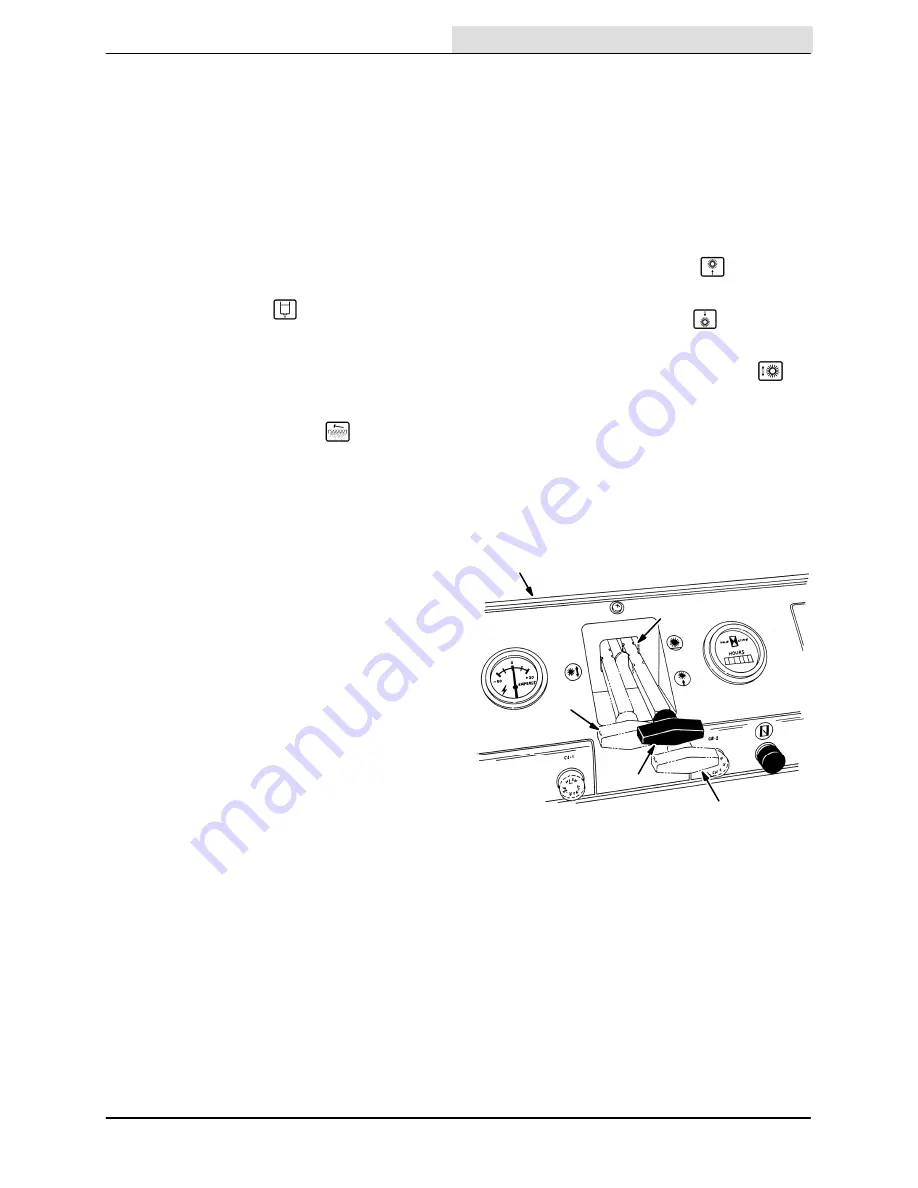
MAIN BRUSH LEVER
The main brush lever controls the position of the
main brush. To raise the main brush, pull the lever
up, to the right and back into the
(Main
Brush Up) position (lower groove). To lower the
main brush on smooth surfaces, push the lever
forward and pull it back into the
(Main Brush
Down)“normal” position (top groove). To lower the
main brush on uneven surfaces, push the lever
forward, to the left, and release it into the
(Main Brush Free-Float) position.
When parking the machine, always raise the
brush to prevent the bristles from taking a set.
To increase main brush contact with the floor, turn
the main brush lever to the left. To decrease main
brush contact with the floor, turn the lever to the
right.
A
E
C
D
B
03134
MAIN BRUSH LEVER
A. Main Brush Lever
B. Instrument Panel
C. (Main Brush Up) Position
D. (Main Brush Down) Position
E. (Main Brush Free-Float) Position
HOUR METER
The hour meter records the number of hours the
machine has operated. This information is useful
in determining when to service the machine.
Summary of Contents for 1186E
Page 1: ...1186E MM268 Rev 05 12 95 Operator Manual ...
Page 8: ...GENERAL INFORMATION 1186E MM268 6 94 vi ...
Page 10: ...SPECIFICATIONS 1186E MM268 6 94 1Ć2 ...
Page 14: ...OPERATION 1186E MM268 6 94 2Ć2 ...
Page 32: ...OPERATION 1186E MM268 6 94 2Ć20 ...
Page 34: ...MAINTENANCE 1186E MM268 6 94 3Ć2 ...
Page 66: ...MAINTENANCE 1186E MM268 6 94 3Ć34 ...
Page 68: ...APPENDIX 1186E MM268 6 94 4Ć2 ...
Page 70: ...APPENDIX 1186E MM268 6 94 4Ć4 ...


