3
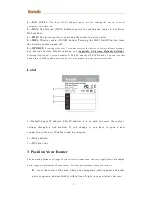
1→LAN (1/2/3):
Th e l o cal ( L AN ) E th ern et p o rt s ar e fo r cabl i n g t h e d evi ce t o lo c al
co mp ut er s, swi t ch es , et c.
2→WAN:
The Internet (WAN) Ethernet port is for cabling the router to a cable or
DSL modem.
3→PWR:
The power port for connecting the router to power outlet.
4→WiFi:
Wireless radio ON/O FF button. Pressing the WiFi On/Off button t urns
the wireless radios on and off.
5→WPS/RST:
P r ess in g i t fo r o ver 7 seco nd s r est or e s th e d evi ce to fact o r y d efa ul t s et ti n gs .
For device's factory default settings, see
Appendix 3 Factory Default Settings.
P r essin g i t fo r abo ut 1 second en ab l e s WP S -P B C an d th e WP S LE D b l in ks. Yo u can u se t hi s
bu tt on to u se WP S to add a wi r el es s d evi ce o r co mp u t er t o yo ur wi r el ess n et wo r k.
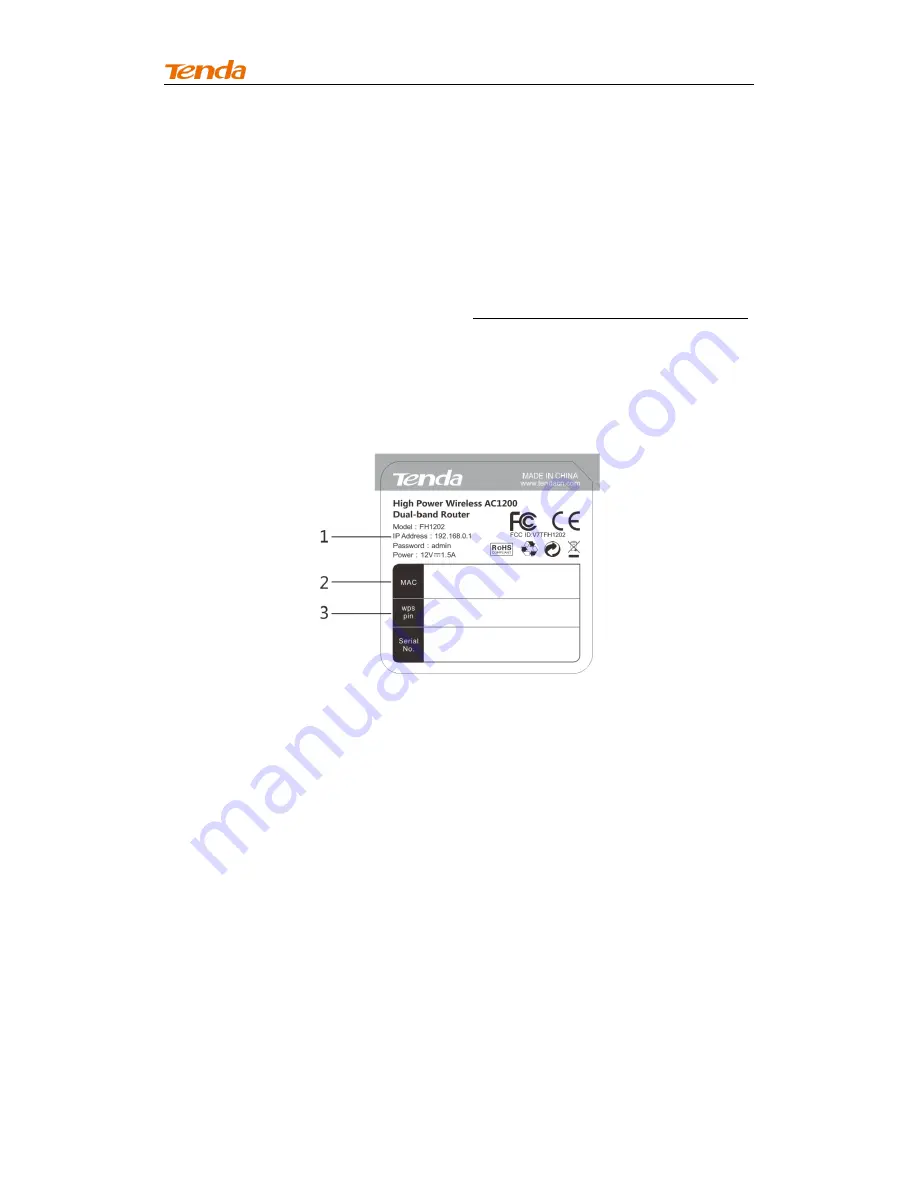
Label
1→Default Login IP address. This IP address is to be used to access the router’s
settings through a web browser. If you chan ge it, you have to open a new
connection to the new IP address and log in again.
2→MAC address.
3→WPS pin code.
3 Position Your Router
Th e op er at in g d i st an ce o r r an ge o f yo u r wi r el ess co n n ect io n can var y si gn i fi can t l y d ep en di n g
on t h e ph ysi cal pl ace men t o f yo u r rou t er. Fo r b est p er fo r man ce, p l ace you r ro ut er :
Near the center of the area where your computers, smart phones and other
devices operate, and preferably within line of sight to your wireless devices.


