background image


32 


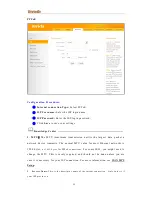
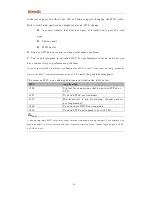
DHCP Server:

 Select whether to enable or disable the DHCP server feature.


Start  IP/End  IP:

  You  can  specify  the  starting  and  ending  address  of  the  IP 

address pool here. These addresses should be part of the same IP address subnet a s 
the router’s LAN IP address. 


Lease  Time:

  The  lease  time  is  a  time  length  that  the  IP  address  is  assigned  to 

each device before it is refreshed.  


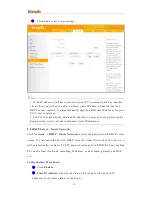
Click 

Save 

to save your settings.  

Ti p

 ---------------------------------------------------------------------------------------- 

1.


By default, the router functions as a DHCP server. Do not disable the 

DHCP server feature unless you want to manually configure the TCP /IP settings 

for all PCs on your LAN.  

2.


Lease time will be renewed automatically upon expiry. No addition al 

configurations are needed.  

3.


If you are not an advanced user, the default DHCP server settings are 

recommended. 

------------------------------------------------------------------------------------------------  

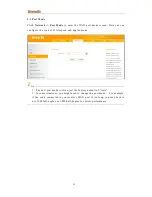
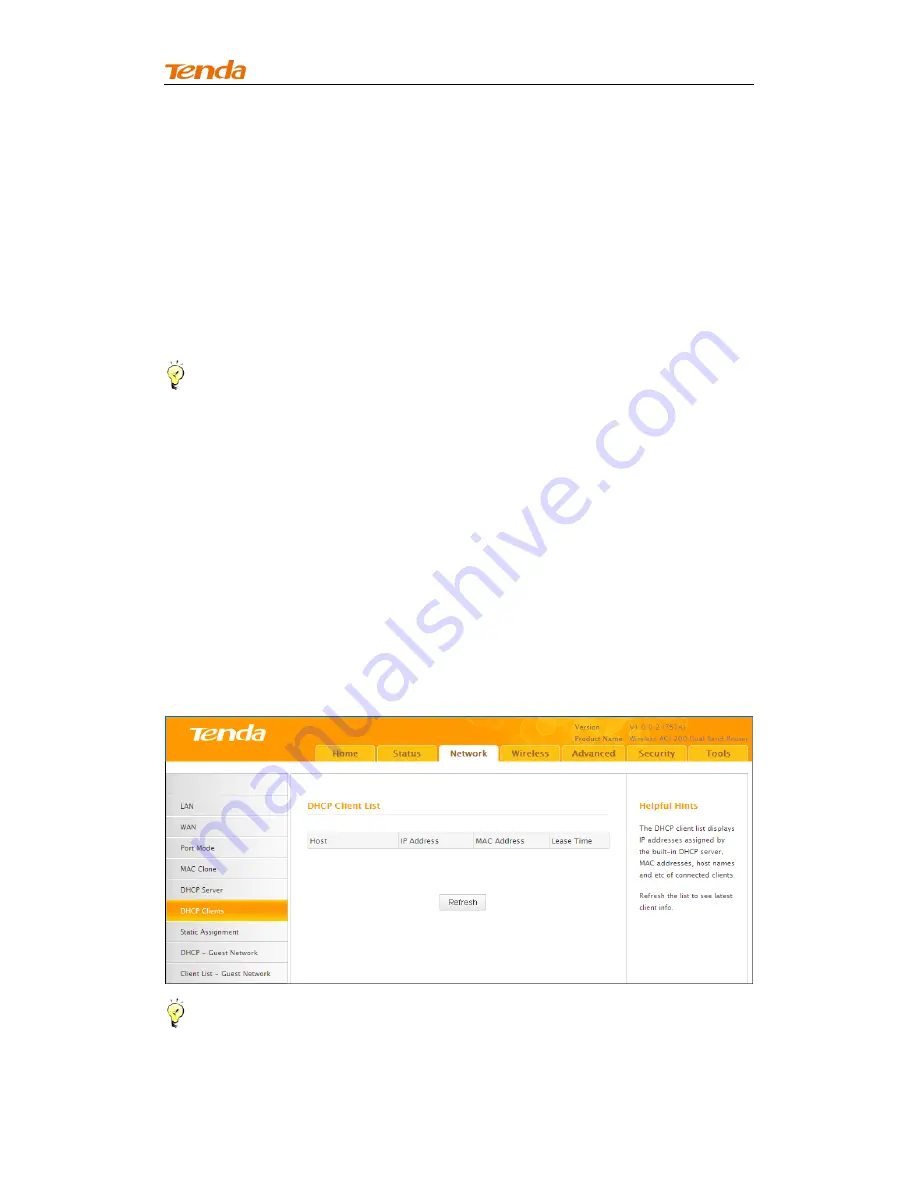
2.6 DHCP Client List  

Click 

Network -> DHCP Clients

 to enter the 

DHCP Clients 

screen. Here you can 

view the host name, IP address, MAC address, and lease time information.  


Ti p

 ------------------------------------------------------------- 

You can know whether there are unauthorized accesses by viewi ng the client list.  

--------------------------------------------------------------------  

Summary of Contents for FH1202

Page 1: ...High Power Wireless AC1200 Dual Band Router I...

Page 2: ...ld like to know more about our product information please visit our website at http www tendacn com Disclaimer Pictures images and product specifications herein are for references only To improve inte...

Page 3: ...or special interest Ignoring this type of note may result in ineffective configurations loss of data or damage to device Tip This format is used to highlight a procedure that will save time or resourc...

Page 4: ...outer 7 4 Verify Internet Connectivity 11 5 Join Your Wireless Network 13 Join Your Wireless Network Windows 7 14 Join Your Wireless Network Windows XP 17 III Features Configurations 20 1 Status 20 1...

Page 5: ...lter 99 5 4 Remote Web Management 101 6 Tools 102 6 1 Logs 102 6 2 Traffic Statistics 103 6 3 Time 105 6 4 Change Password 106 6 5 Backup 107 6 6 Restore 109 6 7 Firmware Update 110 6 9 Reboot 113 App...

Page 6: ...ould contain the following items If any of the parts are incorrect missing or damaged con tact your Tenda dealer Keep the carton including the original packing materials in case you need to return the...

Page 7: ...tion is disabled or WPS authentication negotiation is completed WAN Solid WAN port connected correctly Blinking WAN port is transferring data Off No link is detected on this port LAN 1 2 3 Solid LAN p...

Page 8: ...for about 1 second enables WPS PBC and the WPS LED blinks You can use this button to use WPS to add a wireless device or computer to your wireless network Label 1 Default Login IP address This IP add...

Page 9: ...s to a minimum Away from electrical devices that are potential sources of interference such as ceiling fans home security systems microwaves or PCs Away from any large metal surfaces such as a solid m...

Page 10: ...provided by your ISP Gather ISP Information Your Internet service provider ISP should have provided you with all of the information needed to connect to the Internet If you cannot locate this informa...

Page 11: ...6 Connect the cable from the incoming Internet side to the WAN port on the router Connect one of the LAN ports on the router to the RJ45 NIC port on your PC using an Ethernet cable...

Page 12: ...ll cause damage to the Device 3 Internet Setup Configure PC If your computer is set to a static or fixed IP address this is uncommon c hange it to obtain an IP address automatically from the router If...

Page 13: ...ly detect WAN connection status when you press the Enter key This happens when you first time set up the router or when you restore the router to factory default settings The following screen appears...

Page 14: ...8 but it is deactivated by factory default However if you click the OK button on that page the wireless security key of 12345678 will be activated automatically 4 Here we use the WPA PSK AES for expla...

Page 15: ...E password Dynamic IP DHCP Wireless Security Setup Select Dynamic IP DHCP The default wireless band is 2 4G and default wireless security key is 12345678 For better security key please change the defa...

Page 16: ...y key please change the default security key Security key should be 8 63 characters Click Save to save your settings 4 Verify Internet Connectivity System will automatically enter the Status screen af...

Page 17: ...d Internet fails Make sure the cable from the incoming Internet side is properly connected to the router s WAN port If nothing is wrong Connecting or Connected will be displayed If the connection stat...

Page 18: ...4 MAC Clone 5 Join Your Wireless Network Having finished above settings you can search for the device s default wireless network SSID from your wireless devices notebook iPad iPhone etc and enter a s...

Page 19: ...Tip If you cannot find the icon try disabling the wired network adapter or unplug the Ethernet cable from the wired network adapter of your PC and refresh your desk top If the problem remains unsolved...

Page 20: ...15...

Page 21: ...reen below you are connecting to the wireless network Enter the security key and click OK When you see Connected displayed next to the wireless network you selected you have connected to the wireless...

Page 22: ...17 Join Your Wireless Network Windows XP Right click My Network Places from your PC s desktop and select Properties...

Page 23: ...18 Right click Wireless Network Connection and select View Available Wireless Networks Double click the wireless network you wish to connect...

Page 24: ...19 Enter the security key and click Connect When you see Connected displayed next to the wireless network you selected you have connected to the wireless network successfully...

Page 25: ...of the 3 connection statuses see 4 Verify Internet Connectivity 2 IP Address Subnet Mask WAN subnet mask Gateway Primary DNS Server Secondary DNS Server This type of information appears only if the r...

Page 26: ...21 1 2 WAN Status Click Status WAN Status to enter the WAN Status screen as seen below...

Page 27: ...22 1 3 LAN Status Click Status LAN Status to enter the LAN Status screen as seen below 1 4 Wireless Status Click Status Wireless Status to enter the Wireless Status screen as seen below...

Page 28: ...is to be used to access the router s settings through a web browser Be sure to make a note of any changes you apply to this page Tip 1 Default IP address and subnet mask are respectively 192 168 0 1 a...

Page 29: ...our Internet connection type A Select PPPoE if your ISP uses a PPPoE connection and gives you a PPPoE user name and a PPPoE password B Select Static IP if your ISP provides you with fixed or static IP...

Page 30: ...e largest data packet a network device transmits The normal MTU value for most Ethernet networks is 1500 bytes or 1492 bytes for PPPoE connections For some ISPs you might need to change the MTU This i...

Page 31: ...provides it Static IP Configuration Procedures Internet connection Type Select Static IP IP Address Subnet Mask WAN subnet mask Gateway Primary DNS Server Secondary DNS Server Enter the ISP informatio...

Page 32: ...s necessary for your ISP connection When one network device communicates across the Internet with another the data packets travel through many devices along the way If a device in the data path has a...

Page 33: ...ging the MTU to 1400 If this does not help gradually reduce the MTU from the maximum value of 1500 until the problem disappears The common MTU sizes and applications are listed in the table below MTU...

Page 34: ...r s WAN speed and duplex mode Tip 1 The best port mode is often just the factory default of Auto 2 In some situations you might need to change the port mode For example if the cable connected to your...

Page 35: ...MAC Reset the router s WAN MAC to factory default 2 Clone MAC Clicking this button copies the MAC address of the computer that you are now using to the router Also you can manually enter the MAC addre...

Page 36: ...you enable the DHCP Server the DHCP Server will automatically allocate an unused IP address from the IP address pool specified in this screen to the requesting device as long as the device is set to...

Page 37: ...gs Tip 1 By default the router functions as a DHCP server Do not disable the DHCP server feature unless you want to manually configure the TCP IP settings for all PCs on your LAN 2 Lease time will be...

Page 38: ...e when it accesses the DHCP server Reserved IP addresses could be assigned to servers that require permanent IP settings Static Assignment Application Example To have a PC at the MAC address of 44 37...

Page 39: ...erform the Repair action to activate the configured static IP addresses 2 8 DHCP Server Guest Network Click Network DHCP Guest Network to enter the guest network DHCP server screen If you enable the b...

Page 40: ...the device Click Save to save your settings Click Network Client List Guest Network to enter the guest network DHCP client list screen This section displays a guest network DHCP dynamic client list wh...

Reviews: