


1
INTRODUCTION
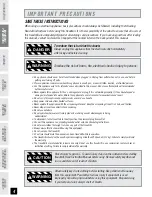
IMPORT
ANT
PRECAUTIONS
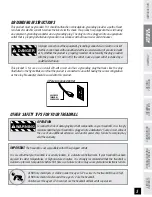
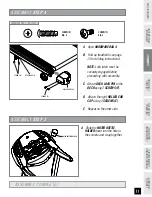
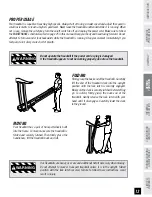
ASSEMBL
Y
BEFORE
YOU
BEGIN
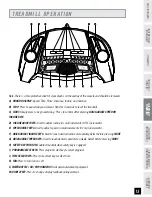
TREADMILL
OPERA
TION
LIMITED
W
ARRANTY
TROUBLESHOOTING
&
MAINTENANCE
CONDITIONING
GUIDELINES
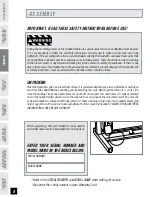
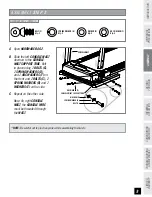
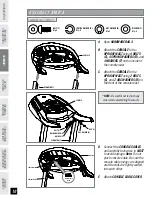
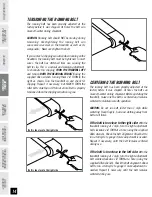
CENTERING THE RUNNING BELT
The running belt has been properly adjusted at the
factory before it was shipped. At times the belt can
move off-center during shipment. Before operating the
treadmill, make sure the belt is centered and remains
centered to maintain smooth operation.
CAUTION:
Do not run belt faster than 1 mph while
centering. Keep fingers, hair and clothing away from
belt at all times.
If the belt is too close to the right side:
With the
treadmill running at 1 mph, turn the right adjustment
bolt clockwise 1/4 TURN at a time (using the supplied
Allen wrench). Check the belt alignment. Allow belt to
run a full cycle to gauge if more adjustment is needed.
Repeat if necessary, until the belt remains centered
during use.
If the belt is too close to the left side:
With the
treadmill running at 1 mph, turn the right adjustment
bolt counter-clockwise 1/4 TURN at a time (using the
supplied Allen wrench). Check the belt alignment. Allow
belt to run a full cycle to gauge if more adjustment is
needed. Repeat if necessary, until the belt remains
centered during use.
Belt is too close to the right side
Belt is too close to the right side
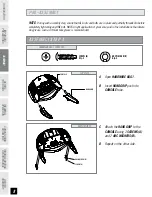
TENSIONING THE RUNNING BELT
The running belt has been properly adjusted at the
factory before it was shipped. At times the belt can
move off-center during shipment.
CAUTION:
Running belt should NOT be moving during
tensioning. Over-tightening the running belt can
cause excessive wear on the treadmill as well as its
components. Never over-tighten the belt.
If you can feel a slipping sensation when running on the
treadmill, the running belt must be tightened. In most
cases, the belt has stretched from use, causing the
belt to slip. This is a normal and common adjustment.
To eliminate this slipping,
TURN THE TREADMILL OFF
and tension
BOTH THE REAR ROLLER BOLTS
using the
supplied Allen wrench, turning them 1/4 TURN to the
right as shown. Turn the treadmill on and check for
slipping. Repeat if necessary, but NEVER TURN the
roller bolts more than 1/4 turn at a time. Belt is properly
tensioned when the slipping sensation is gone.