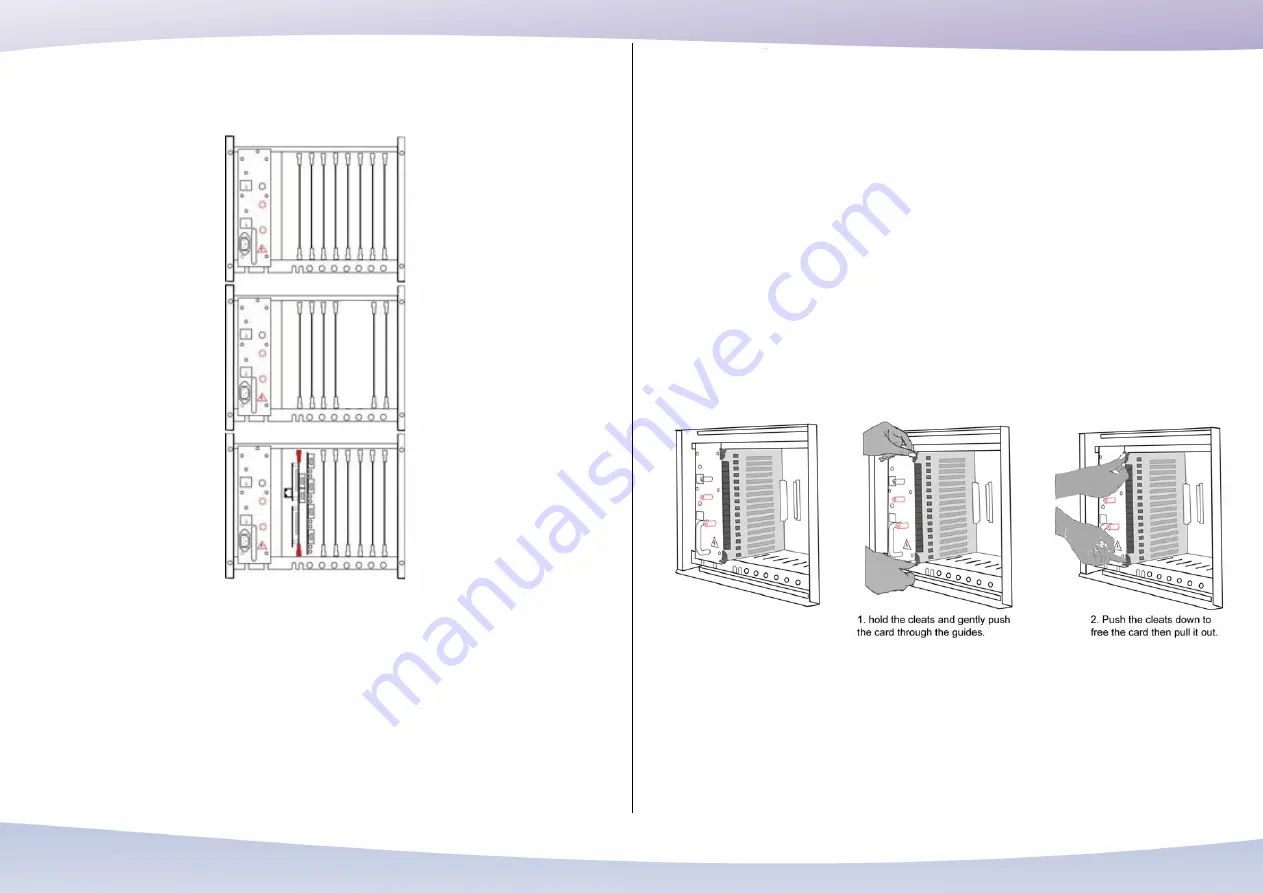
Slots Allocated for Some Purpose
A PX24X with four E1 interfaces
No third auxiliary cabinet. 5th and 6th slots in the first auxiliary cabinet should be left
empty.
How to install cards into available slots
Make sure to keep cards in their electro-statically safe conductor bags when they are
not installed in the system.
Turn off the exchange and make sure the power supply LED is not lit. Failure to do so
might damage your cards and your backplane resulting in system failure if your system
is without the optional protected cards.
Before handling cards, make sure you are electro-statically discharged by wearing an
electrostatic bracelet or touching a metal object such as a radiator or a tap.
On the back of the card there is a male connector with multiple pins. Make sure that
none of these pins are bent or damaged.
Hold the card with two hands, component side facing right, push it gently through the
guides in the upper and lower part of the cabinet all the way until it clicks as the
connector on the card mounts to the connector on the backplane. The cleats on the
upper and lower side of the card should secure tightly into the holes in the cabinet.
Never apply pressure, or force the cards into place, doing so may damage the
connector pins causing a short circuit and resulting in system failure. If necessary,
gently push the card to the left or to the right to align the connectors.
To take out a card, push simultaneously on the cleats and pull with both hands, making
sure you do not touch the components on the face of the card.
Setting Some Jumpers to Configure Ports
1. DATF: Analog DC Loop Trunk (FXO) Card
In each card, one port is equipped with an emergency relay to connect it directly to a
preselected subscriber (FXS) port in case the system power is down.
37


