background image

Operation 

LXT-220 DO 


Teledyne Analytical Instruments


46


Buffer 
Setup 
Status 
 

Parameter Selection Menu 

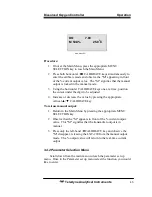
1DO 

            .00 ppm 

Cal 

         .0 mV 


Standardization menu pH 


BUFFER:  Perform a 1 or a 2 point calibration 


SETUP: Set up the range of the 4-20 mA output  


STATUS: Information only. Shows the data stored from the last 
calibration. 

3.4.2.1 B

UFFER 

M

ENU


From the parameter selection menu chose the top line (the 

BUFFER command) and press the two horizontal 

◄►

 CALIBRATE 

keys simultaneously to enter the BUFFER calibration submenu.  Both 
the one-point calibration (standardize) and the two-point (span) 
calibrations are available within this menu.  The procedures for each 
calibration function are given below.


3.4.2.2 O

NE

-P

OINT 

B

UFFER 

C

ALIBRATION 

(S

TANDARDIZE

Because all dissolved oxygen electrodes experience minor 

variations, buffer calibrations are necessary before installing the 
electrodes in service.  Also, occasional calibrations are necessary to 
compensate for electrode degradation while in service.  For 
measurement specifics refer to the dissolved oxygen sensor manual. 


Procedure: 

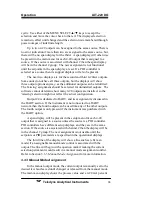
1.


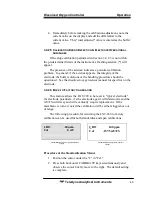
Be sure that the cursor is located under the "1" as illustrated.  

2.


For diagnostic reasons note the ppm and mV values from the 
prior calibration. 

Summary of Contents for LXT-220

Page 1: ...nal protective equipment may be required when servicing this instrument Hazardous voltages exist on certain components internally which may persist for a time even after the power is turned off and di...

Page 2: ...weight of any parts in so far as such alterations do not adversely affect our warranty Important Notice This instrument provides measurement readings to its user and serves as a tool by which valuabl...

Page 3: ...ssolved Oxygen Controller Teledyne Analytical Instruments iii Specific Model Information Instrument Serial Number _______________________ Instrument Range _______________ Calibrated for ______________...

Page 4: ...ry and or damage the instrument CAUTION HOT SURFACE WARNING This warning is specific to heated components within the instrument Failure to heed the warning could result in serious burns to skin and un...

Page 5: ...is manual and keep it available Occasionally some instruments are customized for a particular application or features and or options added per customer requests Please check the front of this manual f...

Page 6: ...ections 17 Installation 19 2 1 Unpacking the Instrument 19 2 2 Mounting 19 2 3 Electrical Connections 20 2 3 1 AC Power 21 2 3 2 Sensor Wiring 21 2 4 Configuring the LXT 220 22 2 5 Calibration 22 Oper...

Page 7: ...Assignments 40 3 3 6 Temperature Calibration 40 3 3 7 4 20 Trim 41 3 3 8 Input A D Converter Trim 42 3 3 9 PID Assignments 43 3 4 Calibration 44 3 4 1 Manual Output Mode 44 3 4 2 Parameter Selection M...

Page 8: ...LXT 220 DO Teledyne Analytical Instruments viii A 4 Model Designation 55 Index 59...

Page 9: ...res Figure 1 1 LXT 220 Front Panel 16 Figure 1 2 Internal Layout of the LXT 220 DO Controller 17 Figure 2 1 Opening the Front Panel 20 Figure 2 2 LXT 220 Electrical Connections 21 Figure 3 1 Available...

Page 10: ...LXT 220 DO Teledyne Analytical Instruments x List of Tables Table 3 1 Protection Level Exceptions 33 Table 4 1 Troubleshooting 52...

Page 11: ...omer should ensure that the principles of operating this equipment are well understood by the user Misuse of this product in any manner tampering with its components or unauthorized substitution of an...

Page 12: ...LXT 220 DO Teledyne Analytical Instruments xii...

Page 13: ...probe however a dual input option is available This optional dual input extends the functionality of the instrument to accept conditioned input from a variety of sensors for specific process measureme...

Page 14: ...bration The default parameters are zero electrode offset and 157 5mV FS slope 4 20mA current output fully expandable to any range within the transmitter s full operating range The output is field sele...

Page 15: ...ommon Note These isolated outputs are floating and require an external 24 VDC power source to operate TI AI can supply an internal 24 VDC power supply to power these outputs Contact the factory for ad...

Page 16: ...sed using the appropriate MENU SELECT key These keys are also used to exit the calibration mode and save calibration data CALIBRATE KEYS UP DOWN LEFT RIGHT The horizontal CALIBRATE keys are used to en...

Page 17: ...er wiring Access to the terminal blocks is gained after removing the 4 captive jackscrews on the front of the instrument Figure 2 shows the internal layout of the LXT 220 Controller A label on the enc...

Page 18: ...Introduction LXT 220 DO Teledyne Analytical Instruments 18...

Page 19: ...erify proper handling by the carrier If damage is noted save the shipping container as proof of mishandling for the carrier 2 Check the contents of the shipping container with the items and quantities...

Page 20: ...ions Panel Mounting This installation uses 1 4 screws Panel mounting is accommodated using the captive jackscrew that will cinch the instrument bezel against the panel 2000268 Dimensions handrail moun...

Page 21: ...plication drawing 4024003 illustrates the proper power wiring for single channel LXT 220 as does the affixed label on the backside of the front panel The wires are best fed through the right conduit a...

Page 22: ...e calibration routine establishes the correspondence between the 4 20mA output signal and the application dependant measurable parameter This manual describes operation for dissolved oxygen measuremen...

Page 23: ...he cursor or numeric values Note Simultaneous pressing both vertical keys or any combination of keys other than the two horizontal CALIBRATE keys is not recommended 3 1 1 Menu Selection Keys The MENU...

Page 24: ...splay only shows 4 menus per screen you can scroll through all available menus by using the MENU SELECT and keys The menus available in the standard LXT 220 instrument configured for single channel di...

Page 25: ...second channel process for instance ORP related screens When there is only one gray screen the information applies to both process applications for example the contrast screen discussed next adjusts t...

Page 26: ...when power is first applied to the LXT 220 The MAIN MENU displays the measured process variable temperature and the current output in percent of full scale While in this menu the current output can b...

Page 27: ...n allows the user to view the calibration engineering data mV input from the sensor and the zero potential from the last cal Each section is entered by placing the cursor under the first letter of the...

Page 28: ...tion In this case the process variable assigned to Channel 1 is plotted and sampled every 6 seconds 1 min To set up additional parameters or to change to current preset parameters refer to Section 3 3...

Page 29: ...e temperature where the different concentrations are equal and is referenced for temperature compensation The noise filter is adjustable from 1 to 20 to dampen any distracting fluctuations on the sens...

Page 30: ...menu 3 3 Configuring the LXT 220 To initially configure or reconfigure the instrument use the left side and MENU SELECT keys to scroll to the bottom of the menus list and stop when the CONFIGURE TRIM...

Page 31: ...1 Password Protection It is worthwhile to become familiar with the password capabilities of the instrument even if you decide not to use them as it is possible that one gets set by mistake and you nee...

Page 32: ...ard commands are required to restore normal password protection The Err PW display is cleared by any keystroke but when attempting to enter a password the display will still show disabled If the passw...

Page 33: ...ING PROTECTION LEVEL To change the protection level navigate using the right side CALIBRATE keys to the old protection level number 3 in the above screen Adjust the numerical value using the right sid...

Page 34: ...y Use the MENU SELECT keys to bring the cursor to the Configure password level screen To enter a new configure password navigate to the old password or no PW using the CALIBRATE keys and select by pre...

Page 35: ...2 4 20 mA Output Assignments The next group of displays are used to assign the 4 20 mA outputs Note The LXT 220 has been configured at the factory for your specific application as specified at the ti...

Page 36: ...0 outputs are installed so the missing selection might not reflect the actual configuration Output 4 is dedicated to HART and its assignment is discussed in the HART section If the instrument is not c...

Page 37: ...field is not present in the operational display The bottom line shows the signal that the selected 4 20 is assigned to On two channel instruments the next display is the manual mode assignment for cha...

Page 38: ...purchased with the HART option then the next five displays are for assigning the HART digital and analog outputs The first of these displays is where represents one of the items from the 4 20 mA assig...

Page 39: ...isplay is used to make the assignment The specified 4 20 must in turn be assigned to an appropriate source Note If the HART analog output is assigned to an output other than 5 then 5 cannot be assigne...

Page 40: ...sed as an alarm if the process value is out of limits The relay configuration menu provides for 8 relays but most units do not have that many relays installed Some units do not have any relays install...

Page 41: ...depress both CALIBRATE keys This will change the unit Press both keys again to toggle back to the original unit All temperature displays on both channels use the selected system of units The scale an...

Page 42: ...ubstantial portion of the full scale voltage It can be of either polarity The input zero point error is automatically removed so there is no adjustment for it The normal input range is 600 millivolts...

Page 43: ...d from the measured process value s are normally available The assignment should be set to unused if no controller is needed This will prevent the PID setup displays from appearing in the operational...

Page 44: ...displays See Section 3 5 Proportional Control Setup and Configuration for configuring and setting up the optional PID control feature 3 4 Calibration Calibration involves performing either a one point...

Page 45: ...r under the digit to be adjusted 4 Increase or decrease the value by pressing the appropriate vertical CALIBRATE key To release manual output 1 Return to the Main Menu by pressing the appropriate MENU...

Page 46: ...enu Both the one point calibration standardize and the two point span calibrations are available within this menu The procedures for each calibration function are given below 3 4 2 2 ONE POINT BUFFER...

Page 47: ...appropriate vertical CALIBRATE key 7 Wait for the real time mV value to stabilize 8 To save the calibration and exit the calibrate mode press either MENU SELECTION key A perfect electrode slope effici...

Page 48: ...eater than 150 0 mV FS If the value falls below 100 0 mV FS the electrode should be serviced or replaced IMPORTANT If a flashing asterisk appears during or after calibration the electrode may require...

Page 49: ...ration problem In general if the asterisk appears the integrity of the electrode the buffer solutions or the handling procedure should be questioned See the dissolved oxygen sensor manual for specific...

Page 50: ...Operation LXT 220 DO Teledyne Analytical Instruments 50 3 This procedure is required at BOTH of the calibration points...

Page 51: ...ont panel can be performed with a detergent and water CAUTION DO NOT USE ACETONE ACIDS OR CAUSTIC SOLUTIONS ON THE ENCLOSURE SURFACE Before cleaning the integrity of the enclosure seals should be insp...

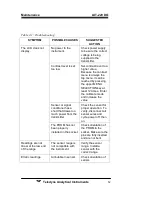
Page 52: ...librate mode and increase the value Sensor or signal conditioner has a short that draws too much power from the transmitter Check the sensor for proper operation To verify disconnect all sensor wires...

Page 53: ...t and temp in C or F Sensor Application specific Input Measurement Parameters Conductivity Resistivity pH Specific Ion Dissolved Oxygen ORP Also external events and analog inputs can be integrated log...

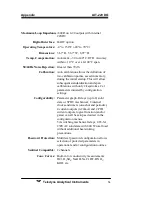
Page 54: ...brations with only 2 keystrokes Cal parameters initiated by configuration settings Configurability Parameter graph Relays up to 8 solid state or SPDT mechanical 8 internal clocks and timers one shot a...

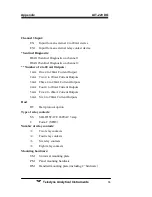
Page 55: ...esignators The following codes will help in identifying a specific instrument configuration Base Model LXT 220 LXT 220 controller Channel 1 Input PH pH ORP Oxidation Reduction Potential REDOX DO Disso...

Page 56: ...nt Output 2mA Two 4 to 20mA Current Outputs 3mA Three 4 to 20mA Current Outputs 4mA Four 4 to 20mA Current Outputs 5mA Five 4 to 20mA Current Outputs 6mA Six 4 to 20mA Current Outputs Hart HT Hart pro...

Page 57: ...ield configurable PT Special temperature input from sensor 1000 ohm pt PID 3 mode proportional control TPC Time Proportional Control Requires 2 solid state relay contacts GO2 Gaseous Oxygen O2 For opt...

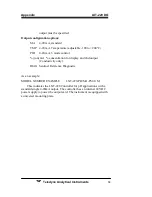
Page 58: ...control ion mA concentration for display and 2nd output Conductivity only DIAG Sentinel Reference Diagnostic As an example MODEL NUMBER EXAMPLE LXT 220 PH MA PS2 UM This indicates the LXT 220 Control...

Page 59: ...LXT 220 30 connections 17 contrast 52 contrast menu 24 25 copyright ii copyright display 24 cross channel assignment 37 current output 26 configure 28 decreasing a value 16 dedicated output 39 defaul...

Page 60: ...ilter 29 noise rejection 54 non linear reading 52 numeric adjustments 16 23 one point calibration 22 one point calibration 44 46 opening the front panel 20 operating temperature 54 operation 23 operat...

Page 61: ...span display 36 span setting 39 specific compensation 14 specific ion 13 14 42 53 specifications 53 stability 53 standardization 22 44 46 STATUS 27 46 STATUS menu 29 submenus 24 Supertwist 53 switch...

Reviews: