background image

Instruction Manual 


Tek-LCD 7801C


www.tek-trol.com 

Technology Solutions

30 


Selections are highlighted with green background for illustration purposes.  


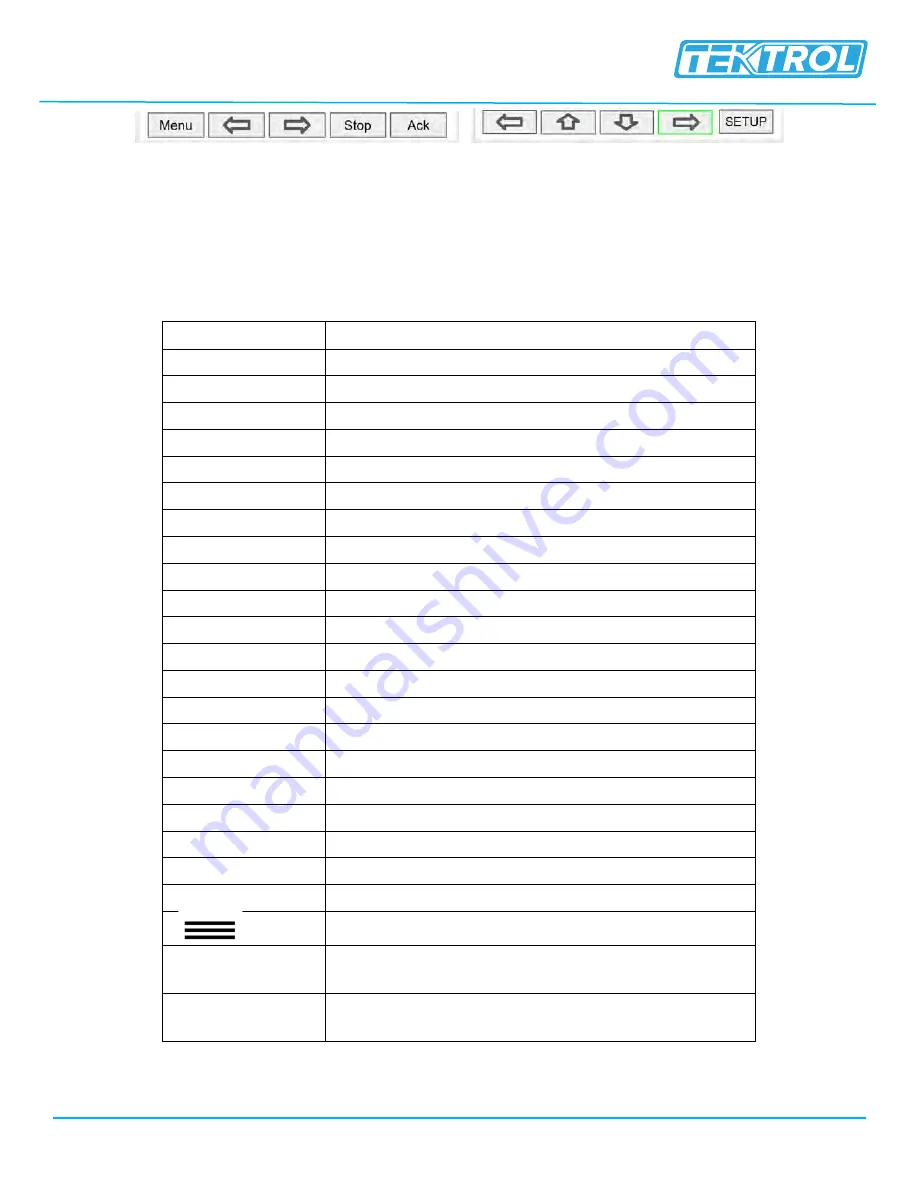
The keys shown in table 1 are used to navigate through menus and edit settings.  


Other special keys appear throughout the programming process. 


Table 1: Key and its Description


Key 

Action 

Menu 

Enter menu 

Right-

key → 


Step into menu/setting


Left-

key ← 


Exit/go back


Down-

key ↓


Next screen/channel/setting


Up-

key ↑


Previous screen/channel/setting


Stop 

Stop automatic scan 

Scan 

Scan screens automatically 

Ack 

Acknowledge alarms/relays


Reset 

Reset total/max/min


Setup 

Enter the Setup menu 

Edit 

Modify selection 

Enter 

Execute keypad entry


Ok 

Accept setting change 

Save 

Save all settings in view 

Cancel 

Discard changes 

Delete 

Delete channel/item


New 

Create new channel/alarm


←|


Move cursor left 

|→  


Move cursor right 

X→ 


Delete to the right 

←X


Delete to the left 


Access additional settings or actions 

Alert!


Flashing red: View new alarm alerts Steady red: Alarm 

alerts, already viewed 

Alert!


Amber: View manually controlled outputs, and 

simulated parameters 


*Note:


This is not a touch-screen display; the pushbuttons must be used to activate the key. 


Screen Navigation 

Menu Navigation 

Summary of Contents for TEK-LCD 7801C Series

Page 1: ...Technology Solutions T CD 7801C EK L Instruction Manual NEMA 4X Panel Mount Multi Channel Controller Document Number IM 7801C www tek trol com...

Page 2: ...contact Customer Support 796 Tek Drive Crystal Lake IL 60014 USA Tel 1 847 857 6076 www tek trol com No part of this publication may be copied or distributed transmitted transcribed stored in a retri...

Page 3: ...Momentary Pushbutton 15 2 5 3 7801C SH Sun Hood 16 2 5 4 7801C 2360 Control Stations 16 2 5 5 Signal Splitter Conditioner Accessories 16 2 5 6 Split Core AC Current Transducer 16 2 5 7 Panel Mount Bu...

Page 4: ...11 Delete Channel 42 6 12 2 Point Linear Scaling 42 6 13 Square Root Scaling 43 6 14 Scale Exponent 43 6 15 Round Horizontal Tank 44 6 16 Open Channel Flow Application 44 6 16 1 Programmable Exponent...

Page 5: ...t 69 6 53 Setup Modbus Output Spoofer 70 6 54 Setup Screens 71 6 54 1 Screens Settings 71 6 55 Setup Function Keys 72 6 56 Setup System 72 6 56 1 Setup Display 73 6 56 2 Setup Colours 73 6 57 General...

Page 6: ...9 1 View Alert Messages 94 8 10 View Digital Outputs 95 8 11 View Modbus Outputs 95 8 12 View Screens 95 9 Operation 97 9 1 Viewing Screens 97 9 1 1 Individual Channel View 97 10 Modbus RTU ASCII Ser...

Page 7: ...r the consequences of misuse by the operator Wrong installation or operation of the devices systems will cause the warranty to be void The respective Terms and Conditions of Sale which forms the basis...

Page 8: ...ts against the packing list provided 1 5 2 Transportation Avoid impact shocks to the device and prevent it from getting wet during transportation Verify local safety regulations directives and company...

Page 9: ...digital outputs Modbus RTU ASCII Modbus Enron and Ethernet Modbus TCP IP protocol communication capabilities Additionally the controller is equipped with up to 32 timers that can be used to control m...

Page 10: ...Rate User selectable 0 1 to 0 5 sec 10 updates sec to 2 updates sec Programming Method Front panel buttons external buttons Number of Alarms Up to 64 high or low logic AND OR Automatic non latching or...

Page 11: ...LCD turns on at 0 C delivering the minimum power If the temperature drops below 10 C the heater delivers its maximum power Connections Removable screw terminal blocks Inputs Outputs 12 to 24 AWG wire...

Page 12: ...xpected maximum total Date Format Month day year Time Format 24 hour 00 Midnight hh mm ss Battery 3 V P N CR2032 included Display Date Time Displayed on the top line of Setup and View menus including...

Page 13: ...Flow Scale Factor Round Horizontal Tank Volume Units Conversion mA Input Reading Percent bar graph Text Percent Channel Input Live Calibration Each channel can be calibrated using live calibration si...

Page 14: ...tek trol com Technology Solutions 12 2 3 Dimensional Drawings Fig 2 Front Panel Mount Fig 3 Panel Cutout Fig 4 Mounting Panel 10 3 4 276mm 10 3 4 276mm 6 1 4 157mm 61 4 157mm 10 1 4 254mm 10 1 4 254m...

Page 15: ...20RY 0 12 0 20 7801C GP 12AI 10AO 10RY 0 12 10 10 7801C GP 16AI 0 16 0 0 7801C GP 16AI 15RY 0 16 0 15 7801C GP 16AI 15AO 0 16 15 0 7801C GP 20AI 0 20 0 0 7801C GP 20AI 10RY 0 20 0 10 7801C GP 20AI 10A...

Page 16: ...troller Calibration and Certificate for up to 36 Inputs and Outputs 7801C 12 DATA NEMA 4X Panel Mount Multi Channel Controller Calibration and Certificate with data for up to 12 Inputs and Outputs 780...

Page 17: ...Drilled in Enclosure 1 7801C LH5CB1 Light Horn with User Choice of Red Green Yellow Blue or White Light Button and Holes Drilled in Enclosure 1 7801C LH3LCB1 RYG Light Horn with Red Yellow Green Ligh...

Page 18: ...op Button 7801C2361 A 1 Black Ack Button 7801C2361 Q 1 Black Silence Button Model Description 7801C 1MA 1MA Signal Isolator with One 4 20 mA Input and One 4 20 mA Output 7801C 1MA 2MA Signal Splitter...

Page 19: ...available in painted steel and plastic and come pre cut with one cutout to mount the Tek LCD 7801C The enclosures are available in various sizes with the larger enclosures capable of housing other pie...

Page 20: ...ts authorized to perform such works CAUTION When removing the instrument from hazardous processes avoid direct contact with the fluid and the meter All installation must comply with local installation...

Page 21: ...ll line voltage connections Observe all safety regulations Electrical wiring should be performed in accordance with all applicable national state and local codes to prevent damage to the meter and ens...

Page 22: ...e controller will run on DC power Note 1 Each 4 20mA input has its own isolated 24VDC power supply to power the transmitter 2 Each 4 20mA output has its own isolated 24VDC power supply to power the ou...

Page 23: ...mA Analog Input Connections Analog 4 20 Input connections are made to screw terminal connectors two inputs per connector The following figures show examples for typical applications Each of the 4 20m...

Page 24: ...the digital inputs Normally open switch contacts can be used as shown in Figure 12 The diagram also shows a Digital Input using an NPN open collector transistor output from a live signal Logic LO or...

Page 25: ...cting the positive voltage to the Ex terminal Fig 13 Active 4 20 mA Output Powered by Controller Fig 14 Passive 4 20 mA Output Powered by External Supply 4 2 8 Digital Output Connections The digital o...

Page 26: ...rnal suppressors snubbers is strongly recommended when switching inductive loads to prevent disrupting the microprocessor s operation The suppressors also prolong the life of the relay contacts Suppre...

Page 27: ...nces up to 4000 feet can be reached with RS 485 Up to 32 Modbus devices can be connected to a single RS 485 bus Fig 21 Serial Connections 4 2 14 Ethernet Option The Ethernet port is available on the R...

Page 28: ...t version of the Tek LCD 7801C configuration software from our website predig com software or from the included CD 2 Extract the contents of the Tek LCD 7801C_Installer zip file into a folder in your...

Page 29: ...rol com Technology Solutions 27 5 The User Account Control message is displayed Click Yes to proceed with the installation 6 The installation progress is displayed 7 Read and accept the End User Licen...

Page 30: ...ek LCD 7801C icon will be placed on your desktop 10 You are now ready to start using the software to configure your TEK LCD 7801C Controller WARNING Only one controller can be connected at a time Atta...

Page 31: ...sh creating a new configuration 6 Click on File to save files open existing files or to create a new configuration even without a controller connected 6 Setup and Programming 6 1 Navigation and Editin...

Page 32: ...ic scan Scan Scan screens automatically Ack Acknowledge alarms relays Reset Reset total max min Setup Enter the Setup menu Edit Modify selection Enter Execute keypad entry Ok Accept setting change Sav...

Page 33: ...ignal connections have been completed and verified apply power to the instrument Inputs outputs channels and relays are configured individually It is recommended that all inputs be configured before c...

Page 34: ...menu is the starting point during the programming process Setup menu setting up Channels Totals Timers Alarms Inputs Outputs Screens and System settings The number of channels shown on this screen is...

Page 35: ...nge Filter Window Average IIR First Order Cutoff Limits Round Hysteresis Delay Pulse Filter See Channel Math Functions on page 15 for details Control Sampler On Off Control w Randomizer Select A or B...

Page 36: ...n background indicates the field to be edited Press Edit key again to change the channel s tag this opens the data entry keypad Use the Down Arrow key to navigate to the keypad Use the and keys to mov...

Page 37: ...ons 35 To enter symbols press the three dots and select the desired symbol When done typing the characters in the selected field press the Enter key To enter numbers select the numeric keypad move the...

Page 38: ...tup Channels menu is used to configure each channel enter a tag select the input source scale the input and program other settings that will determine the channel s processing capabilities Use the Arr...

Page 39: ...nology Solutions 37 Press the Edit key to edit the channel tag and other settings Press the Up and Down arrow keys to select setting to be edited Select the function to be applied to the input and pre...

Page 40: ...the engineering units decimal point enter scale points and press the Ok key Select number of decimals scale the input enter the cut off value select colours for bar graph and text confirm the bar grap...

Page 41: ...s 39 Select a color pattern or press the Edit key to make changes to the colours tag text background and bar graph Use the arrow keys to navigate the settings and press Edit to make changes Press Edit...

Page 42: ...hannel The Manage button is used to move or delete colours 6 9 Live Calibration The Live Calibration feature is used to calibrate a channel by applying a live calibration signal From the Setup menu na...

Page 43: ...additional inputs to be calibrated Adjust the output values according to the calibrated inputs Press Save 6 10 Edit Channel To edit a channel press the Edit key and navigate to the setting you want t...

Page 44: ...delete the channel or the Cancel key to cancel delete action 6 12 2 Point Linear Scaling Linear mode refers to basic 2 point scaling of a 4 20mA signal in engineering units The graph in figure 25 show...

Page 45: ...eadings below a programmed value Below the cut off value the controller will display 0 Fig 26 Square Root Response Graph 6 14 Scale Exponent Exponent mode refers to 2 point scaling with programmable e...

Page 46: ...z Tank from Function options Fig 28 Round Horizontal Tank Volume Graph 6 16 Open Channel Flow Application The Tek LCD 7801C in combination with a level transmitter makes for a practical way to measure...

Page 47: ...ecific Weir or Flume Function In this method the user selects one of the following functions to be applied to the input from a menu in the Tek LCD 7801C Parshall Flumes V Notch Weirs Cipolletti Weirs...

Page 48: ...ration 6 17 Setup Math Function There are many math functions that can be applied to any channel which allows the execution of simple or complex math functions Math channels can be the source for othe...

Page 49: ...Flow Compare Measure Filter Control Relays and Modbus 6 18 Random Varying On Off Control The On Off Control with the Randomizer function is used to prevent grease build up in tank level control appli...

Page 50: ...and the formula for calculating the flow rate using the head height The first thing to do is to create a channel for measuring the head height of the weir or flume This example shows the setup for a 3...

Page 51: ...Instruction Manual Tek LCD 7801C www tek trol com Technology Solutions 49 6 20 Setup Totalizer Based on Flow Rate 6 21 Setup Screen to Monitor Open Channel Flow...

Page 52: ...t available for it The pulse inputs can be either integrated from a rate channel or they can be directly totalized based on the pulse count and K Factor value this is the most accurate method because...

Page 53: ...uts can be totalized directly without the need to create a rate channel Select the units and enter the K Factor provided by the flow meter manufacturer 6 25 Setup Accumulated Total Triggered Selecting...

Page 54: ...ated The trigger can be a digital input a Modbus input or any event selected 6 26 Setup Previous Total The previous total is saved just before the input total is reset The date time when the total was...

Page 55: ...every day at midnight The daily total can be the input to a previous total to save the previous day total Link previous daily totals to maintain a history of daily totals 6 28 Setup Grand Total The gr...

Page 56: ...ng above a certain threshold or a digital input going from low to high Additional Inputs to control the timer mA Input Relay Output Pulse Input Digital Output Modbus Output 6 30 Timer Automatic Action...

Page 57: ...rms they can be driven by a single channel multiple channels digital inputs time interval or a combination of other alarms into logic AND logic OR alarms Set and reset point values determine if it is...

Page 58: ...Instruction Manual Tek LCD 7801C www tek trol com Technology Solutions 56 Automatic only Alarm resets automatically at the reset point...

Page 59: ...m can be used as a summary alarm 6 33 Logic AND Alarm The inputs for the logic AND alarm are any existing alarm regardless of the source or type All alarms in the group must be active to trigger the A...

Page 60: ...me Choose how long the alarm should stay on and if manual acknowledge is allowed 6 36 Setup Inputs The Setup Inputs screen is used to configure the hardware inputs assigning a user defined tag and set...

Page 61: ...on unused inputs Note For more filtering If you need a more stable reading select IIR 16 sec or IIR32 sec setting 6 38 Setup Pulse Inputs The top line for each input shows the slot and input location...

Page 62: ...input 6 39 1 Digital Input Functions A digital input can be used to execute one of the listed functions and at the same time it can be used to trigger an alarm or to totalize count how many times the...

Page 63: ...n be written to other server devices using the Modbus output functions The Snooper mode can listen and read the process variables being transmitted on the RS 485 bus without causing any disruptions to...

Page 64: ...nter Modbus Input tag o Mode Select Client o Server ID Enter the device ID to read from o Address Enter the register address to be read the register number is displayed next to the data type o Enron C...

Page 65: ...her Modbus devices being polled by a Modbus Client The inputs can be used as the source for channels math functions alarms relay control etc o Enter Modbus Input tag o Mode Select Snooper o Server ID...

Page 66: ...digital outputs Modbus Output Configure Modbus outputs 6 45 Setup 4 20 mA Outputs The mA output can be assigned to any analog input channel alarm or digital input It can be scaled to any input and ou...

Page 67: ...when set is active o Break The relay state when break is detected o Fail Safe Relay energized under normal conditions o Relay Status Runtime hh mm ss Select the input source to drive the relay and en...

Page 68: ...Select the input for alternation e g Ch 1 3 Enable alternation 4 Enable alternate on time and enter time 5 Enter the On Off alternation points according to the number of relays to alternate 6 Select r...

Page 69: ...made up of a primary relay and any number of relays selected to alternate with it Multiple alternation groups can be setup using different sources for each group A relay should NOT be assigned to mor...

Page 70: ...stem e g PV channels Totals Relay Runtime etc and selecting the desired data type from bit logic to float 64 The function code is 0x03 and the registers are base 1 e g Reg Address 4400 Reg Number 4440...

Page 71: ...scaled combined with other variables using the math functions and the results can be written to another Tek LCD 7801C or any other Modbus server such as a digital panel meter The Modbus Output menu a...

Page 72: ...ntroller must be configured as a Modbus Server Snooper in the System Modbus menu See page 67 for instructions on how to enable the Add On Features The Spoofer Modbus output is used to replace Modbus d...

Page 73: ...screens that will be displayed during operation and to setup the actions assigned to the function keys F1 F4 6 54 1 Screens Settings Up to eight PVs and or alarms can be displayed per screen The scre...

Page 74: ...Note The function keys F1 F4 can be customized according to the screen in view 6 55 Setup Function Keys The function keys are setup independently for each screen this allows the customization of the...

Page 75: ...Settings menu is used to adjust the backlight brightness refresh rate and to enable or disable the display of commas for all numeric values 6 56 2 Setup Colours The Colours menu is used to select the...

Page 76: ...Options Beeping Alarm Solid Warble Carousel 6 57 1 Add On Features The Add On Features can be enabled at the factory or they can be purchased and enabled by the user at any time A unique key code is...

Page 77: ...user may enter a 4 digit password to protect the system from unintentional changes Password Protected Controller o The correct 4 digit password is required to make changes to the system o If the pass...

Page 78: ...nu 6 60 System Build The Build menu provides the model number and it shows the I O cards installed with their location in the seven available slots If an I O card is removed permanently pressing the R...

Page 79: ...e Rx Timeout is used for devices that are slow to respond such as wireless Modbus servers Modbus Write Protection Select Passcode and enter a Modbus passcode between 0 and 9999 to prevent unauthorized...

Page 80: ...rnet Port Setup Dynamic Host Configuration Protocol DHCP is a network management protocol used to automate the process of configuring devices on IP networks thus allowing them to use any communication...

Page 81: ...Go to the System menu Custom Units o Select New o Enter a label for the unit 8 characters max o Select the unit type or None o Select the base unit o Enter the conversion factor 6 66 1 Delete Custom U...

Page 82: ...e Tek Trol DeviceInstaller it will search for XPort devices on the Local Area Network LAN and display their status 3 If no controller is found click on Options and select the type of connection being...

Page 83: ...k trol com Technology Solutions 81 6 Click on Configuration Records to find these settings see the example above IP Address 192 168 5 32 Local TCP Port 10001 0x2711 7 Click on Web Configuration 8 Clic...

Page 84: ...ection Below are some screenshot examples for Modbus TCP IP connection Note You may download a free trial copy of Modbus Poll from https www modbustools com 8 View Menu The View menu is used to view i...

Page 85: ...o simulate the selected parameter o Channel number and tag o PV and units o View the channel input source o View alarms associated with channel o View analog outputs assigned to channel o Simulate the...

Page 86: ...simulate an alarm condition 8 4 View Totals The View Totals menu displays the value of all the totals and allows resetting each total individually o Total number and tag o Accumulated total and units...

Page 87: ...l 1 Press the 3 Bar key to enter a new total reset the total or simulate a value for the total Totals not associated with a rate channel have additional features Add to or remove from the total Press...

Page 88: ...menu displays the value of the existing timers Press the Right Arrow key to step into the details of the selected timer and view the associated inputs and outputs Press the Right Arrow key to step int...

Page 89: ...ue using the keypad Press the Timer Control key shown in the timer details screen to access all timer control buttons 8 6 View Alarms The View Alarms menu displays the status of all the alarms and the...

Page 90: ...ow key to view the alarm details Press the 3 Bar key to select Ack Alarm Reset Alarm change Set Points or Simulate Alarm condition Press the Set Point key to change the Set Points This re initializes...

Page 91: ...ation states are not saved on power cycle On power up the controller initializes to the actual process conditions The View Inputs menu displays the values and status of all the inputs and the details...

Page 92: ...2 details and the associated channels 8 7 1 Simulate mA Input Use the keys to ramp up and down or use the keypad to jump to any value within the range Press the Ok key to maintain the input in simulat...

Page 93: ...ializes to the actual process conditions The View Outputs menu displays the values and status of all the outputs and the details of the associated channels o Output and tag o mA output value o Relay o...

Page 94: ...ails Press the 3 Bar key to access Analog Output controls Manual control hold current value return to automatic 8 8 2 Manual Control of 4 20 mA Output Select Manual to control the analog output manual...

Page 95: ...he F4 key can be used to turn on and off the selected relay momentarily Press the Right Arrow key to view the relay details o Relay and tag o Status o Runtime o Number of Cycles o Reset relay runtime...

Page 96: ...1 View Alert Messages If Alerts are enabled for alarms the Menu key displays a flashing Alert message on red background Simulated parameters and manual control outputs automatically generate alert me...

Page 97: ...1 View Modbus Outputs The View Modbus Outputs screen displays the Modbus outputs set up by the user it shows the register number and the parameter used to generate each output 8 12 View Screens With t...

Page 98: ...l Tek LCD 7801C www tek trol com Technology Solutions 96 Press the Scan key to have all available screens continue to scan Press the Stop key to have all available screens stop scanning and stay on th...

Page 99: ...rrow key to view the channels Select the channel of interest Navigate through the different items using the navigation keys A green bar indicates the selected item press the Right Arrow key to step in...

Page 100: ...aph Indication The bar graph can be configured to show different colours depending on the value of the process variable The following example illustrates the use of colours Process Variable Bar Graph...

Page 101: ...graph shows green below the first set point The bar graph changes to yellow above set point 1 The bar graph changes to orange above set point 2 The bar graph changes to red above set point 3 The pane...

Page 102: ...le value into specified holding register 16 Write Multiple Registers Set multiple values into specified holding registers The multi channel controller can also work as a Modbus Display Controller by w...

Page 103: ...40041 40056 40 55 Device Tag String 32 char 03 04 R Null terminating string Write 00 for the last char RTC Date Time 40061 60 Year Short 03 04 R 20 2020 40062 61 Month Short 03 04 R 40063 62 Day Shor...

Page 104: ...ing with the software If you have programmed the controller with the front panel buttons and it is not working as intended try re programming it with the Tek LCD 7801C configuration software 11 1 Trou...

Page 105: ...instrument does not respond at all Cycle the power to reboot the microprocessor Settings reprogrammed but instrument behavior remains as previously programmed Cycle the power to reboot the microproces...

Page 106: ...s and solutions for process power and oil gas industries Tek Trol provides process measurement and control products for Flow Level Temperature Pressure Measurement ControlValves Analyzer systems We ar...

Reviews: