10
BEFORE THE FIRST USE
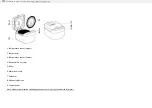
Unpack the appliance
• Remove the appliance from the packaging and unpack all the accessories
and printed documents.
• Open the lid by pushing the opening button on the housing –
fig.1
.
Read the Instructions and carefully follow the operation method.
Clean the appliance
• Remove the pot –
fig.2
, the inner lid and the pressure valve –
fig.3a
and
3b
.
• Clean the pot, the valve and the inner lid with a sponge and washing
up liquid.
• Wipe the outside of the appliance and the lid with a damp cloth.
• Dry off carefully.
• Put all the elements back in their original position. Install the inner lid
in the right positions on the top lid of machine. Then, put the inner
lid behind the 2 ribs and push it on the top until it’s fixed. Install the
detachable cord into the socket on the cooker base.
FOR THE APPLIANCE AND ALL FUNCTIONS
• Carefully wipe the outside of the pot (especially the bottom). Make sure
that there are no foreign residues or liquid underneath the pot and on
the heating element –
fig.5
.
• Place the pot into the appliance, making sure that it is correctly
positioned –
fig.6
.
• Make sure that the inner lid is correctly in position.
• Close the lid in place with a sound of “click”.
• Install the power cord into the socket of the multicooker base and then
plug into the power outlet. The appliance will ring a long sound “Bip”,
all the indicators on the control box will light up for an instant. The rice
cooking mode is set the default cooking program.
• Do not touch the heating element when the product is plugged or after
cooking. Do not carry the product in use or just after cooking.
• This appliance is only intended for indoor use.
Summary of Contents for RK6011
Page 1: ...Mini Spherical Pot Rice Cooker www tefal com EN ZH MS TH...
Page 2: ...Preset Timer Start Menu Keep Warm Cancel 1 5 6 7 13 9 2 3 4 10 14 8 12 11...
Page 22: ...22 8 8 8...
Page 23: ...23 ZH...
Page 24: ...24 4000...
Page 25: ...25 ZH...
Page 26: ...26 1 2 3a 3b 5 6 10 Keep Warm Cancel Keep Warm Cancel 7...
Page 31: ...31 ZH 12 13 14 15 16 17 1 11 24 Keep warm Cancel...
Page 32: ...32 16 18 13...
Page 33: ...33 ZH E0 E1...
Page 54: ...54 8 8 8...
Page 55: ...55 TH...
Page 56: ...56 Connector...
Page 57: ...57 TH 4 000...
Page 58: ...58...
Page 59: ...59 TH 1 2 3a 3b 2 5 6 10...
Page 61: ...61 TH 8 9...
Page 62: ...62...
Page 63: ...63 TH 0 00 12 24...
Page 64: ...64 1 11 24 12 13 14 15 16 17...
Page 65: ...65 TH 16 18...
Page 66: ...66 2...
Page 67: ...67 TH E0 E1...
Page 69: ...EN p 4 20 EN p 21 34 EN p 35 52 EN p 53 68 9100026072 02 EN ZH MS TH...


