background image

Chapter.  4

6  Page

♣  How  to  move  the  Keyboard  &  Mouse

When  using  the  full  screen,  the  mouse  can  be  moved  according  to  the  output  screen  and 

used  immediately.  In  the  split  screen  mode,  the  DVI-connected  computer  is  recognized  as 

1  and  the  HDMI-connected  computer  is  recognized  as  number  2.  Press  the  Scroll  Lock  2 

times  on  the  top  of  the  keyboard  and  then  press  the  numeric  keypad  “1”  to  move  the 

mouse  and  keyboard  to  the  No.  1  computer.

●  Additional  measures

When  you  purchase  a  Divisio  monitor  and  start  operating  for  the  first  time,  the  product 

is  manufactured  by  setting  the  division  and  variable  division.  However,  sometimes  the 

screen  decreases  and  the  black  margins  up  and  down  may  occur  when  the  screen  is 

divided.  This  is  the  case  when  the  first  communication  is  required  for  the  computer  and 

the  monitor  to  communicate  at  the  resolution,  especianlly  in  the  early  versions  of  the  OS. 

Change  the  resolution  once  in  each  split  screen  as  described  below  and  click  the  OK 

button.  After  that,  the  monitor  automatically  recognizes  and  changes  the  resolution.

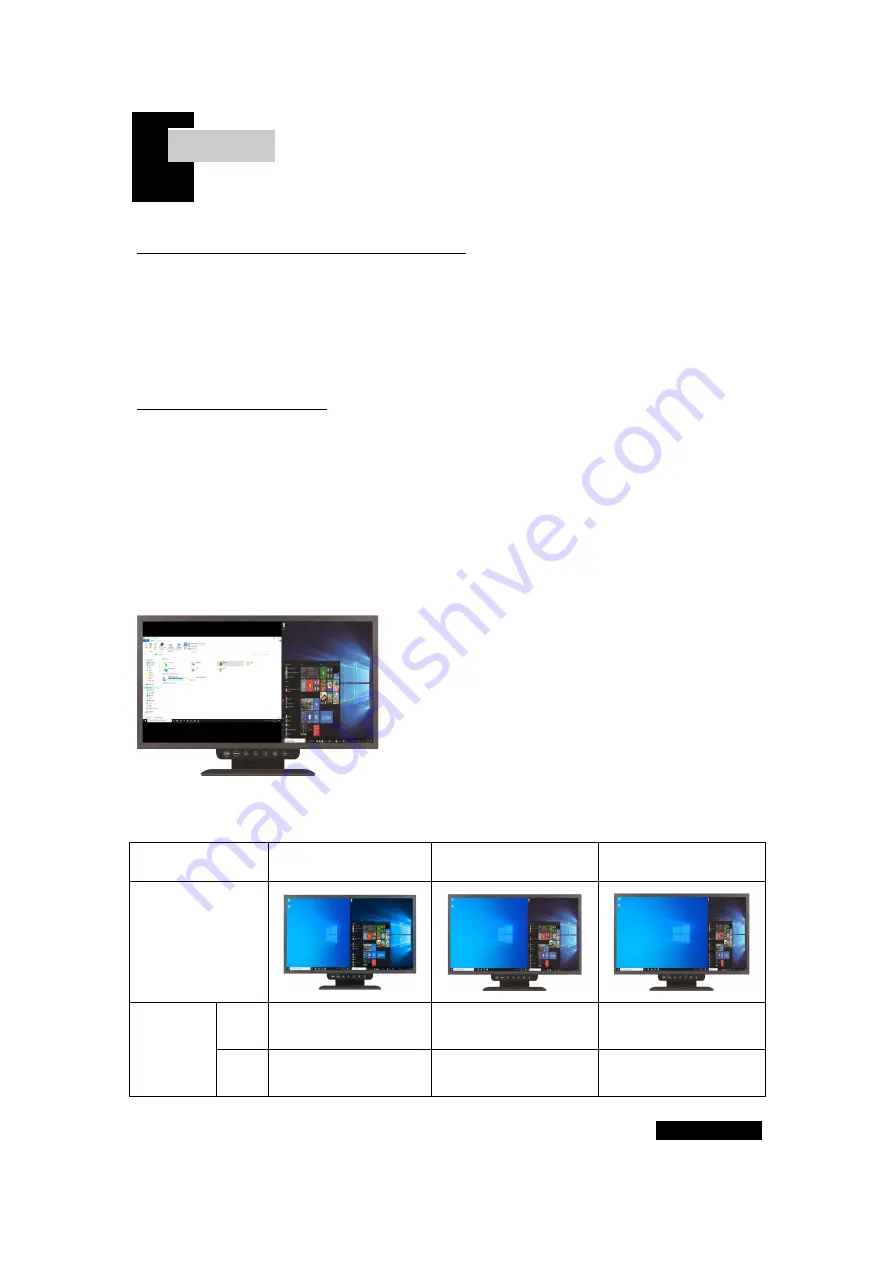
1.  If  the  screen  on  the  left  has  a  black  top  and 

bottom  margin  on  the  split  screen, 

right-click  on  the 

desktop  and  click  Display  Settings.

2.  Click  the  Display  Resolution  button  and  click  the 

resolution  marked 

(recommended)

  at  the  back  of  the 

resolution  number.  Please  refer  to  the  table  below  for 

the  optimal  resolution  of  the  split  screen.

3.  Recommended  resolution  for  split  screen  ratio

Screen  division 

ratio

5:5  Split

6:4  Split

7:3  Split

Split  screen

Resolution

Left

960*1080

(recommend)

1280*1080

(recommend)

1440*1080

(recommend)

Right

960*1080

(recommend)

640*1080

(recommend)

480*1080

(recommend)

          [  How  to  use  K

eyboard  &  Mouse

  ]

Summary of Contents for TOV-271M

Page 1: ...at the same time and is particularly suitable for physical network separation environments It is a product that eliminates harmful electromagnetic waves while providing high definition image quality...

Page 2: ...it over heavy objects Do not use multiple outlets or power plugs in one outlet Place the monitor at a distance from the wall to ensure proper ventilation If the monitor emits smoke or a strange smell...

Page 3: ...may be on the CD that comes with the computer Please refer to the table below for recommended resolutions For normal monitor operation the video card must be set to the recommended resolution on Wind...

Page 4: ...to the monitor may cause malfunction Please connect the adapter and monitor first then plug the power plug into an outlet 2 Please connect each cables to the monitor terminal and PC or external devic...

Page 5: ...monitor and the computer and connect them again Try auto tuning The screen is not clear Make sure the resolution is set to the recommended resolution The screen is unstable and trembling There is a sh...

Page 6: ...monitor circuit 7 Power input When the connection is made as above you can use the monitor by pressing the power switch P on the front of the monitor How to Use the Buttons P Monitor Power switch M M...

Page 7: ...the first communication is required for the computer and the monitor to communicate at the resolution especianlly in the early versions of the OS Change the resolution once in each split screen as de...

Page 8: ...s Contrast Description HDMI Resolution 1920x100 60Hz Brightness Contrast Brightness 75 Color Format Settings Contrast 75 Color Settings Dynamic Contrast Off Picture Quality Settings Display Settings A...

Page 9: ...or Format Select the color format for the screen Default Auto Select 2 Color Domain Adjust the color of the screen Default YUV Domain 6 3 Screen Color Settings Description HDMI Resolution 1920x100 60H...

Page 10: ...tings Other Settings 1 Sharpness Adjust the sharpness of the screen Default 50 6 5 Screen Display Settings Description HDMI Resolution 1920x100 60Hz Brightness Contrast Aspect Ratio Full Screen Color...

Page 11: ...ther Setting Description HDMI Resolution 1920x100 60Hz Brightness Contrast Language English Color Format Settings Menu Transparency 0 Color Settings Menu Rotation Picture Quality Settings Factory Rese...

Page 12: ...x H x D 637mm x 440mm x 190mm With stand Vertical 454mm width 170mm Weight Kg Unpacked 4 5kg Packed 5kg Operation temperature 0 40 C 11 Page Product specifications are subject to change without prior...

Page 13: ...e from the repair date We recommend keeping receipts In the following cases the parts and service charge will be charged during the warranty period 1 When a malfunction occurs due to careless handling...

Page 14: ...d of holding the parts Free replacement or purchase refund 20 refund of the amount depreciated Compensation standards for product repairs exchanges and refunds are subject to the Consumer Damage Rewar...

Reviews: