background image

32

Display:

There are two display setting options available -

Backlight - the display backlight will switch off after a set delay 

• 

from when a button was last pressed.
Brightness - display brightness can be adjusted in 5 steps.

• 

To set Backlight delay:

Select the ‘Display’ option from the ‘Settings’ menu.

• 

Select the ‘backlight’ option from the Display menu.

• 

Press the + or - button to choose a backlight delay time from the 

• 

options of 3, 5, 10, 15 or 30 seconds. Choose the ‘Off’ option if you 
want the backlight to remain on permanently during use (this will 
result in higher battery consumption and a much shorter battery 
life).
Press the 

• 

/,

 button to confirm your choice.

To set Display brightness:

Select the ‘Display’ option from the ‘Settings’ menu.

• 

Select the ‘Brightness’ option from the Display menu.

• 

Press  the  +  or  -  button  to  choose  your  preferred  display 

• 

brightness.
Press the 

• 

/,

 button to confirm your choice.

SETTINGS MENU

Record quality:

This option enables you to choose the quality setting for recordings 
you make. Higher quality recordings will use more memory.

Select the ‘Record’ option from the ‘Settings’ menu.

• 

The record quality menu will open.

• 

Press the + or - button to choose a recording quality setting from 

• 

the options of Low, Normal or High.
Press the 

• 

/,

 button to confirm your choice.

Maximum volume limit:

This option enables you to set the maximum volume that can be set.

Select  the ‘maximum  volume  limit’  option  from  the ‘Settings’ 

• 

menu.
The Volume limit menu will open.

• 

Press the + or - button to choose a maximum volume limit from 

• 

the options of 15 (factory setting), 18, 21, 24, 27 or 30.
Press the 

• 

/,

 button to confirm your choice.

Summary of Contents for MPV4

Page 1: ...Owner s Handbook MPV4 MP4 Playerwith FM radio ...

Page 2: ......

Page 3: ... To avoid possible damage to your hearing do not listen to music at high levels through headphones Never disconnect the player from the PC without following the correct procedure After use always disconnect the earphones and store the earphones and the player safely IMPORTANT SAFETY INFORMATION WARNING This product contains an integral battery There is a risk of fireandburnsiftheplayerishandledimp...

Page 4: ...issing or damaged contact your nearest TESCO store for a replacement Have your receipt ready when you call Retain the packaging If you dispose of it do so having regard to any recycling regulations in your area INTRODUCTION INDEX Important safety information 1 Introduction unpacking 2 Controls connections 3 Battery charging 4 Getting started 5 Building a music library on your computer 6 Transferri...

Page 5: ...utton d Next Cursor right button e Volume down Cursor down button f Previous Cursor left button g Menu button h Reset hole Microphone location i Hook for carrying strap not supplied p USB jack q Headphone jack CONTROLS AND CONNECTIONS FRONTVIEW BACKVIEW BOTTOMVIEW ...

Page 6: ...ke approximately two and a half hours Once plugged into the computer for charging the player should be left charging for the recommended time period A battery level indicator is provided to monitor the charge condition of the battery BATTERY CARE Topreservethelifeofthebattery thefollowingrecommendationsare made Fully charge the battery before first use Charge the battery immediately when it is exh...

Page 7: ...d on my computer For easy communication with your player Windows Media Player version 11 WMP11 or later is recommended to manage your media files Windows Media Player software is supplied free of charge with Microsoft Windows but depending on the age of your computer the version installed may not be version 11 To check the version ofWindows Media Player OpenWindows Media Player click Start All pro...

Page 8: ... the CDs that you wanttoincludeinyourlibrary andrip copy them into the Windows Media Player WMP library OpenWindows Media Player 11 Click on the Rip tab at the top of the screen BUILDING A MUSIC LIBRARY ON YOUR COMPUTER ...

Page 9: ...OMPUTER Load the CD you want to rip into the computer drive The CD will play and the ripping process will begin Ripping progrees is indicatedasshown Once the ripping process is complete you can remove the disc and rip another if required ...

Page 10: ...layer will light and showtheUSBsymbol Afterashortdelay awindowwillopen on the right of the Windows Media Playerdisplaytitled SyncList In the main library click on the albumsortracksthatyouwantto transfer and drag them across to the sync list NOTE You can drag individual tracks from the track list or click on the album symbol to select an entire album TRANSFERRING MUSIC FILES FROM A WINDOWS MEDIA P...

Page 11: ...pies the files to your player Progress bars display synchronisation progress Leave the player docked to the computer until synchronisationisfinished NOTE Synchronisation may take some time if you are copying a large number of files to the player When synchronisation is complete a message will be displayed You can nowdisconnect MP4player Unplug the player Theplayerwillswitchoff TRANSFERRING MUSIC F...

Page 12: ...ter You can add other folders by clicking the Library tab and selecting Add to Library PICTURE LIBRARY You can also switch the Windows Media Player 11 screen to display a library of the Pictures stored on your computer To change between libraries click on the Media Select icon at the top left of the screen to drop down a selection menu for different media types You can then choose to display pictu...

Page 13: ...nchronisation will start as Windows Media Player copies the files to your player Progress bars display synchronisation progress Leave the player docked to the computer until synchronisationisfinished NOTE Synchronisation may take some time if you are copying a large number of files to the player When synchronisation is complete a message will be displayed You can nowdisconnect MP4player Unplug the...

Page 14: ... of drives on your computer After a short delay the player will appear as a Removable Disk To make it easier to identify the player you may want to rename the disk for easy recognition The computer will recognise the player by its new namewheneveryouconnectit Double click to open this drive and you will see folders for music video and pictures Open a second window of My Computer Browsetoyourmusicf...

Page 15: ...e icon on the taskbar at the bottom right of the screen Double click the icon In the box that opens click Stop Another screen opens Click OK When you see the Safe To Remove Hardware notice you can remove the player USING WINDOWS EXPLORER TO TRANSFER MUSIC FILES ...

Page 16: ...is the same as that described in the previous section for transferring music files with the following exception Picture files must be copied to the Pictures folder that will be found on the player Both individual pictures and folders containing pictures may be transferred NOTE Ensure that only compatible JPG picture files are in the folders before transferring them ...

Page 17: ...rs only Converting video files to MTV format Video files may be found in a variety of different formats the most common are MPG and AVI etc These files are not directly compatible with your playersowillneedconversionusingformatconversion software Video Converter software is supplied on a CD ROM with your player Before attempting to transfer any filesyoushouldinstalltheformatconversionsoftware onto...

Page 18: ...versionlist Setting up the format conversion software Once a file is selected you can set upVideo Converter Click on the Advanced setting tab From the Advanced Setting menu Set the OutputVideo Quality setting to High Movie Quality Set the Output Frame Size to 128 x 128 Set the Output Format to MTV Set the OutputVideo Ratio to Full Screen Click OK YoucannowconvertyourvideofilestoMTVformat TRANSFERR...

Page 19: ...ormat the transfer process for video files is the same as that described in the section UsingWindowsExplorertotransfermusicfiles withthe following exception Video files are copied from the C MTV_OUTPUT folder to the Video folder on your player NOTE Ensure that only compatible MTV video files are in the folder before transferring them TRANSFERRING VIDEOS The conversion screen ...

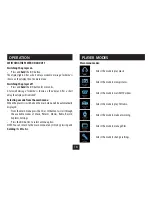
Page 20: ...he player is switched on the main menu will be automatically displayed From the main menu press the or button to scroll through the available modes of Music Pictures Movies Radio Record Explorer Settings Press the button to select a menu option NOTE You can return to the main menu at any time by pressing and holding the M button PLAYER MODES Main menu modes Select this mode to play music Select th...

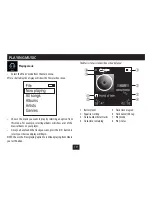
Page 21: ...k time elapsed 5 Track name ID3 tag 6 Play mode 7 Play status 8 Choose the music you want to play by selecting an option from this menu For example selecting albums will show a list of the music albums on your player Onceyouhavefoundthetrackyouwant pressthe buttonto select your choice and play will begin NOTE Choosethe Nowplaying optiontocontinueplayingfromwhere you last finished TheMusicstatusscr...

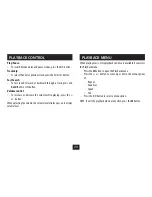
Page 22: ...n NOTE To exit the playback menu at any time press the M button Play Pause To switch between play and pause modes press the button Track skip To select the next or previous track press the or button Fast Search To fast search forward or backward through a track press and hold the or button Volume control To increase or decrease the volume while playing press the or button When adjusting the volume...

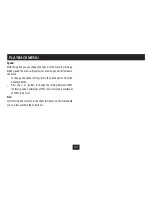
Page 23: ...eanotherPlaybackMenuoptionor Press M to return to the Music Status screen Thedisplaywillshowtherepeatmodethathasbeenset Equaliser There are 6 equaliser mode options that will change the sound response of your player To change the equaliser setting select the Equalizer option from the Advanced Menu Press the or button to scroll through the available options Normal No equalisation Pop Rock Classic J...

Page 24: ...down the music To change the Speed setting select the Speed option from the Advanced Menu Press the or button to change the setting between 100 normal speed a minimum of 70 very slow and a maximum of 130 very fast File SelectthisoptiontoreturntotheFileSelectionmenu Thiswillenable you to select another album track etc PLAYBACK MENU ...

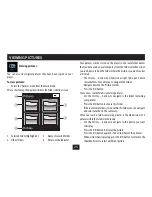
Page 25: ...wn to the Pictures folder Press the button Youcannowseethefolderscontainingpictures Use the buttons to navigate to the folder containing your pictures Press the button to choose this folder Iftherearemorefoldersstoredwithinthisfolder youcannavigate and select another in the same way When you reach a folder containing pictures a thumbnail view of 4 pictureswithinthefolderwillbeshown Use the buttons...

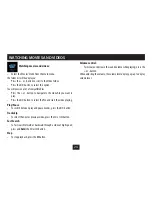
Page 26: ...n to select the file and start the video playing Play Pause To switch between play and pause modes press the button Track skip To select the next or previous video press the or button Fast Search Tofastsearchforwardorbackwardthroughavideoathighspeed press and hold the or button Stop To stop playback press the M button Watching movies and videos Volume control Toincreaseordecreasethesoundvolumewhil...

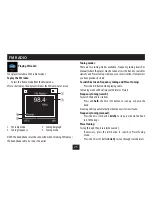
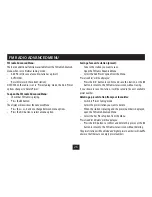
Page 27: ...g Press the button while playing radio Thetuningmodewillbedisplayed NormalorPreset Frequency tuning search To search the band for stations Press and hold the or button to scan up or down the band Scanningwillstopautomaticallywhenthenextstationisfound Frequency tuning manual Press the or button briefly to step up or down the band in 0 1Mhz steps Preset tuning To step through the presets when saved ...

Page 28: ...en the FM radio Advanced Menu Select the Add Preset option from the Menu Presetconfirm willbedisplayed Press the button to confirm and save the station or the M button to return to the FM radio status screen without saving If you choose to save the station it will be saved in the next available presetnumber Deleting a preset station from your favourites Switch to PresetTuning mode Select the prese...

Page 29: ...ll previously saved favourite presets Select FM mode Open the FM radio Advanced Menu Select the AUTO SCAN option from the menu Press the button to confirm and start Auto Search or the M button to return to the FM radio status screen without searching The player will scan the band stopping at each station found and save thestationsaspresetfavourites FM RADIO ADVANCED MENU ...

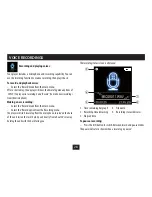
Page 30: ... Making a new recording Select the Record mode from the main menu Select the Record option from the Recording menu Theplayerwiilstartrecordingfromthemicrophone locatedontheback of the unit inside the reset hole Speak clearly from about 30cm away holdingtheunitwiththebackfacingyou Recording and playing voices Therecordingstatusscreenisdisplayed To pause a recording Press the button to switch betwee...

Page 31: ...ordings from the main menu Select the Record mode from the main menu Select the VOICE option from the Recording menu Thedisplaywillshowthelatestrecordingthathasbeenmade Press the or button to choose the recording you want to play Press the button to play the recording Therecordingwillbegintoplay Whilst playing the recording you can change tracks with the or button and select Advanced menu function...

Page 32: ...e Main menu Thedisplaywillshowafolderlist Pressthe or buttontoscrollupordownthefolderlisttosearch for the Music Video or Picture folder depending on the media type you want to play Press the button to open the folder Sub foldersandfileswithinthisfolderwillnowbedisplayed Repeat the last two steps to navigate further through the folders and then select the file you want to play When you find the fil...

Page 33: ...ting option available Auto off the unit will power off after a set delay if the player is not playing or being operated To set Auto Off Select the Power option from the Settings menu Select the Auto off option from the Power menu Press the or button to choose a power off time from the options of 10 30 60 or 120 minutes Choose the Off option to disable the power off delay feature Press the button t...

Page 34: ...n from the Settings menu Select the Brightness option from the Display menu Press the or button to choose your preferred display brightness Press the button to confirm your choice SETTINGS MENU Record quality This option enables you to choose the quality setting for recordings you make Higher quality recordings will use more memory Select the Record option from the Settings menu The record quality...

Page 35: ...the Settings menu Select the Reset option from the SysTools menu If you want to proceed and reset the player select the Yes option The player will reset all user settings and clear radio presets To display system information for the player Select the SysTools option from the Settings menu Select the Sys Info option from the SysTools menu The player firmware version will be displayed with the maxim...

Page 36: ...eft The buttons are not working or display does not switch off The player may need re initialising Gently insert a metal pin the end of a paper clip is recommended into the Reset hole in the back of the player You will feel a small click and the player will reset Poor FM reception The FM signal strength may be low Try re positioning the player and headphone wire the headphone wire is the aerial Yo...

Page 37: ...lp line on 0845 456 6767 Please have your original purchase receipt with you when you call This warranty in no way affects your consumer rights WARRANTY UK Waste electrical products batteries should not be disposed of with household waste Separate disposal facilities exist for your nearest facilities see www recycle more co uk or in store for details ROI Produced after 13th August 2005 Waste elect...

Page 38: ......

Page 39: ......
Page 40: ...Tesco Stores Ltd Delamare Road Cheshunt Herts EN8 9SL Technika Helpline 0845 456 6767 Calls cost up to 4p per minute from a BT landline other providers may vary MPV4V0 2 ...

Reviews: