background image

English   

- 3 -

 Safety Precautions 

 Please read the following recommended safety 
precautions carefully for your safety. 

 Power Source 

 The TV set should be operated only from a  220-240 
V AC, 50 Hz  outlet. Ensure that you select the correct 
voltage setting for your convenience. 

 Power Cord 

 Do not place the set, a piece of furniture, etc. on the 
power cord (mains lead) or pinch the cord. Handle the 
power cord by the plug. Do not unplug the appliance 
by pulling from the power cord and never touch the 
power cord with wet hands as this could cause a short 
circuit or electric shock. Never make a knot in the cord 
or tie it with other cords. The power cords should be 
placed in such a way that they are not likely to be 
stepped on. A damaged power cord can cause 

fi

 re or 

give you an electric shock. When it is damaged and 
needs to be replaced, it should be done by quali

fi

 ed 

personnel. 

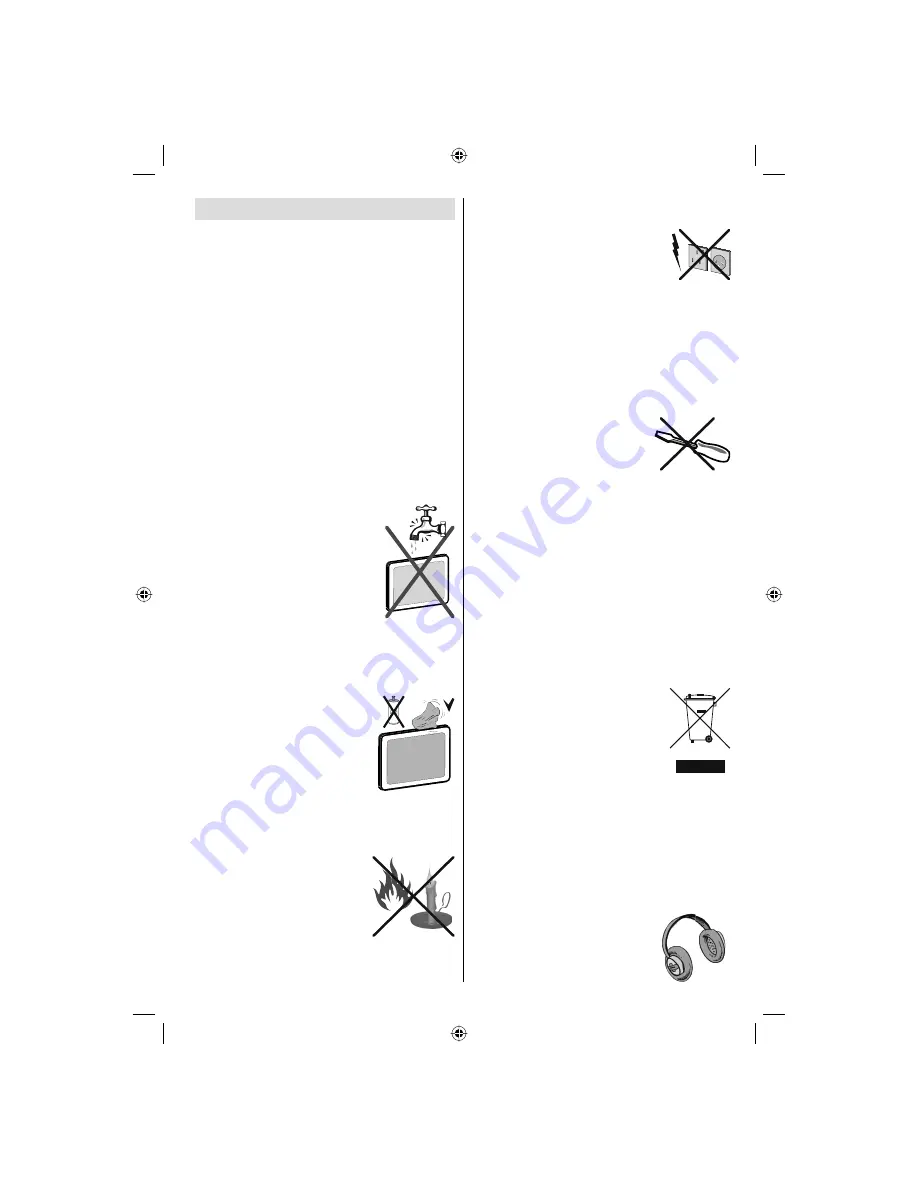
 Moisture and Water 

 Do not use this device in a humid 
and damp place (avoid the bathroom, 
the sink in the kitchen, and near the 
washing machine). Do not expose this 
device to rain or water, as this may be 
dangerous and do not place objects 
filled with liquids, such as flower 
vases, on top. Avoid from dripping 
or splashing.
If any solid object or liquid falls into the cabinet, unplug 
the TV and have it checked by quali

fi

 ed  personnel 

before operating it any further.  

 Cleaning 

 Before cleaning, unplug the TV set 
from the wall outlet. Do not use 
liquid or aerosol cleaners. Use soft 
and dry cloth.  

 Ventilation 

 The slots and openings on the TV 
set are intended for ventilation and to ensure reliable 
operation. To prevent overheating, these openings 
must not be blocked or covered in anyway. 

 Heat and Flames 

 The set should not be placed near 
to open flames and sources of 
intense heat such as an electric 
heater. Ensure that no open 

fl

 ame 

sources, such as lighted candles, 
are placed on top of the TV. 

Batteries should not be exposed to excessive heat 
such as sunshine, 

fi

 re or the like. 

 Lightning 

 In case of storm and lightning or when 
going on holiday, disconnect the power 
cord from the wall outlet.  

 Replacement Parts 

 When replacement parts are required, make sure that 
the service technician has used replacement parts, 
which are speci

fi

 ed by the manufacturer or have the 

same speci

fi

 cations as the original one. Unauthorized 

substitutions may result in 

fi

 re, electrical shock or 

other hazards.  

  Servicing 

 Please refer all servicing to quali

fi

 ed 

personnel. Do not remove the cover 
yourself as this may result in an 
electric shock. 

 Waste Disposal 

 Instructions for waste disposal:
• Packaging and packaging aids are recyclable and 

should principally be recycled. Packaging materials, 
such as foil bag, must be kept away from children.

• Batteries, including those which are heavy metal-

free, should not be disposed of with household 
waste. Please dispose of used battery in an 
environment friendly manner. Find out about the 
legal regulations which apply in your area.

• Cold cathode fluorescent lamp in LCD PANEL 

contains a small amount of mercury; please follow 
the local laws or regulations for disposal. 

 Information for Users  in European Union 
Countries 

 This symbol on the product or on its 
packaging means that your electrical 
and electronic device should be 
disposed at the end of its service 
life separately from your household 
wastes. There are separate collection 
systems for recycling in EU.
For more information, please contact the local 
authority or the dealer where you purchased the 
product. 

 Disconnecting the Device 

 The mains plug is used to disconnect TV set from 
the mains and therefore it must remain readily 
operable. 

 Headphone Volume 

 Excessive sound pressure from 
earphones and headphones can 
cause hearing loss. 

[GB]_MB35_COST_46882W-1810UK_PANEUIDTV_SILVER1_TECHNIKA_10065830.indd   3

[GB]_MB35_COST_46882W-1810UK_PANEUIDTV_SILVER1_TECHNIKA_10065830.indd   3

16.10.2009   10:21:13

16.10.2009   10:21:13

Summary of Contents for LCD46-920

Page 1: ...COLOUR TELEVISION WITH REMOTE CONTROL OPERATING INSTRUCTIONS For assistance please call our Tesco Electrical Helpline on 0845 4566767 LCD46 920 ...

Page 2: ...he Buttons on the TV 11 Operation with the Remote Control 12 Initial Settings 12 General Operation 13 Information Banner 13 Electronic Programme Guide EPG 13 Displaying Subtitles 13 Digital Teletext for UK only 14 Analogue Teletext 14 Widescreen 14 IDTV Menu System 14 Channel List 14 Timers 16 Conditional Access 16 TV Setup 17 Setup 17 Media Browser 21 Playing MP3 Files 21 Viewing JPG Files 22 Sli...

Page 3: ...ug Play for Windows 98 ME 2000 XP Vista Audio line out Game Mode optional Active antenna power optional SRS TruSurround XT optional Accessories SUBTITLE SLEEP F IN O P ES T R E RETURN V P 1 4 7 2 5 8 3 6 9 JKL STU DEF MNO VWX PQR YZ M OK GHI SOURCE ABC EPG 0 SCREEN LANG FAV TV DTV S AP W Remote Controller Batteries 2 X AAA Instruction Book Introduction Thank you for choosing this product This manu...

Page 4: ...s are placed on top of the TV Batteries should not be exposed to excessive heat such as sunshine fire or the like Lightning In case of storm and lightning or when going on holiday disconnect the power cord from the wall outlet Replacement Parts When replacement parts are required make sure that the service technician has used replacement parts which are specified by the manufacturer or have the sa...

Page 5: ... non active pixels may appear on the screen as a fixed blue green or red point Please note that this does not affect the performance of your product Warning Do not leave your TV in standby or operating mode when you leave your house Licence Notification optional is a trademark of SRS Labs Inc TruSurround technology is incorporated under license from SRS Labs Inc GB _MB35_COST_46882W 1810UK_PANEUID...

Page 6: ...mode Cursor up Page up in TXT mode 15 Cursor right 16 OK Select Freeze picture Hold in TXT 17 mode Cursor down Page down in TXT mode 18 Menu on off 19 Cursor left Subpage in TXT mode 20 Previous Programme Swap 21 Picture mode selection 22 Programme down Page up in DTV 23 mode Mute 24 Volume down 25 Favourite mode in DTV mode 26 Mono Stereo Dual I II Current language 27 in DTV mode Image size Expan...

Page 7: ...2 Subwoofer Out is for connecting an external active subwoofer to the set to give a much deeper bass effect Use an appropriate RCA cable to connect the set to a subwoofer unit Audio Line Outs 3 output audio signals to an external device such as an optional sound system To connect the external speakers to your TV use AUDIO LINE OUTS of the TV with an audio cable 4 SCART 2 inputs or outputs for exte...

Page 8: ...ect the audio cable between AUDIO INPUTS on the TV and audio outputs of your device to enable component audio 8 S PDIF Coaxial Out outputs digital audio signals of the currently watched source Use an SPDIF coaxial cable to trasfer audio signals to a device that has S PDIF input 9 RF Input connects to an antenna or a cable Note that if you use a decoder or a media recorder you should connect the ae...

Page 9: ...ernal 5 devices Connect the video cable between the VIDEO IN socket on the TV and the VIDEO OUT jack on your device Audio Inputs are used for connecting audio signals of external 6 devices Connect the audio cable between the AUDIO INPUTS on the TV and the AUDIO OUTPUT jacks on your device Note If you connect a device to the TV via the VIDEO INPUT you should also connect your device with an audio c...

Page 10: ...RY USB Memory Connection Plug your USB device to the USB input of the TV IMPORTANT The TV supports only FAT32 disk formatting NTFS format is not supported It is recommended that you connect your USB device directly to the USB input of the TV Some compatibility problems may occur if you use a separate cable connection Connecting the LCD TV to a PC For displaying your computer s screen image on your...

Page 11: ...one Using Other Connectors You can connect a range of optional equipment to your LCD TV Possible connections are shown below Note that cables shown in the illustration are not supplied To connect external speakers use an audio cable Do not reverse theAUDIO LEFT andAUDIO RIGHT jacks Turn on the LCD TV and external speaker set after all connections are made Refer to your speaker set s manual for fur...

Page 12: ...an blink to indicate that features such as Standby Search Over Air Download or Timer is active Input Selection Once you have connected external systems to your TV you can switch to different input sources Press SOURCE button on your remote control for directly changing sources or Select Source option from the main menu by using or button Use then or button to highlight an input and press button to...

Page 13: ...tallation OSD will appear on the screen By pressing or buttons select the country you want to set and press OK button button for EU countries Note Country selection OSD will not be available for UK After then the active antenna selection OSD appears on the screen By pressing or buttons set active antenna mode as on or off If an active antenna is connected to your TV you can select this option as O...

Page 14: ...blanks Press EPG button to view the EPG menu Electronic Programme Guide appears on the screen It is able to get Information of the channel programs weekly by means of 7 DAY EPG All programs of channels are displayed On the bottom of the screen info bar showing all the available commands will be displayed RED button Shrink makes the info boxes smaller GREEN button Expand makes the info boxes larger...

Page 15: ...atedly to select between to change zoom mode When Auto is selected the format being displayed is determined by the picture being broadcast PLEASE NOTE Menu size changes depending on the chosen image size IDTV Menu System The IDTV menu can only be viewed when watching digital terrestrial broadcasting Press the button to turn IDTV on while the TV is in analogue mode Press the M button The menu below...

Page 16: ...y Pressing the numeric buttons 0 9 replaces the highlighted character with the characters printed above the button one by one as the button is pressed Press the M button to cancel the editing or OK button to save the new name Adding Locks to Channels Channel locking provides a password protected access to channels selected by parents In order to lock a channel you should know the parental lock pas...

Page 17: ...n Start and End time Repeat You can set a timer to be repeated as Once Daily or Weekly Change Delete permits or prohibits any modifications for other users You can save the adjustments by pressing the GREEN key or cancel the process by pressing the RED button You can edit the list via GREEN key and delete with the RED button Conditional Access Press the M button to display the main menu and use th...

Page 18: ...r EU countries only Use or button to select Hard of Hearing and then press or button to set this setting as On or Off If the broadcaster enables any special signal concerning the audio you can set this setting as On to receive such signals Favourite Mode Use this function to enable or disable favourite mode Press button to set this function as on or off Channel List Use or buttons to go to Channel...

Page 19: ...the menu A dialog box asking for the lock key will be displayed The key is set to 0000 initially Enter PIN If it is incorrect Wrong Pin OSD will be displayed If it is correct the Parental Control menu will be displayed Maturity Lock If you set Country option as UK in the first time installation Maturity Lock option will not be visible When set this option gets the maturity information from the bro...

Page 20: ...Country option is set to Denmark Sweden Norway or Finland Use or button to select Standby Search and then press or button to set this setting as On or Off If you change Standby Search to Off this function will be unavailable To use Standby search please make sure that you select Standby Search as On Language In this menu the user can adjust the preferred language Language is changed by pressing OK...

Page 21: ...or and or buttons Press OK or RED button to continue To cancel press BLUE button The following menu will be displayed during the automatic tuning AfterAPS is finalized the programme table will appear on the screen In the programme table you will see the programme numbers and names assigned to the programmes If you do not accept the locations and or the programme names you can change them via the p...

Page 22: ... channels appears on the screen This process is same as described in Automatic Search section Media Browser To display Media Browser window press either M button on the remote control and then select Media Browser by pressing or button Press OK button to continue Media Browser menu contents depending on the contents of your USB drive will be displayed Also when you plug a USB device the following ...

Page 23: ...nd Cursor Left Goes backward Forward Cursor Right Goes forward Menu M button Sets subtitle Audio You can set subtitles by using OK button before starting the playback or by using M button during the playback Press RETURN Exit button to switch back to previous menu Note PIP PAP mode is not available while in Media Browser mode Analogue TV Menu System Picture Menu Mode For your viewing requirements ...

Page 24: ... to Auto 16 9 4 3 Panoramic 14 9 Cinema Subtitle or Zoom Reset Press or button to select Reset Press or or OK button to reset the picture modes to factory default settings Store Press or button to select Store Press or OK button to store the settings Stored will be displayed on the screen Sound Menu Volume Press or button to select Volume Press or button to change the level of the Volume Equalizer...

Page 25: ...the Spdif Out as On or Off Note If Spdif Out is set to On headphone will be disabled SRS TruSurr XT optional By pressing or select SRS TruSurr XT Press or button to set SRS TruSurr XT as on or off Note If you set SRS TruSurr XT as On some features in the Sound menu can be unavailable to be set Store Press or button to select Store Press or OK button to store the settings Stored will be displayed o...

Page 26: ...g or button Blue Background If the signal is weak or absent the TV will automatically change to a blue screen To enable this set Blue Background to On By pressing or button select Blue Background Press or button to set Blue Background as On or Off Menu Background Press or button to select Menu Background You can set menu background level by pressing or button Backlight This setting controls the ba...

Page 27: ...to select Store Press or OK button to store the settings Stored will be displayed on the screen Install Menu in AV Modes The following screen appears in the install menu when the TV is in AV modes Note that limited options will be available Switch to TV mode for viewing complete version of the Install menu Colour System Press or button to select Colour System Use or button to change the colour sys...

Page 28: ...u press the BLUE button APS function stops and Program Table appears on the screen If you wait until the end of APS Program Table will be displayed with the programmes found and located Source Menu Press or button and select the sixth icon Then press or OK button Source menu appears on the screen In source menu highlight a source by pressing or button and switch to that mode by pressing button Sou...

Page 29: ...Zoom Mode information is displayed on the screen when a new programme is entered or INFO button is pressed Mute Function Press button to disable sound Mute indicator will be displayed in the upper side of the screen To cancel mute there are two alternatives the first one is pressing the button and the second one is increasing the volume level PIP Picture in Picture and PAP Picture and Picture Mode...

Page 30: ...his zooms up the wide picture 14 9 aspect ratio to the upper and lower limits of the screen Cinema This zooms up the wide picture 16 9 aspect ratio to the full screen Subtitle This zooms up the wide picture 16 9 aspect ratio with subtitles to the full screen Zoom This option zooms to the picture Note You can shift to screen up or down by pressing buttons while picture zoom is selected as panaromic...

Page 31: ...s socket outlet Poor Picture Have you selected the correct TV system Is your TV set or house aerial located too close to a non earthed audio equipment or neon lights etc Mountains or high buildings can cause double pictures or ghost images Sometimes you can improve the picture quality by changing the direction of the aerial Is the picture or teletext unrecognisable Check if you have entered the co...

Page 32: ... 7 29 1280 768 75 60 2 VESA 30 1280 960 60 60 0 VESA 31 1280 960 75 75 0 VESA 32 1280 960 85 85 9 VESA 33 1280 1024 60 64 0 VESA 34 1280 1024 75 80 0 VESA 35 1280 1024 85 91 1 VESA 36 1400 1050 60 65 3 37 1400 1050 75 82 3 38 1440 900 60 55 9 39 1440 900 75 70 6 40 1600 1200 60 75 0 VESA 41 1680 1050 60 65 3 42 1920 1200 60 74 5 Appendix B AV and HDMI Signal Compatibility Input Signal Types Source...

Page 33: ...9 9 8 8 8 8 9 9 HDMI3 9 9 9 9 9 8 8 8 8 9 9 HDMI4 9 9 9 9 9 8 8 8 8 9 9 YPbPr 9 9 9 9 9 9 9 9 9 8 9 PC VGA 9 9 9 9 9 9 9 9 9 9 8 RGB This indicates that selection is possible only if Scart 1 has a RGB signal Restrictions Scart 1 source must have RGB signal to perform PIP PAP with sources TV Scart 2 FAV If these sources are set to main window and Scart 1 does not have a RGB signal Pip Pap source ca...

Page 34: ...ap WxH 14592x12288 Up to 179 Mega pixel External Subtitles srt Support Text File Format but do not support Picture File Format smi sub Note Necessary bitrates for some video types are higher than USB limits For this reason some video types cannot be played Products Battery Information for Users on Disposal of Old Equipment and Batteries European Union only These symbols indicate that equipment wit...

Page 35: ...l DVB modes Video MP ML PAL 4 3 16 9 Audio MPEG Layer I II 32 44 148kHz NUMBER OF PRESET CHANNELS 200 CHANNEL INDICATOR On Screen Display RF AERIAL INPUT 75 Ohm unbalanced OPERATING VOLTAGE 220 240V AC 50 Hz AUDIO SRS TruSurround XT AUDIO OUTPUT POWER WRMS 10 THD 2 x 8 POWER CONSUMPTION W 250 W max 250mW Standby PANEL 16 9 display 46 Screen Size DIMENSIONS mm DxLxH With foot 296 x 1129 x 766 Weigh...

Page 36: ...al which is marked with the letter E or by the earth symbol or with Green or Green and Yellow colors The Blue or Black coloured wire must be connected to the terminal which is marked with the letter N or black colour The Brown or Red coloured wire must be connected to the terminal which is marked with the letter L or Red colour For continued protection against risk of fire replace only with a fuse...

Page 37: ...50157258 ...

Reviews: