background image

8

WHAT IS INCLUDED IN THE BOX
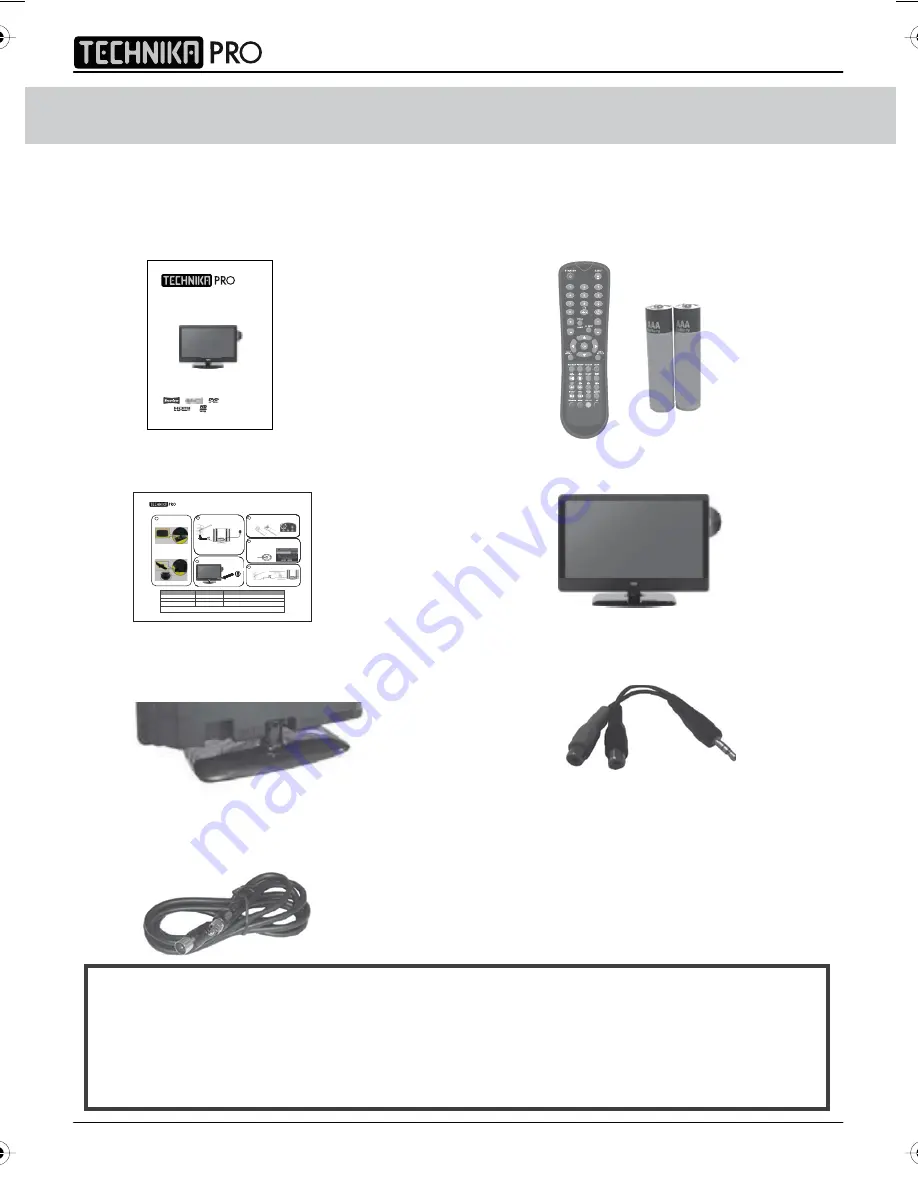
Accessories

Included with this TV are the following accessories:

1x - User Guide Book 


1x - Remote c AAA batteries 


1x - Quick Start Guide 


1x - TV

1x - Stand 


1x - 3.5mm jack to phono cable

1x - RF lead

Please save your packaging as you will need this in the event 

of warranty/service repair or support. We are unable to carry out 

warranty/service if you are unable to package it correctly. The safest way 

to package your item in the event of warranty/service repair 

is in it’s original box/packaging.

PICTURE

FORMAT

INFO

VOL

CH

GUIDE

X23_50 full hd english manual paPage 1   1. 10. 2009   13:28:17


IDTV 

Model No. 23-230

User Guide

IDTV 

Quick Start Guide – Model 23-230

Online support: www.skymediauk.co.uk            email: [email protected]

y

@

y

p

p

4

RF cable supplied, connect the TV to the TV Aerial 

wall socket (Fig A) then connect the Power cable 

to your TV and Electrical outlet (Fig B) 

6

Insert the batteries supplied into the Remote control and press

the Power/Standby button to power on the TV

Fig B

4

6

7

You will now be welcomed with the initial set up screen Press

Fig A

Fig B

4

IMPORTANT:- If your TV signal is inadequate to receive a

good Digital signal, you will need to connect a 'Signal

booster' between your TV and TV Aerial Socket. See section

6.

6

7

You will now be welcomed with the initial set-up screen. Press

OK on the remote control and tuning will start. If after tuning

some channels are missing, please refer to section 6.

Remote control

buttons

Fig A

Fig B

4

5

Switch on the television using the power on/off switch

located on the side or underside of the TV.

6

8

Connect a 'Signal booster' as shown below.

7

Remote control

buttons

Fig A

Fig B

4

5

6

8

7

Remote control

buttons

Fig A

Fig B

On/Off Switch

4

5

6

Once the 'Signal booster' is connected, retune the TV in order to

receive all of the channels.

8

7

Remote control

buttons

Fig A

Fig B

On/Off Switch

4

5

6

8

7

Remote control

buttons

Fig A

Fig B

On/Off Switch

2

3

4

6

5

Remote control

buttons

Fig A

Fig B

On/Off Switch

 X23/MAN/0009

Fault 


Cause   


Solution 

LED/Power on indicator light on TV not working 

No power being received to TV   

Ensure power outlet is switched on, check Power on/off switch on TV is switched on

No channels found or screen displays ‘no signal’ 

TV not receiving any signal 


Connect to loft/external aerial and retune TV

Some channels missing or picture appears ‘blocky’ 

Signal too weak 


If signal reception is below 85%, connect a signal booster (15-20Db) and retune (see 


section 6). If signal reception below is 70%, an aerial upgrade may be necessary

If after checking the above you are unable to solve the problem, in the first instance contact the helpline as most problems

can be solved by the technical support team

TROUBLE SHOOTER:

Base of stand

Insert the TV into the stand

Twist the TV into the CLOSE position 

until it clicks into place at 45 degrees


A

B

1

UK

TECHNICAL SUPPORT HELPLINE

ROI

087

01443 3940

1 2000 463

(Open Monday - Friday 8.30am - 6pm, Saturday 9am - 5pm)

Summary of Contents for LCD23-230

Page 1: ...LCD23 230 Full HD LCD TV with Freeview DVD Model No User Guide ...

Page 2: ...2 IDTV ...

Page 3: ...u quickly followed by 8 8 8 8 so press the number 8 four times You will now enter the First time installation mode if you do not please refer to the section called getting started later in this user guide Simply press OK or Enter on the remote control and your TV will retune If you do not retune your TV when advised to do so by Digital UK you may lose some or all of your channels until you do re t...

Page 4: ...ed to be replaced ensure that any replacement is of the same amperage and approved with the BSI mark Never try and replace the mains plug unless you have adequate qualifications and are legally authorised to do so In the event that a replacement Mains cable is required contact the manufacturer for a suitable replacement Never use the television if it is damaged in any way Always place the televisi...

Page 5: ...5 User Guide ...

Page 6: ...6 IDTV ...

Page 7: ... 19 Blue Screen 19 System Lock 19 First Time Installation 20 Reset Television to Factory Settings 20 CHANNEL SERVICES Using Electronic Program Guide 20 Using Digital TV teletext 21 Using Analogue TV teletext 21 PC OPERATION Using with a PC or Laptop 22 23 DVD MENU OPERATION System Setup 24 Changing Regions 25 Audio Setup 25 Digital Setup 25 GENERAL INFORMATION Using with Sky Digital Virgin Media 2...

Page 8: ...ls are missing please refer to section 6 Remote control buttons Fig A Fig B 4 5 Switch on the television using the power on off switch located on the side or underside of the TV 6 8 Connect a Signal booster as shown below 7 Remote control buttons Fig A Fig B 4 5 6 8 7 Remote control buttons Fig A Fig B On Off Switch 4 5 6 Once the Signal booster is connected retune the TV in order to receive all o...

Page 9: ... now come off Wall Mounting the TV 1 Remove the four screws highlighted below 2 The wall mount can now be easily attached to the mounting holes on the rear of theTV These holes are indicated in the picture User Guide Important If wallmounting this TV only use the screws already provided in the wallmounting holes Using other screws which are longer could cause irreparable damage to internal parts B...

Page 10: ...al reception in order to recieve all of the channels available The most economical way to do this is by purchasing and connecting a signal booster in between the TV and the TV aerial socket If this does not solve the problem you will need to upgrade the TV aerial to a digital hi gain compatible aerial IMPORTANT AFTER TUNING DO NOT PRESS ANY BUTTONS FOR 20 SECONDS SO THE CHANNEL INFORMATION CAN BE ...

Page 11: ... mode To display channel information NUMBER BUTTONS Digital analogue mode 0 9 to select a TV channel directly The channel will change after 2 seconds Teletext mode To enter a page number Analogue mode To enter a channel of 2 digits i e channel 15 Digital analogue mode To return to the previous channel viewed VOL To increase decrease the sound level TITLE LANG DVD mode To display the DVD title menu...

Page 12: ...hoosing Mode Source To switch between the different connections is very easy Using the buttons on the remote control 1 Press SOURCE The following will appear 2 Press or to select the input you require 3 Press OK Using the buttons on the Television 1 Press SOURCE 2 Scroll up down using CH CH buttons to the input source you require 3 Press Vol to change input source to the one selected 1 2 3 4 5 6 7...

Page 13: ...NNECTING A HIGH DEFINITION DEVICE OPTION A HDMI OPTION B COMPONENT AUDIO CABLES Source should be set to HDMI Source should be set to YPbPr COMPONENT CONNECTING A CAMERA OR CAMCORDER Source should be set to SCART A B C D E F G H I 3 5mm Component S Video Audio input SCART Adaptor Note SCART to AV Adaptor often included with some devices alternatively these can be purchased from the helpline website...

Page 14: ... enter menu 2 Press to highlight Contrast 3 Press to increase the contrast or to decrease the contrast 4 Press EXIT to exit Adjusting Brightness Only available when Picture Mode is set to Personal Increase or decrease the brightness of the picture 1 Press LCD MENU to enter menu 2 Press to highlight Brightness 3 Press to increase the brightness or to decrease the brightness 4 Press EXIT to exit Adj...

Page 15: ...Temperature only available on some sources There are 3 presets for colour temperature 1 Press LCD MENU to enter menu 2 Press to highlight Colour Temperature 3 Press to navigate through the various options 4 Press EXIT to exit Dynamic Noise Reduction Reduces the interference in the picture 1 Press LCD MENU to enter menu 2 Press to highlight DNR 3 Press to switch between OFF LOW MID HIGH 4 Press EXI...

Page 16: ...menu 2 Press to move to Sound Settings Menu 3 Press to highlight Bass 4 Press to increase the bass or to decrease the bass 5 Press EXIT to exit Adjusting Treble To adjust the amount of treble within the sound 1 Press LCD MENU to enter menu 2 Press to move to Sound Settings Menu 3 Press to highlight Treble 4 Press to increase the treble or to decrease the treble 5 Press EXIT to exit Adjusting Balan...

Page 17: ...4 Press to enter manual tuning 5 Press to highlight Start Screen 6 Press to start 7 Press EXIT to exit Programme Edit Changing Channel Position Only Freeview Analague TV modes You can change the analogue channel position to suit your requirements 1 Press LCD MENU to enter menu 2 Press to move to Tuning Settings Menu 3 Press to highlight Programme Edit 4 Press to enter the program edit menu 5a Free...

Page 18: ...o exit TIMER SETTINGS MENU Lets you adjust the OSD timing and the sleep timer Sleep Timer Lets you set the sleep timer so the television automatically switches off after a certain amount of time 1 Press LCD MENU to enter menu 2 Press to move to Timer Settings Menu 3 Press to highlight Sleep Timer 4 Press to increase the time to the required amount 5 Press EXIT to exit On Screen Display Timer Lets ...

Page 19: ...ource and limit the maximum volume 1 Press LCD MENU to enter menu 2 Press to move to General Settings Menu 3 Press to highlight System Lock 4 Press to enter System Lock menu 5 To enter this menu you will be asked for your pin code Default is blank so you just need to press OK 6 To set locks you first need to switch System Lock to ON this will un grey the options You can now select the following Ke...

Page 20: ... installation sequence First Time Installation Country Language Please ensure that the aerial is connected to the connector labelled RF In on the rear of the TV Ensure that OK is highlighted in yellow and press OK on your remote If after this scan not all digital channels are found your aerial may require a signal booster alternatively upgrade your aerial to a high gain digital version OK Cancel U...

Page 21: ...e page indicated on screen for each colour 3 To exit Teletext press TEXT twice at any time Other buttons SIZE this increases or decreases the size of the text on screen INDEX some pages are more than one page long this button displays the number of pages REVEAL if there is an answer or something hidden this will display it SUBPAGE displays the sub page if it exists HOLD This stops the pages changi...

Page 22: ...t of the television move the slider 5 Left click your mouse on Advance Advance Settings and left click on Monitor 6 Left click on the drop down for Screen refresh rate and select 60 Hertz 7 Click on Apply then click Yes and the settings will be saved 8 Now switch off your computer and connect the television as shown below 9 Re start your computer and switch the source to VGA CONNECTING A LAPTOP In...

Page 23: ...o enter menu 2 Press to select PC settings 3 Press to select Clock 4 Then press or to increase or decrease the clock 5 Press EXIT to exit Horizontal Position Changes the horizontal position of the picture 1 Press LCD MENU to enter menu 2 Press to select PC settings 3 Press to select H Position 4 Then press or to move the picture to left or right 5 Press EXIT to exit Vertical Position Changes the v...

Page 24: ...t NTSC PAL or AUTO 5 Press OK to confirm 6 Press DVD SETUP to exit Adjusting Picture Format This lets you select the format of the picture that is being shown between 16 9 4 3 LetterBox and 4 3 1 Press DVD SETUP to enter menu 2 Press to select TV System 3 Press to select TV Type 4 Press to enter menu 5 Press or to highlight 4 3PS 4 3LB or 16 9 6 Press OK to confirm 7 Press DVD SETUP to exit Return...

Page 25: ...rence between the maximum and minimum volume 1 Press DVD SETUP to enter menu 2 Press twice to select Digital Set Up 3 Press to select Dynamic Range 4 Press to enter menu 5 Press or to increase or decrease the Dynamic range 6 Press OK to confirm 7 Press DVD SETUP to exit Adjusting the Sound Lets you change the sound between Stereo Mono Left Mono Right and Mixed Mono 1 Press DVD SETUP to enter menu ...

Page 26: ...CONTROL BSKYB OR UNIVERSAL REMOTE CONTROL You may wish to use your Sky Digital or a universal remote control to operate some of the functions of this TV For this you require a code that needs to be programmed into your Sky Digital or universal remote control For codes for universal remote controls please visit our website where you will find the very latest information and codes For codes for Sky ...

Page 27: ...uld be set to SCART Option 2 Connecting via HDMI cable If you are supplied with a HDMI cable is the easiest option A HDMI cable can output both video and audio and enables you to enjoy digital quality video and audio with minimal loss of picture quality TV Source should be set to HDMI Option 3 Connecting via Component cable If you are supplied with a cable from the console which has RED GREEN BLUE...

Page 28: ...enu as shown earlier in the manual and increase the level of the bass and decrease the treble 1 Ensure you have inserted put the disc in facing the correct way 2 Ensure the disc is clean and is not scratched 3 Some copied discs will not play 4 Check the DVD is a region 2 disc to change the region of the DVD player refer to section Changing Regions In addition to connecting via SCART you should con...

Page 29: ...eo 1 x SCART 1 x S Video 1 x Component YPbPr 1080p Sound 1 x 3 5mm jack for PC audio input 1 x 3 5mm jack shared for S Video YPbPr component audio input 80p 0 1 o t p u 1 I M D H 3 x 2 S M R s t t a W t u p t u O r e k a e p S s e Y D V D r e y a l p D V D Power Voltage 110 240v 50 60Hz 1 5A 90W standby 1W Dimensions Inc Stand 561W x 402H x 178D 3 6 s g K t e N 7 7 s g K s s o r G Panel Weight Inp...

Page 30: ...your Sky Box as well as this TV these are available to order from the helpline or web site Our Sky Sky remote controls operate your Sky or Sky box in exactly the same way your current Sky Sky remote does and our versions also look very similar to the Sky equivalent models albeit slightly smaller in size they will also operate many of your TV s functions including Power on off channel up down volum...

Page 31: ......

Page 32: ......

Page 33: ......

Page 34: ...X23 MAN 0008 TESCO Stores Ltd Cheshunt EN8 9SL UK ...

Reviews: