


24
DVD MENU OPERATION
HOW TO PLAY DVD’S
The DVD player has an automatic DVD feature
which means when you insert a disc it will
automatically switch source and start to play.
If you disc does not play please refer to
frequently asked questions section of the user
guide.
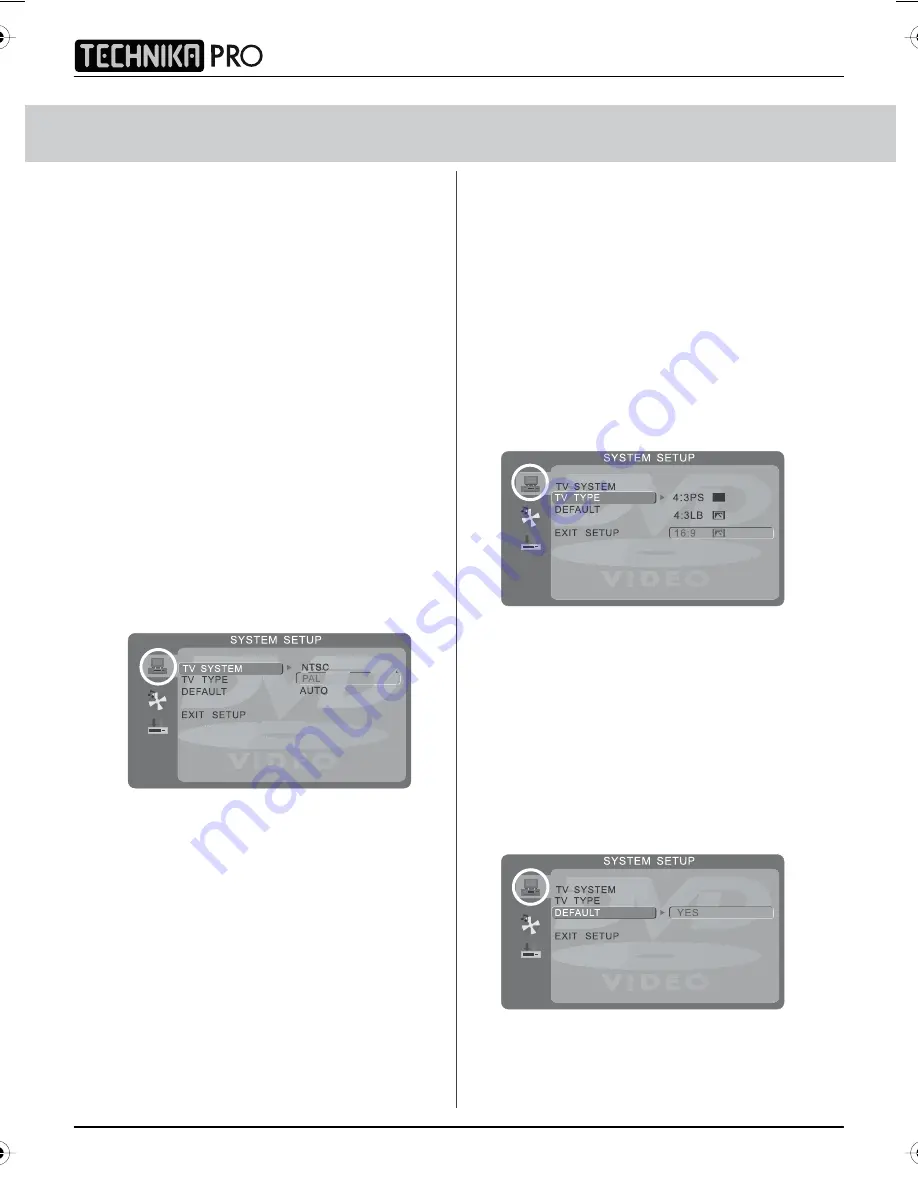
SYSTEM SET UP
Adjusting TV System
Lets you adjust between NTSC, PAL,
AUTO (PAL is default for the UK)
1) Press [DVD-SETUP] to enter menu
2) Press [>] to select TV System
3) Press [>] to enter menu
4) Press [\/] or [/\] to highlight NTSC, PAL
or AUTO
5) Press [OK] to confirm
6) Press [DVD-SETUP] to exit
Adjusting Picture Format
This lets you select the format of the picture
that is being shown between 16:9, 4:3
LetterBox and 4:3.
1) Press [DVD-SETUP] to enter menu
2) Press [>] to select TV System
3) Press [\/] to select TV Type
4) Press [>] to enter menu
5) Press [\/] or [/\] to highlight 4:3PS,
4:3LB or 16:9
6) Press [OK] to confirm
7) Press [DVD-SETUP] to exit
Returning to Default
This lets you switch the DVD menus show above
back to Default settings
1) Press [DVD-SETUP] to enter menu
2) Press [>] to select TV System
3) Press [\/] to select Default
4) Press [>] to enter menu
5) Press [>] to highlight Yes
6) Press [OK] to confirm
7) Press [DVD-SETUP] to exit
19_17 english manual 24.pdf 21. 7. 2009 15:01:32
IDTV
Summary of Contents for LCD23-230
Page 1: ...LCD23 230 Full HD LCD TV with Freeview DVD Model No User Guide ...
Page 2: ...2 IDTV ...
Page 5: ...5 User Guide ...
Page 6: ...6 IDTV ...
Page 31: ......
Page 32: ......
Page 33: ......
Page 34: ...X23 MAN 0008 TESCO Stores Ltd Cheshunt EN8 9SL UK ...