


7
4.2. Wireless Wi‑Fi 6 home network enabler
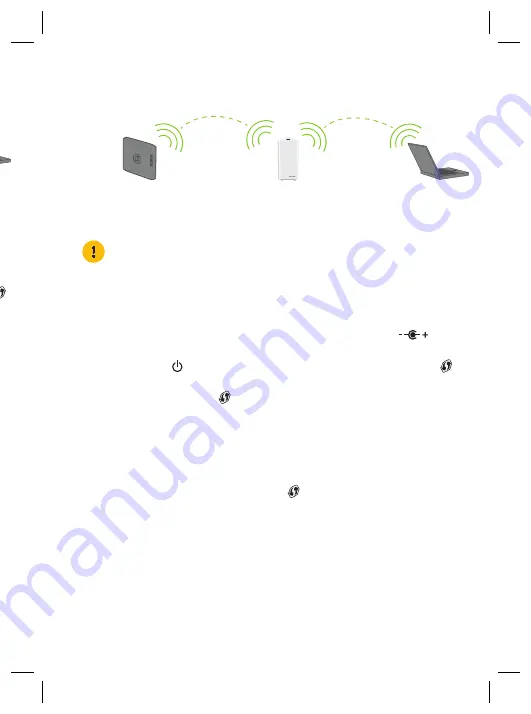
This scenario allows you to add (extra) Wi-Fi 6 coverage using the OWA3111.
OWA3111
Wi-Fi 6 access point
Wi-Fi device
Internet gateway
or Wi-Fi extender
Wi-Fi
Wi-Fi 6
Step 1: Set up the Wi‑Fi extender
1
Position your OWA3111 half-way between your Internet gateway (or extender) and
your Wi-Fi devices.
2
Take the power supply, plug the small end into the power inlet port (
) of the
OWA3111 and then plug the other end into a nearby power outlet.
3
Press the power ( ) button on the back of the OWA3111. The
Status
LED ( )
will first be solid yellow during startup.
4
Wait until the
Status
LED ( ) slowly blinks yellow.
5
Pair the OWA3111 with your Internet gateway (or extender) using WPS. For
detailed instructions, see
“5.2. Pairing the OWA3111 with your Internet gateway” on
page 8
.
6
Check the link quality via the
Status
LED ( ) on the OWA3111. If it is:
Solid green
, then link quality is optimal.
Solid yellow
, then link quality is fair, but not optimal.
Solid red
, then link quality is bad. It is advised to reposition your OWA3111.
See
“5.6. Optimizing the link quality” on page 10
for more information.
Step 2: Connect your Wi‑Fi devices
If your Wi-Fi device:
• Supports WPS, use WPS to pair it with the OWA3111. For more information, see
“5.4. Pairing Wi-Fi devices to your OWA3111” on page 10.
• Does not support WPS, configure it with the Wi-Fi network name (SSID) and
wireless key that are printed on the product label on the bottom of the OWA3111.
For more information, consult the user documentation of your device.
Step 3: Connect an Ethernet device (optional)
You can use both of the OWA3111’s Ethernet ports to connect Ethernet devices (for
example, a Set-Top Box, a NAS drive or computer) to your home network.
4.3. EasyMesh home network extender
This scenario allows you to extend Wi-Fi coverage in your home by retransmitting
Wi-Fi messages from your existing Wi-Fi EasyMesh network.
OWA3111
EasyMesh agent
Wi-Fi device
Internet gateway or OWA3111
as EasyMesh controller
Wi-Fi 6
EasyMesh
Wi-Fi 6
Requirements
Your Internet gateway or another EasyMesh-capable Wi-Fi device must be
enabled and configured as the EasyMesh controller.
Step 1: Set up the repeater and onboard to the EasyMesh network
1
Position your OWA3111 half-way between your Internet gateway (or extender) and
your Wi-Fi devices.
2
Take the power supply, plug the small end into the power inlet port (
) of the
OWA3111 and then plug the other end into a nearby power outlet.
3
Press the power ( ) button on the back of the OWA3111. The
Status
LED ( )
will first be solid yellow during startup.
4
Wait until the
Status
LED ( ) slowly blinks yellow.
5
Enable EasyMesh on your OWA3111 if not done yet. For more information ,see
“5.7. Configure your Wi-Fi extender to your needs” on page 11
.
6
Onboard the OWA3111 to the EasyMesh network using WPS. For detailed
instructions, see
“5.3. Joining your OWA3111 with an existing EasyMesh network” on
page 9
.
7
Check the link quality via the
Status
LED ( ) on the OWA3111. If it is:
Solid green
, then link quality is optimal.
Solid yellow
, then link quality is fair, but not optimal.
Solid red
, then link quality is bad. It is advised to reposition your OWA3111.
See
“5.6. Optimizing the link quality” on page 10
for more information.
Step 2: Connect your Wi‑Fi devices
Because the OWA3111 now uses the same Wi-Fi settings as the EasyMesh home
network, Wi-Fi devices that were already connected to your home network will also
be able to connect to the OWA3111, and vice versa.


