background image


14 


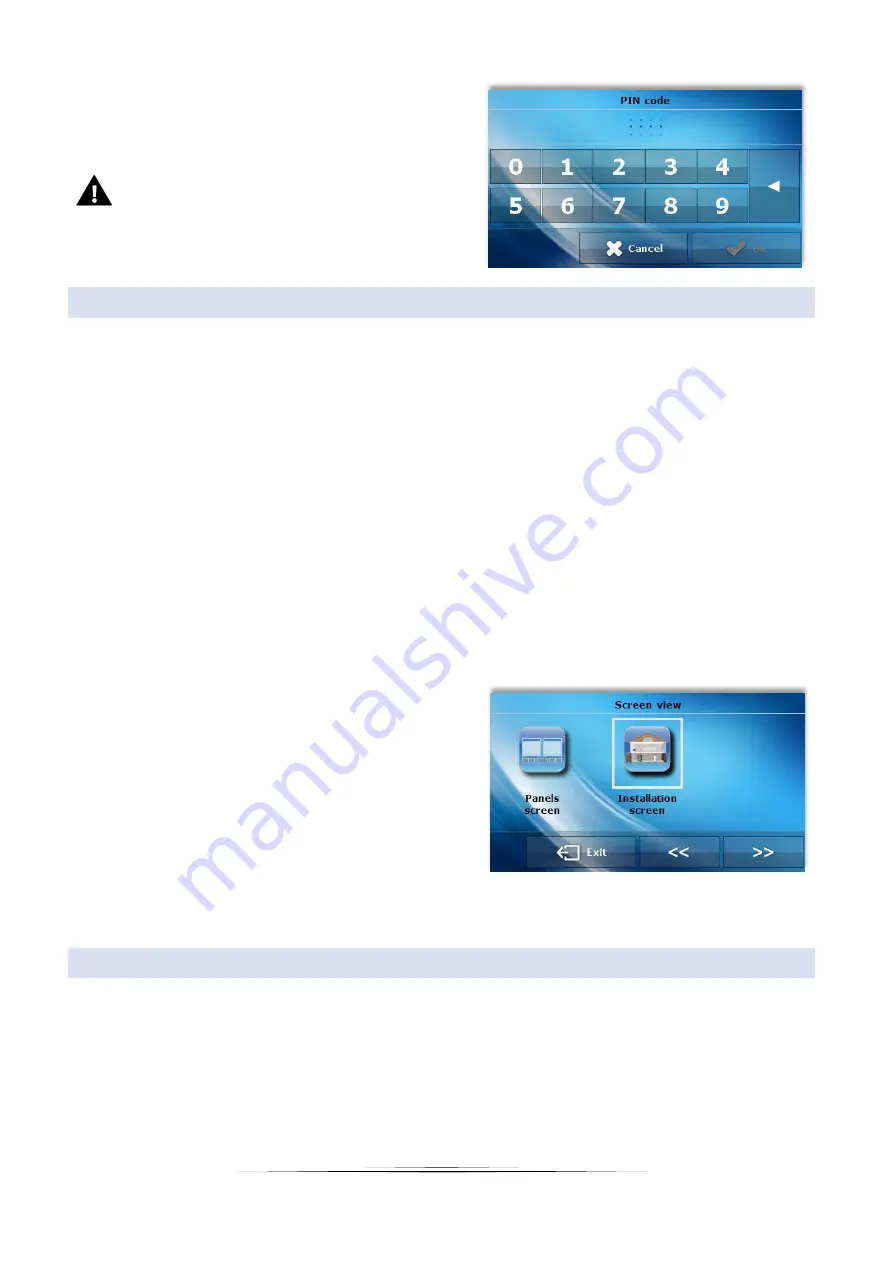
PIN code – In order to set PIN code, which is necessary 
for the user to operate the controller when the lock is 
activated, tap on PIN icon. 


NOTE 

0000 is the default PIN code. 


4.


SCREEN 

Tap on Screen icon in the main menu in order to configure screen settings. 


Screensaver – The user may activate a screensaver which will appear after a pre-defined time of inactivity. In 
order to return to the main screen view, tap on the screen. The following screensaver settings may be configured 
by the user: 
 

o


Screensaver selection – After tapping on this icon, the user may deactivate the screen saver (No screensaver) or 
set the screensaver in the form of: 


- Clock – – the screen displays the clock. 
 
- Blank – after the pre-defined time of inactivity the screen goes blank. 
 
- Blanked only at night - the screen will go blank at nighttime. 
 

o


Idle time – This function is used to define the time after which the screensaver is activated. 


Screen view – Tap on Screen view icon to adjust the main 
screen  view,  Installation  view  is  set  as  default  but  the 
user may also select panel screen. 


Night from/ Day from – Further in the screen menu, the 
user  may  define  the  exact  time  of  entering  nighttime 
mode(Night from) and returning to daytime mode (Day 
from). 


Daytime screen brightness/ Nighttime screen brightness – After tapping on screen brightness icon, the user 
may adjust the screen brightness (in percentages) both for the daytime and the nighttime. 

5.


WEEKLY CONTROL  

The weekly setting of pre-set temperatures reduces heating costs and provides the desired thermal comfort 24 hours a 
day. The parameter that determines the correct operation of this function is the current time and day of the week.  

After selecting the weekly control function, the user may switch on / off the operation schedule and configure appropriate 
parameters. 

Before setting the hourly deviations, select the day of the week to which the settings will apply. 

Summary of Contents for EU-281C

Page 1: ...1 EU 281C...

Page 2: ...ation screen 7 B Main screen description panel screen 9 VI Controller functions menu options 11 1 Block diagram of main menu 11 2 Time 12 3 Protections 13 4 Screen 14 5 Weekly control 14 6 CH boiler c...

Page 3: ...vice may be damaged if struck by a lightning Make sure the plug is disconnected from the power supply during storm Any use other than specified by the manufacturer is forbidden Before and during the h...

Page 4: ...igniter and installation controllers A large clear graphic display with a backlit touch screen makes it easy to read and change the controller parameters EU 281C room regulator offers Room temperature...

Page 5: ...sh mounted The controller should be installed by a qualified person WARNING Risk of fatal electric shock from touching live connections Before working on the controller switch off the power supply and...

Page 6: ...st digit 2 Hold the button and wait until the control light flashes goes on and off the numer of times indicating the first digit of the channel number 3 Release the button When the control light goes...

Page 7: ...REEN DESCRIPTION The controller is equipped with a large touch screen It displays the current status of basic CH boiler parameters Depending on the user s preferences the display may show the heating...

Page 8: ...tor screen displays 8 Water tank 1 temperature current and pre set value tap here to edit the pre set water tank temperature 9 Circulating pump icon animated icon indicates that the pump is active 10...

Page 9: ...nsor is used in the main controller 5 Current room temperature 6 Current time and day of the week 7 Right parameter panel 8 Buttons used to change the screen view 9 Enter the controller menu 10 Left p...

Page 10: ...gulator Chart panel Current temperature chart CH boiler water tank or room temperature graphic representation of temperature changes over time Pellet boiler operation mode panel It offers fire up and...

Page 11: ...Menu Time Clock Day of the week Alarm clock Protections Auto lock PIN code Screen Screensaver Screen view Night from Day from Daytime screen brightness Nighttime screen brightness Weekly control ON OF...

Page 12: ...s used to set the current time according to which the regulator operates Day of the week This function is used to set the current day of the week according to which the regulator operates Alarm clock...

Page 13: ...eds to select the days of alarm clock activation Screen view when the alarm clock is about to be activated 3 PROTECTIONS Tap on Protection icon in the main menu to configure parental lock settings Aut...

Page 14: ...to define the time after which the screensaver is activated Screen view Tap on Screen view icon to adjust the main screen view Installation view is set as default but the user may also select panel s...

Page 15: ...on this icon to change the pre set CH boiler temperature it may also be done by tapping on parameters panel in the main screen view Operation modes Tap on this icon to choose one of the following pum...

Page 16: ...sired oscillation in case of small temperature fluctuation within the range 0 10 C with the accuracy of 0 1 C Example if the pre set temperature is 23 C and the hysteresis is 1 C the room temperature...

Page 17: ...y shows the same message as the main controller If the internal sensor is damaged the following alarm appears Room temperature sensor damaged VIII TECHNICAL DATA Power supply 230V Power consumption 1W...

Page 18: ...agnetic compatibility EU OJ L 96 of 29 03 2014 p 79 Directive 2009 125 EC establishing a framework for the setting of ecodesign requirements for energy related products as well as the regulation by th...

Page 19: ...19...

Page 20: ...20...

Reviews: