background image

actual setting of the volume adjustment. At the highest or lowest value you hear a tri-
ple confirmation tone. Press the confirmation key ( 5 ) or the volume key           ( 8 )
to select the desired setting of the volume adjustment, and the display will return to
the main screen.

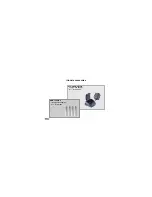
5) Squelch adjustment

To adjust the threshold level of the noise suppression ( squelch ) in reception mode
depress out of the keys ( 4 ) Down       5 times or Up        3 times. The display shows
the writing         . Then depress briefly the confirmation key ( 5 ). Then the display
shows the writing           with one or several points or bars. The number of those points
or bars shows the actual setting of the squelch sensitivity level. The more points or
bars appear, the lower the level can be for opening the squelch. By the help of the
Up/Down keys ( 4 ) this setting can be changed and watched in the display. At the hig-
hest or lowest value you hear a triple confirmation tone. Press the confirmation key (
5 ) to select the desired setting of the squelch sensitivity level, and the display will
return to the main screen.

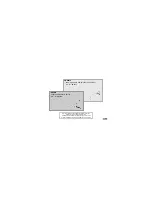
6) Activating and setting of the VOX function

If the VOX function ( = voice activated transmission ) is active, the transmitter is swit-
ched on if the sound level at the microphone Mic ( 7 ) exceeds a certain intensity. After
a certain time, within which the sound level at the microphone remains below this
intensity value, the radio switches automatically back to receive mode.  During recep-
tion of an incoming signal the VOX function is inhibited.  Thus you can communicate
without the necessity of having a hand at the unit.  To activate the VOX function 

English

13

▼ 

▼ 

SQ

Summary of Contents for UHF-DualTalk

Page 1: ...Operation Manual electronic UHF DualTalk Public Mobile Radio Low Power Device...

Page 2: ...1 2 3 4 5 4 6 7 8 9 10 electronic 2 UHF DualTalk PMR LPD Radio...

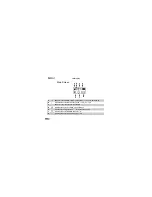
Page 3: ...1 Antenna 2 Jack SP MIC 3 LCD Screen 4 Up Down Key 5 Confirmation On Off Key 6 Speaker 7 Mic Microphone 8 Volume Key 9 PTT Key 10 Call Tone Key 3...

Page 4: ...channel selection 10 2 Channel selection within the actual band 11 3 Activation of the CTCSS function selection of the CTCSS tone 11 4 Volume adjustment 12 5 Squelch adjustment 13 6 Setting of the VOX...

Page 5: ...ndition of the batteries F Indicates the selected PMR channel 1 8 C Appears if key lock function is activated B Indicates the selected frequency band i e PMR or LPD G Indicates the selected CTCSS Code...

Page 6: ...id grip into the two corresponding guide holes at the top of the battery compartment Then secure the lid by pushing the locking on it until it snaps in Finally rotate the belt clip back into its origi...

Page 7: ...onfirmation key 5 While you hold this key press also the Up key 4 Then two short confirmation tones sound from the speaker 6 and the key symbol position C appears in the display Now all keys except th...

Page 8: ...2 5 mm on the top side of the unit can be used to connect an external earphone microphone e g ORM MS While the socket is used the internal speaker 6 and the internal microphone Mic 7 are switched off...

Page 9: ...every pressure of a key is indicated by a short tone Operation of the TEAM UHF DualTalk The TEAM UHF DualTalk offers you the possibility to communicate in a band of your choice of two radio bands in t...

Page 10: ...o bands the actual band is With the help of the keys 4 you can toggle between both indicati ons Then depress the confirmation key 5 for the final selection of the indicated band Now the display shows...

Page 11: ...annel of the actual band By the help of the Up Down keys 4 the channels 1 to 8 of the PMR band or the channels 1 to 69 of the LPD band can be changed in the wanted direction in a ring like system Pres...

Page 12: ...ifferent from zero it will be visible in the main screen at the position G That means that the CTCSS function has been activated with the CTCSS tone corresponding to the code number If the selected co...

Page 13: ...the level can be for opening the squelch By the help of the Up Down keys 4 this setting can be changed and watched in the display At the hig hest or lowest value you hear a triple confirmation tone P...

Page 14: ...es from the speaker and in the display you see at the position E the symbol 1 to 2 seconds after you have finished your message the unit switches back to receive mode which is indicated by two short t...

Page 15: ...be changed and watched in the display At the highest or lowest value you hear a triple confirmation tone Press the confir mation key 5 to select the desired setting of the sound level threshold and th...

Page 16: ...In the display you can see where the 8 stands for the actual channel number in the actual band This is the main screen for monitor operation In this condition you can only adjust the volume level sett...

Page 17: ...el scan starts stepping upwards or downwards The unit stops on every occupied channel where the squelch opens for 10 seconds If there is in the demodulated signal also a CTCSS tone it will show also t...

Page 18: ...audible at the counter sta tion In the display appears position E Speech transmission is impossible now After finishing transmission the unit switches back to receiving mode with a short melody in the...

Page 19: ...carried out since each modification or unauthorised inter vention will immediately cancel all and any guarantee or repair claims they are also likely to result in nonconformity to ETS regulations whi...

Page 20: ...4 433 650 42 434 100 60 434 550 7 433 225 25 433 675 43 434 125 61 434 575 8 433 250 26 433 700 44 434 150 62 434 600 9 433 275 27 433 725 45 434 175 63 434 625 10 433 300 28 433 750 46 434 200 64 434...

Page 21: ...250 3 Kanalnummer Channel Nr Num ro du canal Numero del canale Numero del canal Freq MHz 1 446 00625 MHz 2 446 01875 MHz 3 446 03125 MHz 4 446 04375 MHz 5 446 05625 MHz 6 446 06875 MHz 7 446 08125 MHz...

Page 22: ...SLG UHF DualTalk charger with adaptor Art Nr PR2030 NMH 700 mAh rechargeable batteries Art Nr AK7005 72 itional accessories...

Page 23: ...te nur geeignete Original TEAM Zubeh rteile verwenden Please use original TEAM accessories only N utilisez que des accessoires TEAM originaux s il vous pla t Solamente utilizzare degli accessori TEAM...

Page 24: ...K 0359 Nachdruck oder Vervielf ltigung auch Auszugsweise nur mit ausdr cklicher Genehmigung von TEAM Electronic GmbH electronic TEAM Electronic GmbH Bolongarostrasse 88 D 65929 Frankfurt Main Telefon...

Reviews: