


- 18 -
Using the Picture menu
Using the TV features
PROGRAM
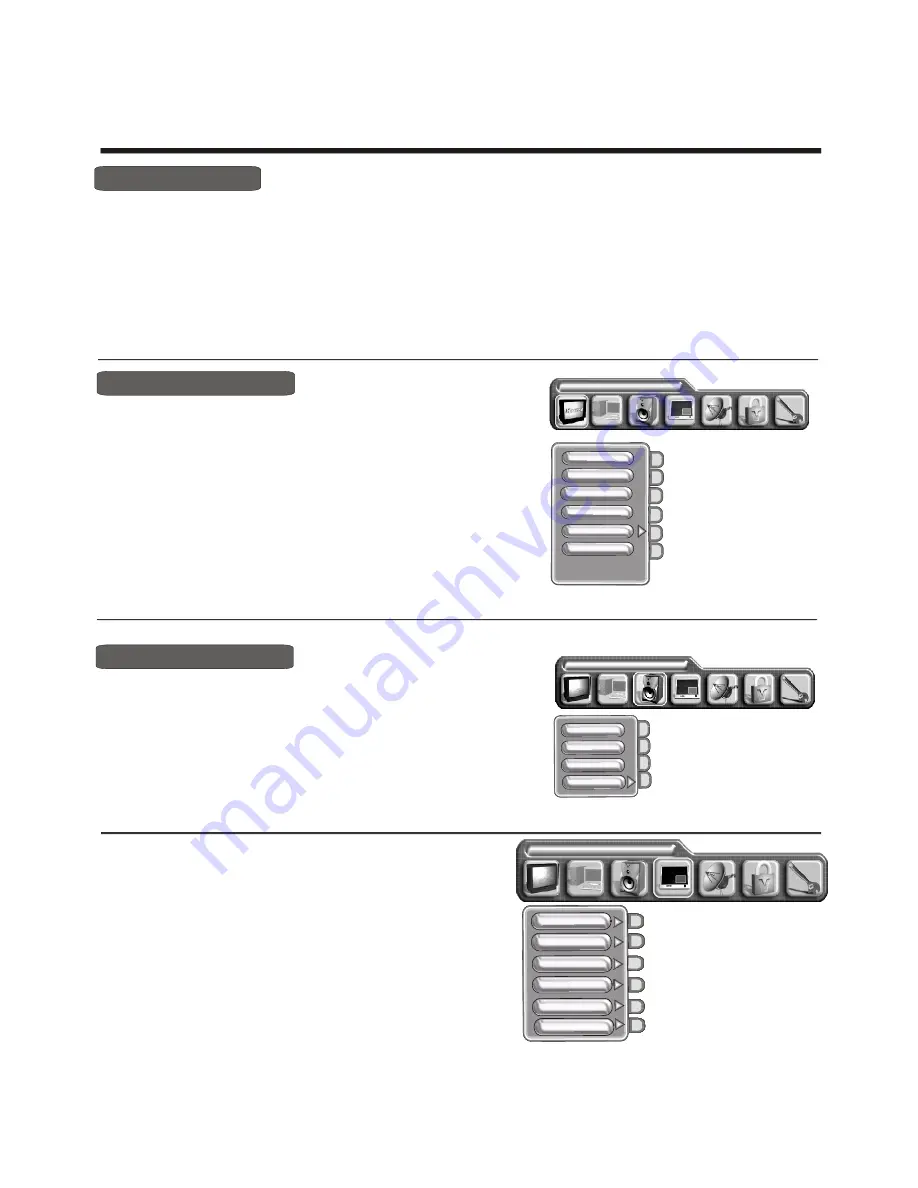
Picture parameters
Brightness
Contrast
Colour
Colour temp
Sharpness
1) Press [MENU] button to enter the main menu.
2) Press
button to select the item Picture
Parameters.
3) Press
button to select the item you want to adjust.
4) Press
button to adjust the level.
5) The adjusted data is stored automatically in the user mode.
NOTE : The Colour temp is only to adjust in the PC mode.
.
[VOL+ or VOL-]
[VOL+ or VOL-]
[CH+ or CH-]
Adjust picture settings
Using the Audio settings menu
Adjust audio settings
1) Press [MENU] button to enter the main menu.
2) Press
button to select the item Audio settings.
3) Press
button to select the item you want to adjust.
4) Press
button to adjust the level.
5) The adjusted data is stored automatically in the user mode.
[VOL+ or VOL-]
[VOL+ or VOL-]
[CH+ or CH-]
Audio settings
1) Press MENU button to enter the main menu ,press the
select the Picture in picture.
2) Press
button to enter the PIP size,
[VOL+ or VOL-]
button to select the PIP size, and
press
Press the
button to select the Off/Small/Medium/Large/PBP .
3) Press
button to select the PIP
source or press
the [Main Ch.] button to select main picture source.
4) Press
button to select the PIP position or PIP
brightness
,
contrast
or colour
, press [VOL+ or VOL-] button to adjust the value.
to
[CH+ or CH-]
[ VOL+]
[CH+ or CH-]
[
Sub Ch.
]
[CH+ or CH-]
Note: 1) When main picture is TV/ VIDEO/S-VIDEO. pip picture is HDTV/VGA.
2) When main picture is HDTV/VGA. PIP picture is TV/ VIDEO.
Using the PIP menu
Picture in picture
PIP position
PIP size
PIP
colour
PIP brightness
PIP contrast
Hue
Bass
Treble
Balance
Sorround
Volume
1) Press MENU button to enter the main menu.
2) Press [VOL+ or VOL-] button to select the item TV settings.
3) Press [CH+ or CH-] button to select Channel edit.
4) Press [ VOL+] button to start
Program
edit.
5)
Program
edit can carry out program 1 and program 2 to be interchanged by the button [SWAP],or copy program1 to
program 2 by the button [COPY].
Program
edit
Summary of Contents for plh4220sd
Page 1: ...PDP4220EU USER S MANUAL PDP COLOUR TV Part No...
Page 14: ...14...
Page 26: ...Appendix...


