12
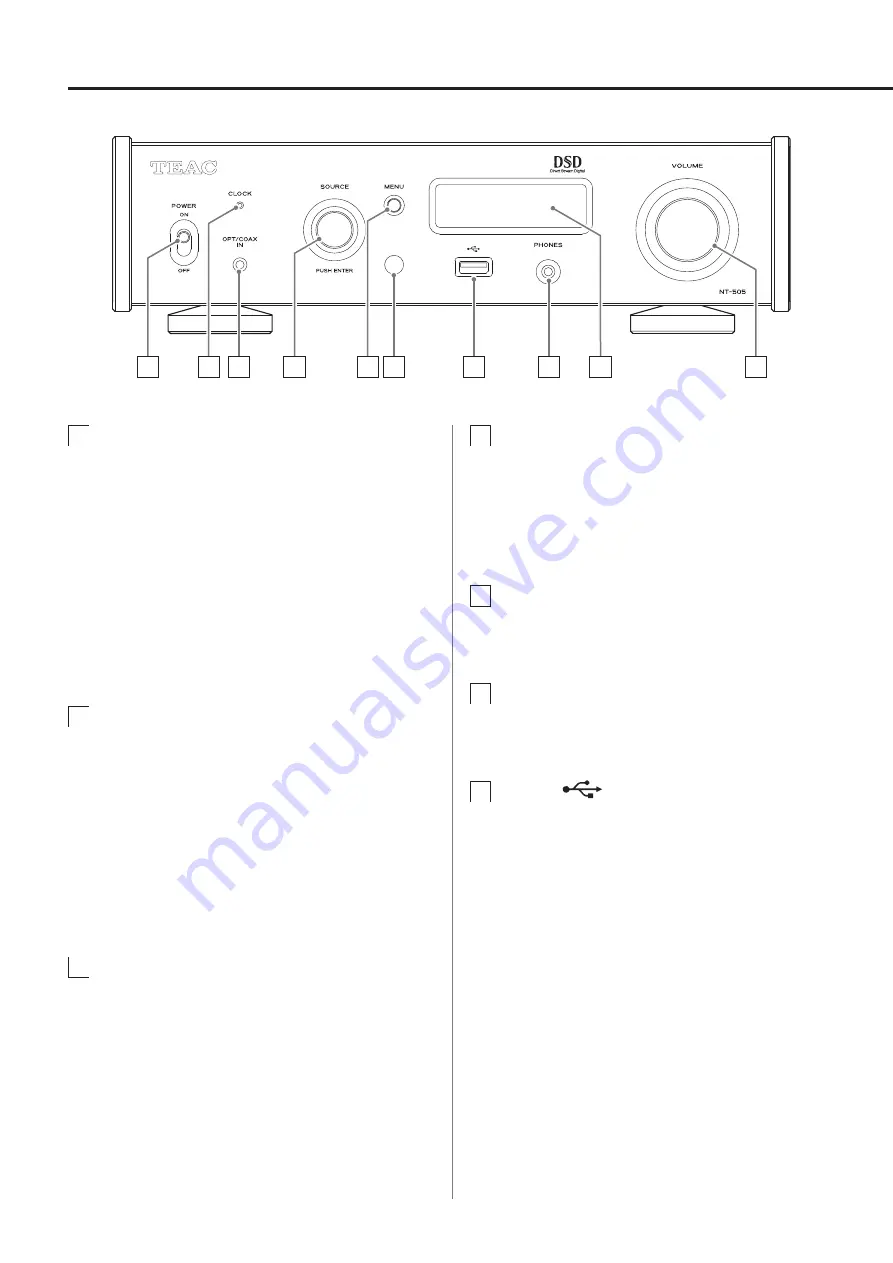
Names and functions of parts (main unit)
A
POWER switch
Use to turn the unit on and off.
o
If the display is dark even though the POWER switch is set to
ON, the cause is usually one of the following.
o
The power is on, but DIMMER (display brightness) is set
to OFF (page 23).
o
The automatic power saving function has put the unit
into standby.
o
The power cord is disconnected.
To turn the unit on, press the STANDBY/ON button on the
remote control, or set the POWER switch to OFF once and
then back to ON.
B
CLOCK indicator
This shows the clock synchronization status.
Lit:
The unit is synchronized with the clock from the
CLOCK SYNC input (10MHz IN) connector.
Blinking:
No clock is being input or the unit is not being
synchronized.
Unlit:
No clock sync is occurring.
o
Clock sync is only possible when the input source is USB or
NET (including USB flash drives).
o
See page 22 for clock sync settings.
C
Digital audio input (OPT/COAX IN) connector
Use to input digital audio (page 10).
Optical connection: Use an optical cable with a mini plug.
Coaxial connection: Use the included RCA conversion cable.
D
SOURCE knob
Use to select the input source.
Use to change setting values when a menu item is shown.
Press to use as an ENTER button.
Turn when the menu is open to change the item shown or the
setting value.
E
MENU button
Press to enter setting mode (page 21).
Press when in setting mode to return to the previous screen.
F
Remote control signal receiver
This receives signals from the remote control. When operating
the remote control, point it at the remote control signal receiver.
G
USB port (
)
Connect USB flash drives here.
o
To play music files on a USB flash drive, set the input source
to NET and use the app for playback.
o
Do not connect a computer to the USB port on the front of
the unit. To input audio from a computer, connect it to the
USB port on the back of the unit.
o
For details, see the TEAC HR Streamer User’s Manual.
A
B C
D
E F
G
H
I
J


