Teac LCD2681FHDR User Manual Download Page 7

Use and Maintenance

Although the LCD screen is made with high-precision technology and 99.99% or more of the pixels are effective,
black dots may appear or bright points of light (red, blue, or green) may appear constantly on the LCD screen.
This is a property of the LCD screen and is not a malfunction.

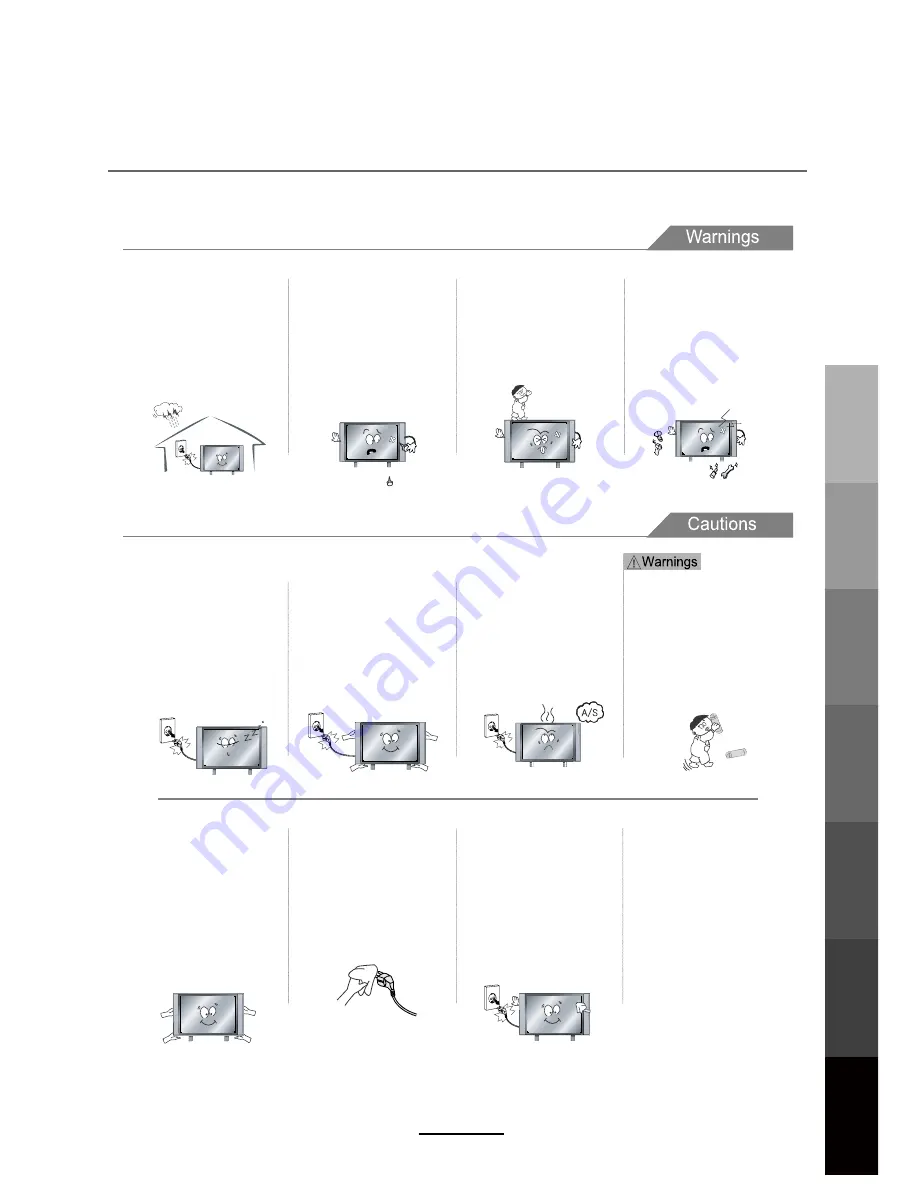
Disconnect the power cord from 
the power source during a 
thunderstorm.

• Not doing so may result in fire 
or electric shock.

When not using the unit for 
long periods of time, discon-
nect the power cord from the 
wall outlet.

• If not cleaned, clogged dust 
particles at ventilation holes 
could cause the unit to heat up, 
and ignite when switched on, 
which may result in a fire 
outbreak.

Always have two or more people 
at hand to lift or move the unit.

• If the unit is dropped, it could 

get

 damaged or otherwise 

cause injury.

Wipe off any moisture, dirt, or 
dust on the power plug pins 
with a clean, dry cloth.

• Failure to do so may result in 
fire or electric shock.

Always turn off the unit and 
unplug the power cord when 
cleaning the unit. Use a soft dry 
cloth to clean the unit.

• Never clean with 

in

dustrial 

strength polish, wax, benzene, 
paint thinner, air freshener,
lubricant, detergent, or other 
such chemicals. Also, do not 
clean with a damp cloth.

When moving the unit, be sure 
to turn off the unit and unplug 
the power cord from the wall 
outlet.

• Moving the unit with the 
power cord connected to the 
outlet may cause damage to 
the cord, resulting in fire or 
electric shock.

If you notice any unusual odors 
or smoke around the unit, 
immediately disconnect the unit 
from the outlet and contact the 
service center.
• Failure to do so may result in 
fire or electric shock.

When removing the batteries 
from the remote control, make 
sure children do not swallow 
them. Keep the batteries out of 
the reach of infants and 
children.

• If a child has swallowed a 
battery, seek medical attention 
immediately.

DO NOT insert any metal 
objects, such as a screwdriver, 
paper clip, or a bent wire into 
the ventilation openings or A/V 
terminals.

• Doing so poses a serious risk 
of fire or electric shock.

DO NOT allow children to climb 
onto the unit. 

• The unit could topple over 
onto a child and result in 
serious injury.

DO NOT dismantle or modify the 
unit in any way. Do not attempt to 
service the unit yourself.

• Doing so may result in fire or 
electric shock. If the unit 
requires repair, contact the 
service center.

Do not display still images and partially 
still images on the LED panel for more 
than 2 hours as it can cause screen 
image retention. This image retention is 
also known as “screen burn”. To avoid 
such image retention, reduce the 
degree of brightness and contrast of the 
screen when displaying a still image.
Watching the LED TV in 4:3 format for a 
long period of time may leave traces of 
borders displayed on the left, right and 
centre of the screen caused by the 
difference of light emission on the 
screen. Playing a DVD or a game 
console may cause a similar effect to 
the screen. Damages caused by the 
above effect are not covered by the 
Warranty. Displaying still images from 
Video games and PC for longer than a 
certain period of time may produce 
partial after-images. To prevent this 
effect, reduce the ‘brightness’ and 
‘contrast’ when displaying still images.

 3

Safety Precautions

Basic Operation

OSD Menu

Multimedia

 Operation

Recording

Operation

User Guidance

  Information

Maintenance

 and Service

Summary of Contents for LCD2681FHDR

Page 1: ...TY INFORMATION INSIDE PLEASE READ IMPORTANT For Optimum picture and sound quality please use TEAC Audio Video cables TEAC High Performance Audio Video cables and connectors have been designed to enhan...

Page 2: ...your own records Owner s Name Owner s Address Postcode Model Name No Serial No Dealer s Name Dealer s Address Postcode Authorised Service Centres in Major Australian Cities NSW 151 Arthur Street Homeb...

Page 3: ......

Page 4: ...ng Information Names of each part Front View 7 6 Remote control 9 10 Basic Operation Basic Operation 11 12 OSD Menu 1 CHANNEL Menu 13 15 2 PICTURE Menu 16 4 TIMER Menu 18 5 OPTION Menu 19 6 LOCK Menu...

Page 5: ...electric shock A congested outlet may cause the outlet to overheat and start a fire A loose or improperly inserted power plug may result in fire Doing so may result in electric shock Doing so may res...

Page 6: ...rface such as a sloped table or any stand with a contact area smaller than the bottom surface of the unit stand 3ODFLQJ WKH XQLW RQ D IODW VWDEOH VXUIDFH can prevent accidents from happening Ignoring...

Page 7: ...vice center Failure to do so may result in fire or electric shock When removing the batteries from the remote control make sure children do not swallow them Keep the batteries out of the reach of infa...

Page 8: ...ot bend the power cord excessively Prevent the cord from being walked on or pinched by weights placed on it 5 4 Safety Precautions Basic Operation OSD Menu Multimedia Operation Recording Operation Use...

Page 9: ...amage which may result in fire or hazards the unit should not be exposed to rain or liquids b Do not place objects containing liquids such as vases on the unit If drinks or liquids have been spilled o...

Page 10: ...per the diagram on right 3 Gently remove the stand 4 To re install the stand place the unit face down on a soft surface and reverse the above instructions NOTE Make sure the power is completely disco...

Page 11: ...menu MENU Display exit the OSD menu CH Scan through channels VOL Adjust the volume POWER Turn on standby the TV set INPUT MENU CH CH VOL VOL POWER Basic Operation OSD Menu Multimedia Operation Recordi...

Page 12: ...al input for AV Shared with YPbPr1 2 YPbPr1 2 Connect to the YPbPr output on external devices PC audio in PC audio input Headphone Connect Headphone RF Connect to antenna or cable source COAX Digital...

Page 13: ...ate through the on screen menus and adjust the system settings to your preference CH FAV Displays Channel List and the Favourite Program List EPG To show the Electronic Program Guide 1 2 3 4 5 6 7 8 9...

Page 14: ...t HOLD Hold or carry on the current subpage SIZE Press to see top half of page double size Press again to see the bottom half of page double size Press again for normal size SUBPAGE Press to subpage a...

Page 15: ...creen television display should appear Selecting an input source The unit incorporates multiple input sources which can be selected via the INPUT button on the television panel or remote control The f...

Page 16: ...tem Once in the submenu use buttons to select an item Press the OK button to access the selected item to make changes to the settings To return to the main menu press the MENU button To exit the menu...

Page 17: ...press the button to select the desired item Press the MENU button to return to the previous menu Press the EXIT button to exit Auto Scan Press OK to enter the auto scan option Select the desired Coun...

Page 18: ...rrent CH Select the channel you want to tune Search Press button to manual search Fine Tune Press button to fine tune a channel Frequency Display the current frequency The Program Edit menu offers the...

Page 19: ...erase any existing data on the device Back up all existing data before formatting TEAC accepts no responsibility for any loss of data Select a program press FAV button to mark or unmark the program as...

Page 20: ...t NTSC mode only Colour Temperature Choose from Medium Cool User and Warm Choose from Video PC Red Controls the red colour of the picture Green Controls the green colour of the picture Blue Controls t...

Page 21: ...lance Adjust the balance of the left and right sound track or turn off the volume of the left or right sound track Auto Volume Control the volume of the program automatically Turn on the function by s...

Page 22: ...e unit goes to sleep from the following selections 10min 20min 30min 60min 90min 120min 180min 240min and off Auto Sleep Turn the automatic standby function on off When activated the unit will switch...

Page 23: ...ws you to select HDMI CEC Turn on off HDMI CEC function Press OK button to restore factory default settings Note Restore Factory Default will erase all channels and user settings 5 OPTION menu Descrip...

Page 24: ...you must enter your password to view the channel Use and buttons to select the channel and press the GREEN button on the remote control to lock the channel Press the GREEN button a second time to unl...

Page 25: ...Press buttonV to select the type of media in the device you want to play from the following options PHOTO MUSIC MOVIE and TEXT Press buttonV to select the device and press OK button to enter 1 Press...

Page 26: ...ndividual files to be added to the playlist before playing the picture files in full screen mode Once all music file selections have been made in music mode access the picture files again and press pl...

Page 27: ...e Screen Mute mode press again to exit playback To play video files select individual files to be added to the playlist alternatively press the green button to select all files in the folder Once all...

Page 28: ...on to change Prev Next page Turn to previous next page of the text Prev Next Turn to previous next file Stop Stop auto turning pages Music Play pause the music program Playlist Display the playlist on...

Page 29: ...recording purposes 2 Unit will only support hard disk drives with additional power supply maximum disk partition size of 400GB and a maximum capacity of 1 5TB For optimum performance it is highly rec...

Page 30: ...This function supports DTV program recording Time shift and playback as described below DVR will only record when there is an external USB drive connected to the unit with sufficient memory space ava...

Page 31: ...d to the USB HDD port Follow the instructions below to enter the DVR menu and format the USB HDD The following sections explain each submenu that can be accessed through the DVR file system 1 Press th...

Page 32: ...vice will need to be formatted before being used for Recording functions to ensure the USB device connected is been format in FAT32 file system and that there is sufficient storage space available for...

Page 33: ...ect recording time from 1 hour to 6 hours Note 1 This applies only to manual instant recording 2 Recording will stop once it reaches the maximum set time Record buttons Record Press to start the recor...

Page 34: ...y pause live TV in case of a distraction such as a doorbell or a ringing telephone Once the distraction has passed playback can be resumed from the point where the TV program was paused Press the PLAY...

Page 35: ...V will record the program automatically according to a preset schedule TITLE Displays the name of the recording program MODE Select the record mode Auto Once Everyday Weekly Start Time Set the time fo...

Page 36: ...then press OK Recorded List After the recording has been done the stored programs can be viewed through a Recorded List by pressing the REC LIST button on the remote control To play the items press O...

Page 37: ...appears but there is no sound 1 Check if the MUTE function has been activated 2 Increase the sound level by pressing volume adjustment button 3 Check if sound terminal of external input is connected...

Page 38: ...ultimedia Player formats Dimensions Weight Wall mounting dimensions Wall mounting screw size Operating temperature range Power Consumption 42 2 2 2 1 1 3 The HDMI support 1 3 the HDCP support 1 1 1 1...

Page 39: ...phones and cameras for recording purposes 2 Unit will only support hard disk drives with additional power supply maximum disk partition size of 400GB and a maximum capacity of 1 5TB For optimum perfor...

Page 40: ...TEAC CUSTOMER SUPPORT HOTLINE TCS 1300 553 315 Between Monday to Friday AEST 8 30AM to 6PM...

Reviews: