background image

27

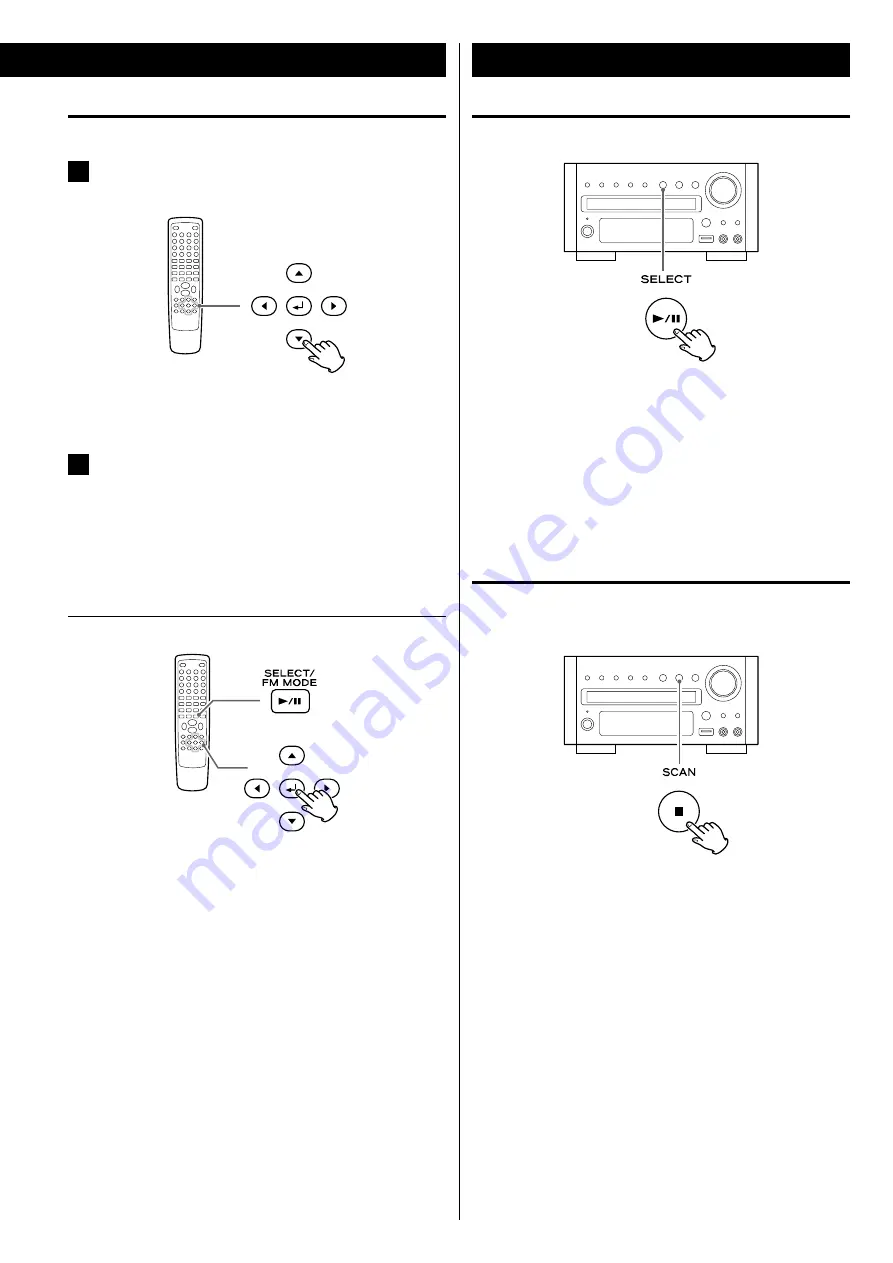
Pausing playback (Freezing the picture)

Press the Play/Pause button (

y

/

J

) to pause audio playback. Any 

DVD or video CD image is frozen.
Press the Play/Pause button (

y

/

J

) again to restart playback.

Caution:

Do not leave player in the “pause” mode for extended periods of 
time. Damage to your television or the player may occur.

Stopping playback (Resume mode) 
(DVD only)

When  the  Stop  button  (

H

)  is  pressed,  playback  is  stopped,  and 

the  display  shows  “Press  Play  Key  To  Continue”.  Pressing  Play/
Pause (

y

/

J

) continues playback. 

Pressing any of the following buttons cancels resume mode: 

Stop (

H

) in the stop mode,

Open/Close (

L

), SOURCE, STANDBY/ON

Basic Operations for a Disc and USB Memory Device

JPEG files

1

  Choose a picture in the directory list by pressing the 

5

/

b


buttons.

After a short wait a thumbnail of the picture will appear on the 
right.

2

  Press  the  Cursor  buttons  to  select  a  picture  to  large 

view.

<

  Some photos may appear distorted due to the configuration or 

characteristics of the disc. Larger photos may take a short while 
to appear due to their larger data size.

Viewing the picture at full-screen size

or

Press the Enter or Play/Pause button (

y

/

J

).

<

  When viewing at full-screen size, press Skip buttons (

.

/

/

) to 

view a previous or next photo. You can also use the 

g

/

t

 buttons 

to rotate the image.

<

  When  viewing  at  full-screen  size,  press  the  Stop  button  (

H

)  to 

display a number of thumbnails at a time on the screen. You can 
use the Cursor buttons to select a particular photo and then press 
the Enter button to view that image at full-screen size. You can also 
select SLIDE SHOW to view all the photos in a series or MENU to 
adjust settings. You can also select 

g

PREV or NEXT

to move to 

the previous or next screen of thumbnail images.

<

  Press the MENU button to exit thumbnail or full-screen views.

Summary of Contents for DR-H358i

Page 1: ...41008477 Z DR H358i DVD Receiver OWNER S MANUAL...

Page 2: ...roduce heat 9 Do not defeat the safety purpose of the polarized or grounding type plug A polarized plug has two blades with one wider than the other A grounding type plug has two blades and a third gr...

Page 3: ...SULT IN HAZARDOUS RADIATION EXPOSURE WARNING TO PREVENT FIRE OR SHOCK HAZARD DO NOT EXPOSE THIS APPLIANCE TO RAIN OR MOISTURE is a trademark of DVD Format Logo Licensing Corporation This product incor...

Page 4: ...w Motion 29 Repeat and Shuffle Playback 30 A B Repeat Playback 31 Changing the Display Mode 31 Time Search VCD CD 32 Time Search MP3 WMA 32 Chapter Search Time Search DVD 33 Chapter Search Time Search...

Page 5: ...tray Do not attempt to clean the unit with chemical solvents as this might damage the finish Use a clean dry or slightly damp cloth Keep this manual in a safe place for future reference Do not move th...

Page 6: ...available Dipole For use in marginal signal areas This type of antenna is omni directional and should increase the strength of all DAB stations being received Multi element antenna Also for use in ma...

Page 7: ...tly together Caution The metal portions of the two separate wires should not touch or an electrical short can occur Removing too much insulation may lead to a short circuit if the bared wired should c...

Page 8: ...you intend to use with this unit Be sure to insert each plug securely To prevent hum and noise avoid bundling the signal interconnection cables together with the AC power cord or speaker cables A B C...

Page 9: ...ck may be affected Connect the unit directly to the television In all cases use the highest quality cables for the best possible picture Select proper setting in the VIDEO OUTPUT setup page 39 A HDMI...

Page 10: ...deck etc RCA cable Caution Switch off the power to all equipment before making connections Read the instructions of each component you intend to use with this unit Be sure to insert each plug securel...

Page 11: ...the remote control unit is operated near other products which generate infrared rays or if other remote control devices using infrared rays are used near the unit it may operate incorrectly Conversely...

Page 12: ...12 Identifying the Parts Main Unit A P N D C B E G F H I J K L M O...

Page 13: ...isten with headphones first lower the volume level to the minimum Then connect the headphones plug into the PHONES jack and adjust the volume by turning the VOLUME knob The speakers will make no sound...

Page 14: ...t E ANGLE Use this button to select camera angles during DVD playback F Search m PRESET In tuner mode use these buttons to select a preset channel In DISC USB or iPod mode use these buttons to search...

Page 15: ...mode use these buttons to skip tracks files songs Y Stop H SCAN In tuner mode use this button to preset stations automatically In DISC or USB mode use this button to stop playback Z Play Pause G J SE...

Page 16: ...recorder the screen may momentarily black out at the edited point When playing a DVD RW disc that was edited on a DVD recorder you may see scenes from just before the edited point About CD R CD RW CD...

Page 17: ...rotective sheets on the discs and do not use any protective coating spray Use a soft oil based felt tipped pen to write the information on the label side Never use a ball point or hard tipped pen as t...

Page 18: ...t the adapter into the DR H358i dock Fit the front edge of the adapter into the Dock and then press the back edge of the adapter onto the Dock until a slight click is heard indicating the adapter is i...

Page 19: ...r to set the current minute 6 Press the CLOCK button RDS DAB Sync Off or RDS DAB Sync On appears on the display 7 Press the Volume buttons or to turn on or off the RDS DAB sync function RDS DAB Sync O...

Page 20: ...MMER button to dim the display Press the button again to cancel the dimmer function 1 3 2 1 Press the STANDBY ON button to turn the unit on The unit turns on with the source that was last selected You...

Page 21: ...the speakers The DVS and the LOUDNESS buttons do not work together LOUDNESS button This button compensate for the loss of bass at low volumes Select off when listening at normal levels When the LOUDN...

Page 22: ...tton to select iPod You can also select iPod by pressing the iPod USB button on the remote control unit once or twice 2 Insert the iPod into the dock The iPod automatically turns on and starts playbac...

Page 23: ...scroll to the menu item you want and then press the Enter button Repeat playback Each time the REPEAT button is pressed the repeat mode of iPod changes as follows Repeat 1 repeat one song Repeat All...

Page 24: ...centered in the tray in order to avoid any malfunction or jamming of the tray or damage to the disc 1 5 3 2 4 4 Press the Open Close button L again to close the tray The tray will close Take care that...

Page 25: ...button to select USB Source 2 Plug your USB memory device into the USB connector It takes a few seconds for the unit to load the USB memory device Some files may automatically start playback You can r...

Page 26: ...he screen Please disregard folders which do not contain playable files During playback elapsed time of the current file is displayed on the front panel display Video CDs with PBC When a Video CD Versi...

Page 27: ...icture will appear on the right 2 Press the Cursor buttons to select a picture to large view Some photos may appear distorted due to the configuration or characteristics of the disc Larger photos may...

Page 28: ...track number 35 press 10 10 10 and 5 To select a MP3 or WMA file enter 3 digit numbers As an example to select number 5 press 0 0 and 5 Optionally you may press just the number 5 and then wait a few...

Page 29: ...ce is obviously restricted to one subtitle or no subtitles It may be necessary to change the subtitles on some discs using the on screen disc menu Some discs cannot have their subtitles changed in the...

Page 30: ...t and Shuffle Playback Repeat chapter Repeat track Repeat one The currently selected chapter track file will be played repeatedly If another chapter track file is selected during repeat playback the n...

Page 31: ...int A and point B To cancel the A B Repeat press the A B button again Changing the Display Mode Each time the OSD On Screen Displays button is pressed during playback following information appears on...

Page 32: ...the TIME button To search within the entire disc Press the TIME button once DT is highlighted on the screen To search within the current track Press the TIME button twice TT is highlighted on the scre...

Page 33: ...TIME button three times 2 Within 7 seconds enter your desired hour minute and second using the Number buttons Playback starts from the selected part Chapter Search You can start playback from the beg...

Page 34: ...Repeat this step to programme more chapters tracks If you made a mistake move the cursor on the track number and overwrite it using the Number buttons To programme more than 11 chapters tracks press t...

Page 35: ...ons and press the PROGRAM button The file is added to the programme list 3 Press the MENU button once or twice to display the programme list 4 Highlight the first file in the programme list using the...

Page 36: ...etc 1 Turn on the unit and the connected television or monitor The SETUP menu is available only in the DISC Source mode or the USB Source mode If another source is selected press the SOURCE button to...

Page 37: ...t and right part of the image are cut off 4 3 picture 16 9 picture 4 3 LETTER BOX This mode is used with 4 3 televisions 4 3 images are displayed normally 16 9 images are visible at their full width b...

Page 38: ...namic range control to Dolby Digital material reducing the volume of loud sounds and increasing the volume of quiet ones This is useful for spoken word material and nighttime listening etc OFF default...

Page 39: ...TV set compatibility with this model 480p 525p and 576p 625p DVD player please contact our customer service center COLOR SETTING You can adjust some parameters of video picture 1 Highlight COLOR SETTI...

Page 40: ...AUDIO SUBTITLE DISC MENU You can select a preferred language for audio subtitle and disc menu When you select a preferred language that is not recorded on the DVD one of the recorded languages is aut...

Page 41: ...temporarily unlock discs for playback If you forget your password use 2580 Settings Password Setup PARENTAL Parental control Playback of some DVD discs can be limited depending on the age of the users...

Page 42: ...ing 1 While listening to DAB radio press the SELECT button The signal strength is displayed Check the antenna adjustment or positioning for the best reception 2 Press the SELECT button again to displa...

Page 43: ...and time which is supplied by the radio station and should always be accurate 3 Bitrate The bitrate and sound mode of the current receiving broadcast is displayed 4 Signal level Signal strength displa...

Page 44: ...ist 1 In DAB menu mode select Local scan 2 Press the SELECT button You can also activate the Local scan by using the SCAN button page 42 2 Full scan Auto scan The unit will scan all the DAB bands betw...

Page 45: ...cel manual tune and resume normal reception 4 DRC Use this option to set the Dynamic Range Control DRC value to be applied to received broadcasts DRC is used to reduce the range between high and low v...

Page 46: ...are in the list but have no service in your area at the end 6 Main menu You can check the DAB software version and initialize the DAB settings 1 In DAB menu mode select Main menu page 44 2 Press the S...

Page 47: ...is found If you want to stop the tuning process press the TUNING button Selecting stations which cannot be tuned automatically Manual selection When the TUNING button is pressed momentarily the frequ...

Page 48: ...nd then press the MEMORY button for more than 4 seconds The station is stored You can store up to 20 FM and 20 DAB stations Automatic Memory Presetting FM only 1 Select FM Radio using the SOURCE butto...

Page 49: ...7 2 Press the INFO REPEAT button Each time the RDS button is pressed the RDS mode is changed as follows RDS Display Setting of the FM How to select preset stations DAB FM 1 Select FM Radio or DAB Radi...

Page 50: ...urce You can also select AUX1 Source or AUX2 Source by pressing the AUX button on the remote control unit once or twice 3 Play the source and adjust the volume using the VOLUME knob of the DR H358i an...

Page 51: ...s to set the start time hour and then press the TIMER button The minutes value starts blinking Sleep Timer Wake Up Timer 1 The power can be switched off after a specified amount of time Press the SLEE...

Page 52: ...with the source that was last selected Do not forget to turn the unit off standby or the timer will not work If the timer reaches the timer on time the unit is set to SLEEP 60 automatically and the po...

Page 53: ...id vibration and shock e If the disc is dirty clean the surface of the disc e Do not use scratched damaged or warped discs There is no sound or only a very low level sound is heard e Adjust the volume...

Page 54: ...Pod software page 18 Cannot operate the iPod on the components e Select iPod as the source Cannot operate the iPod e Make sure the HOLD switch of the iPod is not set to HOLD Troubleshooting 2 If norma...

Page 55: ...kHz 0 3 dB Signal to noise ratio 90 dB IHF A FM Tuner Section Without notes 100 1 MHz 65 dBf Tuning range 87 5 MHz to 108 0 MHz 50 kHz steps Total harmonic distortion 1 kHz Mono 1 Stereo 1 5 Frequency...

Page 56: ...Road Montebello California 90640 U S A Phone 323 726 0303 TEAC CANADA LTD 5939 Wallace Street Mississauga Ontario L4Z 1Z8 Canada Phone 905 890 8008 TEAC MEXICO S A DE C V R o Churubusco 364 Colonia De...

Reviews: