2800 Laura Lane • Middleton, WI 53562 | 800.288.9383 | www.tcsbasys.com
7
STEP 8
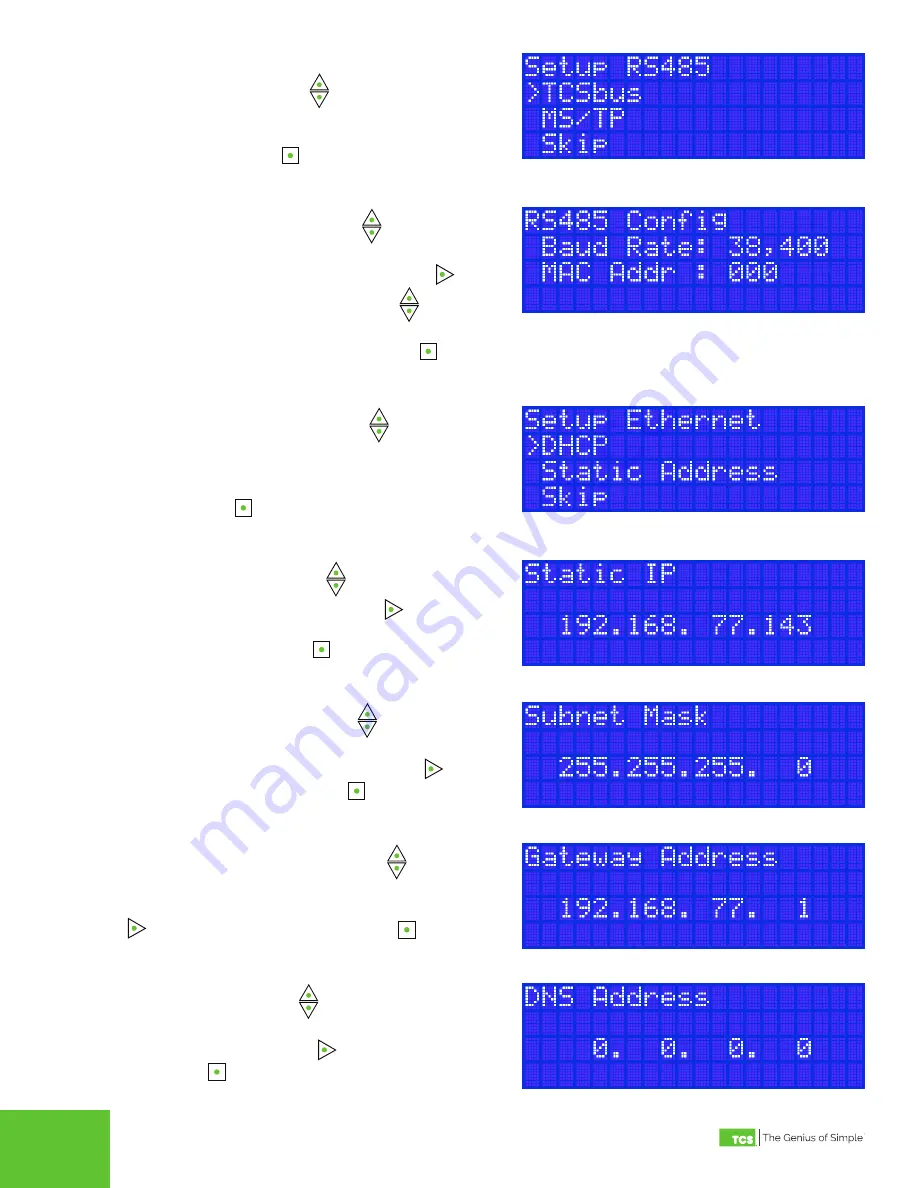
On the
Setup RS485
screen, select the network’s com-
munication protocol. Press
to advance through the
selections. You may also skip this by advancing to the
“Skip” selection, which will take you to the
Setup Ethernet
screen (Step 10). Press
to save your selection and
proceed to the next screen.
STEP 9
On the
RS485 Config
screen, press
to advance
through the Baud Rate settings until you find the baud
rate that matches your RS-485 network. Press
to
advance to the MAC address field. Press
to enter
the value of the unit’s MAC address (hold down the upper
arrow to rapidly advance the number). Press
to save
the settings and proceed to the next screen.
STEP 10
On the
Setup Ethernet
screen, press
to advance
through the selections. If you select DHCP or Skip you
will exit the Setup Wizard and return to the Main Menu. If
you select Static Address, you will be taken to the
Static
IP screen. Press
to save your selection and proceed
to the next screen.
STEP 11
On the
Static IP
screen, press
to enter the values of
the static IP address of the unit. Press
to advance
through the fields (hold down the upper arrow to rapidly
advance the number). Press
to save the setting and
proceed to the next screen.
STEP 12
On the
Subnet Mask
screen, press
to enter the val-
ues of the subnet mask of the unit (hold down the upper
arrow to rapidly advance the number). Press
to
advance through the fields. Press
to save the setting
and proceed to the next screen.
STEP 13
On the
Gateway Address
screen, press
to enter the
values of the gateway address of the unit (hold down
the upper arrow to rapidly advance the number). Press
to advance through the fields. Press
to save the
setting and proceed to the next screen.
STEP 14
On the
DNS
screen, press
to enter the values of the
DNS of the unit (hold down the upper arrow to rapidly
advance the number). Press
to advance through the
fields. Press
to save the setting and exit the Setup
Wizard.


