background image

 16


Using more of your TV

Notes:


- This feature is available only for digital non- 

encrypted channels. Even when CICAM (CI or CI+) 
is inserted, this feature is not available on encrypted 
channels.


- Before you connect the USB drive to the TV, make 

sure you have backed up the data in the drive 
to avoid the loss of your important data due to 
unforeseen malfunction. 


- The bigger the USB drive free memory for the PVR 

function, the bigger the recording length. 


- If you want to change channel or signal source 

during recording, store the recording data before 
changing the channel or source.


- The TV cannot play files normally if the parameters 

of the file exceed the limitations of the system, the 
file format is not supported, the file is damaged, or 
the file cannot be decoded.


- Do not disconnect the USB drive when the system 

is reading a file or transmitting data, otherwise the 

system or the drive may be damaged.

Using EPG 

(Electronic Programme Guide)

EPG is an on-screen guide that displays scheduled 

digital TV programmes. You can navigate, select and 

view programmes.

Note

: The DTV EPG does not require an internet 

connection.To use the DTV EPG, HbbTV must be set 
to Off. when HbbTV is set to ON, then it will enter the 
HbbTV EPG directly. Please refer to “ HbbTV ”  part of 
this manual for assistance to set HbbTV to on or off.

1. 

Press 

GUIDE

 on the remote control, the 

Program 

Guide

 menu will appear, which allows you to get 

information about the current or next programme 
playing on each channel. Navigate through the 

different programmes using the ▲/▼/◄/► buttons 

on the remote control.

2. 

Use the related buttons shown at the bottom of the 
screen to view EPG.


-

Program filter

: Programme guide filter for digital 

TV programmes.

• 

Press 

 to display the type list of the programme.

• 

Navigate through the different types using the 

▲/▼ buttons on the remote control.

• 

Select one or more types, which you want to 
highlight from the type list, press 

OK

 to select or 

deselect. A checkmark will appear to the right of 
the type when selected.


- Custom schedule

: Press ▲/▼ to select a 

programme, then press the 

RED

 button to set 

the schedule. Use the ▲/▼ buttons to 

select      

Schedule reminder 

or 

Schedule recording 

, then 

press 

OK

 to enter.

Google Cast

Google Cast™ lets you cast your favorite videos, games, 
and apps from your mobile device, in full quality, to your 
TV. Just one tap of the Cast button on your Android or 
iOS screen is all you need to supersize the things you 
love. Cast your content then continue browsing on your 

phone or tablet.

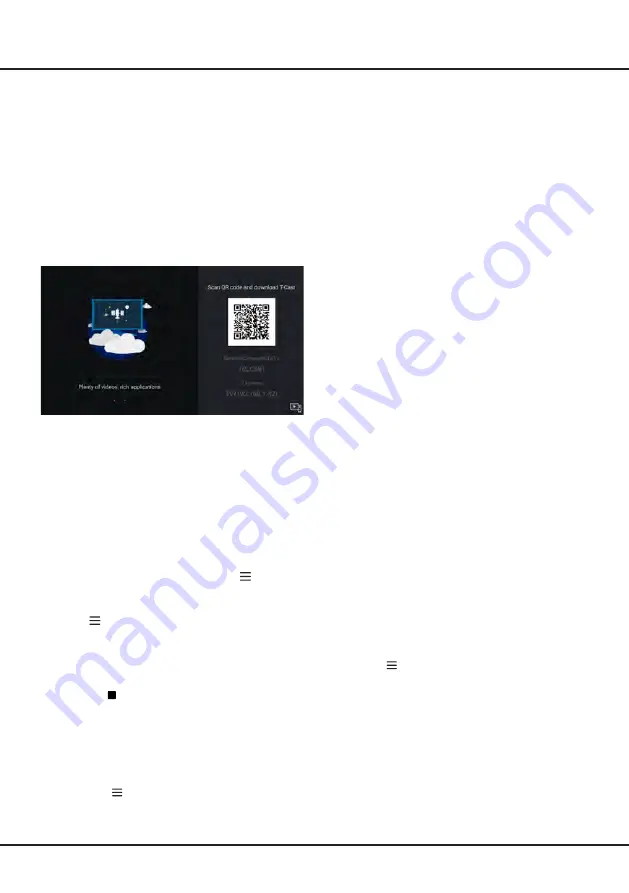
T-Cast

T-Cast lets you enjoy plenty of videos, rich of 
applications by scanning the QR code on the TV screen 
and downloading T-Cast.

PVR

(Personal Video Recorder)

Allows you to record your favourite TV programmes. 
Before you use the function, connect a USB drive to the 

TV first. 

Note: The feature is available only in selected products 

and, due to specific TV network limitations and country 

technical requirements, might not be available in 

product or place of installation. Feature might also be 
blocked by TV network due to copyright protection (HD 
content, recording protection). Please use 

 on the 

remote control to check if the feature is available in your 
product.

1. 

Press 

 on the remote control and select 

PVR

.

2. 

Press 

OK

/► to enter and select 

Record

. It starts to 

record automatically.

3. 

Press 

BLUE

 button on the remote control and use 

▲/▼/◄/► to adjust the recording duration.

4. 

Press 

OK/  

to stop recording manually, the recorded 

file will be saved. In normal operation, the recording 
will stop automatically when the recording duration 
expires.

5. 

In recording, the PVR mini pane will also show on 
the screen to indicate the recording progress.

6. 

To watch the recorded programme, exit PVR mode 
first, Press 


and select 

PVR > PVR List

, then 

select the related record file. Press 

OK 

to play. (It is 

the same if you record a digital radio programme).

Summary of Contents for P4 Series

Page 1: ...his User s Guide are provided for reference only and may differ from actual product appearance Product design and specifications may be changed without notice OPERATION MANUAL For use with models P20...

Page 2: ...ant Power On 13 Using TV Settings menu 13 Chapter 4 Using more of your TV Installing Channels 14 Using Subtitles 14 Turning on off subtitles 14 Enabling subtitle languages on digital TV channels 14 Se...

Page 3: ...ust those controls that are covered in these operating instructions as improper adjustment of other controls may result in damage If this happens unplug the set and refer to the service personnel If t...

Page 4: ...the model Initial Setup The first time you switch the set on the Welcome screen appears which guides you through the initial setup process Follow the on screen instructions to finish the initial setup...

Page 5: ...5 Chapter 2 Connections and Setup Part 2 TCL initial setup...

Page 6: ...is Y Pb Pr compatible The component sockets provide excellent picture quality because the video is separated into three independent parts AV IN adapter socket The AV IN adapter socket can be used to...

Page 7: ...he Option menu Navigation direction buttons OK To confirm an entry or selection To return to the previous menu or quit an App To select input source EXIT To exit the Settings menu LANG To select an au...

Page 8: ...utton for the first time you will be prompted to pair the remote with the TV Please follow the on screen guide for paring instructions a Keep the remote control and TV in 1 meter press OK and button o...

Page 9: ...l Wireless using the internal wireless or external wireless USB adapter and your home wireless network Note The following instructions are just the usual ways to connect your TV to the wired or wirele...

Page 10: ...r on the on screen keyboard and press OK Once connected the wireless network will be saved Next time when you connect to the same network you do not have to re enter the password 8 Press to close the...

Page 11: ...low the instructions on this page on how to switch on your TV set and the remote control before going on to follow ing pages describing how to use the channel set up procedure 1 Insert two AAA batteri...

Page 12: ...th the TV remote control WARNING Configure the network settings before using Smart TV applications Slow responses and or interruptions may occur depending on your network conditions If you experience...

Page 13: ...er the Google settings 3 Press to choose the items and press OK to enter 4 Press to return to previous interface 5 Press EXIT to close the menu Using Instant Power On It enables you to turn on your TV...

Page 14: ...is in networked standby mode you can use the App to wake up the TV remotely Installing Channels This section describes how to search and store channels automatically This may be done in any of the ca...

Page 15: ...ve backed up the data on the drive to avoid unforeseen malfunction and data loss We recommend that you use a USB drive with at least 1GB free space and a disk speed faster than 5 0MB sec The bigger th...

Page 16: ...on the remote control Select one or more types which you want to highlight from the type list press OK to select or deselect A checkmark will appear to the right of the type when selected Custom sche...

Page 17: ...networks with the simple press of a button Freeview Plus provides an unrivalled user experience and places free to air television at the forefront of innovation with services that include A 7 day easy...

Page 18: ...e hard disks consume a lot of power which may result in power supply problems We recommend inserting only one hard disk or a low power consumption mobile hard disk 4 The video from a mobile hard disk...

Page 19: ...located in the fringe area of a television signal where the signal is weak the picture may be marred by dots When the signal is extremely weak it may be necessary to install a special antenna to impro...

Page 20: ...vices either express or implied including but not limited to warranties of merchantability of satisfactory quality fitness for a particular purpose of accuracy of quiet enjoyment and non infringement...

Page 21: ...r license from Dolby Laboratories Dolby Dolby Audio and the double D symbol are trademarks of Dolby Laboratories The Bluetooth word mark and logos are registered trademarks owned by Bluetooth SIG Inc...

Page 22: ...8DU EAU1D TCL Electronics Australia Pty Ltd ABN 83 111 032 896 Address 797 Springvale Road Mulgrave VIC 3170 Australia Telephone 1300 738 149 service au tcl com www tclelectronics com au Like us on Fa...

Reviews: