background image

11

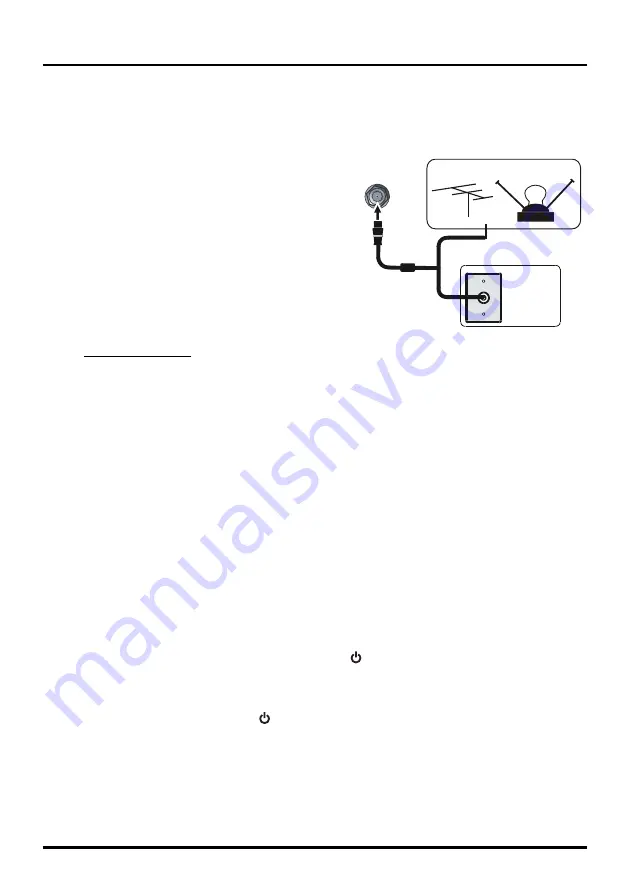
ANT/CABLE

/SAT IN

Outdoor or indoor Antenna 

Cable Box,

( Wall Outlet)

RF Coaxial 

Wire 

(75 ohm)

Or

Or

Connections and Setup

Obtain the Signal

The first step in connecting your TV is obtaining the signal. The back panel of your TV allows you to receive 

analog and/or digital channels by using the 

ANT/CABLE/SAT IN

.

Connect the outside aerial or cable network to the 

ANT/

CABLE/SAT IN

 on the back of the TV set to receive off-air 

channels or cable channnels.
•  If you have a set-top box, you may need to call your 

cable company or satellite service provider. They may 

recommend special cables to allow you to view digital 

channels.

•  The aerial socket (75 OHM - VHF / UHF / cable) can be 

used for connecting an external aerial or other equipment 

fitted with a modulator (video recorder, satellite receiver, 

etc.). We recommend that you do not connect other 

equipment (video recorder, satellite receiver, etc.) to your 

TV set to begin with, so as not to complicate the set-up 

procedure with the additional steps involved. Connect 

them when you have finished setting up the channels.

•  Visit www.antennaweb.org for help in deciding what type of antenna to use in order to receive the local 

digital channels available to you. Enter your location, and the program will list local analog and digital 

stations available using your antenna.

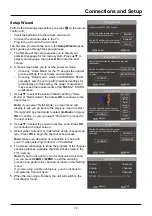
Switching On

Follow the instructions on this page on how to switch on your TV set and use the remote control before going 

on to following pages describing how to use the channel scan procedure.
1.  Insert two AAA batteries in the remote control.

Precautions on using batteries:


- Only use the battery types specified.


- Make sure you use the correct polarity.


- Do not mix new and used batteries.


- Do not use rechargeable batteries.


- Do not expose batteries to excessive heat such as sunshine, fire or the like, throw them in a fire, 

recharge them or try to open them, as this could cause them to leak or explode.


- Remove the batteries from the remote control if you are not using it for a long period of time.

2.  Connect the power cable to a mains socket. (If the power cable is not connected to the television, please 

first connect the power cable to the television.) Your TV set should only be connected to an AC supply. 

It must not be connected to a DC supply. If the plug is detached from the cable, do not, under any 

circumstances, connect it to a mains socket, as there is a risk of electric shock. 

3.  When powered on, if the TV set is in standby mode, press   on the remote control or on the TV set to 

turn on the TV.

Switching Off

To put the TV set into standby mode, press   on the remote control or on the TV, the TV set remains 

powered up, but with low energy consumption.
To switch off the TV set, unplug the mains socket from the mains outlet.

Summary of Contents for LE58FHDE3010

Page 1: ...877 300 8837 User s Guide For use with models LE50FHDE3010 LE58FHDE3010 Figures and illustrations in this User s Guide are provided for reference only and may differ from actual product appearance Pr...

Page 2: ...the disconnect device shall remain readily operable Therefore you should ensure that the TV is installed in a manner that allows you to disconnect the power cord when desired Product Registration Plea...

Page 3: ...e personnel Service is required when the component is damaged in any way such as power supply cord or plug damage liquid spilled on or objects falling onto the component rain or moisture exposure abno...

Page 4: ...13 Using Menu System 14 Input Menu 14 Picture Menu 14 Picture Mode 14 Brightness 14 Contrast 14 Saturation 14 Sharpness 14 Tint 14 Color Mode 14 Backlight 14 Dynamic Backlight 14 Dynamic Light Sensor...

Page 5: ...it on the top shelf so the heated air from it won t harm other components Avoid Audio Interference Position cables properly insert each cable firmly into the designated jack If you place components a...

Page 6: ...reen Then follow the steps below Note A is applied to models of 50 B is applied to models of 58 Mounting Your TV to the Wall If you are mounting your TV to the wall don t attach the table stand To mou...

Page 7: ...ls Use three video grade or component video cables for the connection L R AUDIO Provides left and right audio connection when using the CMPT VIDEO input Red and white jacks for R AUDIO and L AUDIO con...

Page 8: ...nds for Mobile High definition Link and allows you to link a MHL capable mobile device to the television HDMI 3 IN Lets you connect a component such as a digital cable box with an HDMI output for the...

Page 9: ...HDMI 3 IN COMPONENT IN CMPT AUDIO VIDEO IN AV Menu operaton for input source selection or select the input soure directly by pressing INPUT button HDMI 1 DVI IN PC VIDEO IN Component Video Connection...

Page 10: ...automatically When connecting MHL compatible device to HDMI 2 MHL port on the TV switch TV source to HDMI 2 Note Do not connect the MHL compatible device to any ports other than HDMI 2 MHL port When...

Page 11: ...FO If no menus are currently active press INFO to display the Channel information VOL Increases or decreases the TV volume MUTE Turns the volume on and off FAV Press the FAV button to browse the chann...

Page 12: ...al stations available using your antenna Switching On Follow the instructions on this page on how to switch on your TV set and use the remote control before going on to following pages describing how...

Page 13: ...t the desired location setting Home Mode or Retail mode then press OK to continue to the next screen Note if you select Retail Mode a screen menu will display to ask you go back to the previous menu t...

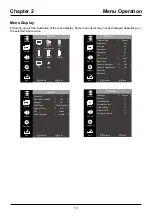
Page 14: ...13 Chapter 2 Menu Operation Menu Display Following are just the illustration of the menu display Some menu items may not be displayed depending on the selected input source...

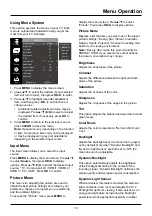
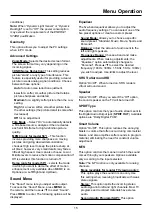
Page 15: ...ess MENU to display the menu screen Press to select Picture then press OK to display options Picture Mode Displays a list that lets you select one of the preset picture settings Energy Star Vibrant Ci...

Page 16: ...djust audio output To access the Sound Menu press MENU on the remote and then use to select Sound Press OK to enter The following options will be displayed Equalizer The five band equalizer allows you...

Page 17: ...he previous menu or press CLEAR to close the menu Favorite 1 Select Setting Channel Favorite press OK to enter a list of available channels displayed 2 Press to select the desired chanel then press OK...

Page 18: ...such as adult language L Movies can only be blocked by age based ratings Once you block programs you can unblock them by entering a password By default the software inside your TV is turned off or un...

Page 19: ...8 and older G General audience PG Parental guidance 14 Viewer 14 and over 18 Adult Canadian French Ratings G General audience 8 ans Viewer 8 and older 13 ans Viewer 13 and older 16 ans Viewer 16 and...

Page 20: ...l settings USB Menu You can connect a device with USB to your TV or use a USB flash drive only suppport FAT format and unpartitioned USB device This connection allows you to insert a USB flash drive d...

Page 21: ...Why are there bars on my screen and can I get rid of them Most digital video is sent in a 16 9 format which fills your screen but is sometimes sent in 4 3 which does not fill your screen It depends on...

Page 22: ...blue and green connect to the corresponding COMPONENT INPUT jacks on the back of your TV Check the antenna connections Make sure all of the cables are firmly connected to the jacks There is no sound...

Page 23: ...or further assistance If you have black bars on each side of your picture the component you connected might have a switch or a menu option allowing you to change the picture quality output that will f...

Page 24: ...warm water While cleaning do not spray liquid directly on the screen or allow liquid to run down the screen and inside the TV Also never place drinks or vases with water on top of the TV This could i...

Page 25: ...atement At the sole discretion of TTE television screen sizes 32 and smaller will either be repaired at an Authorized TCL Service Center or directly exchanged for a new or refurbished remanufactured u...

Page 26: ...ND LIMITED WARRANTY ARE GOVERNED BY THE LAWS OF THE STATE OF CALIFORNIA EXCEPT TO THE EXTENT PROHIBITED BY APPLICABLE LAW ANY IMPLIED WARRANTY OF MERCHANTABILITY OR FITNESS FOR A PARTICULAR PURPOSE ON...

Page 27: ...ations However there is no guarantee that interference will not occur in a particular installation If this equipment does cause harmful interference to radio or television reception which can be deter...

Reviews: