


8
FLASHBACK 2 DELAY User Manual
5.3 Using the looper
With
the
l
ooper
bui
l
t
into
your
Fl
ashback
2,
you
can
record
and
p
l
ay
back
grooves
and
l
ines
for
p
l
aying
a
l
ong.
You
can
even
overdub
your
recording
an
un
l
imited
number
of
times.
T
he
first
round
of
recording
a
l
ways
sets
the
l
ength
of
the
l
oop.
T
he
duration
of
a
l
oop
can
be
up
to
4
0
seconds
in
mono
and
20
seconds
in
stereo,
regard
l
ess
of
how
many
overdubs
you
make.
I
f
an
overdub
exceeds
the
l
ength
of
the
l
oop,
a
third
round
of
recording
begins.
T
his
gives
a
very
natura
l
,
l
ogic
and
musica
l
fee
l
when
recording
l
oops.
T
he
D
E
LAY
and
FEE
DBACK
knobs
are
inactive
in
Loop
mode.
Recording
and
p
l
aying
l
oops:
•
•
Set
the
De
l
ay
type
se
l
ector
to
LOOP.
•
•
Make
sure
the
peda
l
is
in
bypass
mode
(i.e.,
the
L
E
D
shou
l
d
be
off
).
F
ee
l
the
groove
and
prepare
for
recording.
T
hen
tap
the
peda
l
’s
footswitch
to
start
your
recording
and
begin
p
l
aying.
T
he
peda
l
’s
L
E
D
fl
ashes
red.
•
•
T
o
stop
recording,
press
the
footswitch
again.
Fl
ashback
De
l
ay
immediate
l
y
switches
to
p
l
ayback
mode
and
starts
p
l
aying
the
l
oop.
I
n
p
l
ayback
mode,
the
L
E
D
is
green.
•
•
T
o
overdub
your
recording,
press
the
switch
once
more.
T
he
L
E
D
now
b
l
inks.
•
•
T
o
de
l
ete
a
ll
recordings,
doub
l
e-tap
the
footswitch.
•
•
An
externa
l
footswitch
can
be
connected
to
the
Stereo
I
nput
jack
to
act
as
a
dedicated
Stop
switch
(mono
mode
on
l
y).
6. Bypass Mode
6.1 True Bypass and Buffered Bypass explained
T
rue
Bypass
mode
is
a
hard-wire
bypass
that
gives
abso
l
ute
l
y
no
co
l
oration
of
tone
when
the
peda
l
is
bypassed.
T
his
is
the
defau
l
t
mode
for
your
effect
peda
l
.
Using
T
rue
Bypass
on
a
ll
peda
l
s
is
a
perfect
choice
in
setups
with
a
few
peda
l
s
and
re
l
ative
l
y
short
cab
l
es
before
and
after
the
peda
l
s
I
f...
•
•
you
use
a
l
ong
cab
l
e
between
your
guitar
and
the
first
peda
l
or
•
•
if
you
use
many
peda
l
s
on
your
board
or
•
•
if
you
use
a
l
ong
cab
l
e
from
your
board
to
the
amp,
...
then
the
best
so
l
ution
wi
ll
most
l
ike
l
y
be
to
set
the
first
and
the
l
ast
peda
l
in
the
signa
l
chain
to
Buffered
Bypass
mode.
Can you hear the difference between a pedal in True
Bypass or Buffered Bypass mode?
Maybe,
maybe
not
–
many
factors
app
l
y:
active
vs.
passive
pick-ups,
sing
l
e-coi
l
vs.
humbucker,
cab
l
e
qua
l
ity,
amp
impedance
and
more.
We
cannot
give
a
sing
l
e
u
l
timate
answer.
Use
your
ears
and
find
the
best
so
l
ution
for
your
setup
!
6.2 Switching between True Bypass and
Buffered Bypass
T
o
set
the
bypass
mode,
proceed
as
fo
ll
ows:
•
•
Disconnect
the
peda
l
and
turn
it
on
its
back.
•
•
Unscrew
the
back
p
l
ate
of
the
peda
l
and
l
ook
for
the
two
sma
ll
dip-switches
in
the
upper
l
eft
corner.
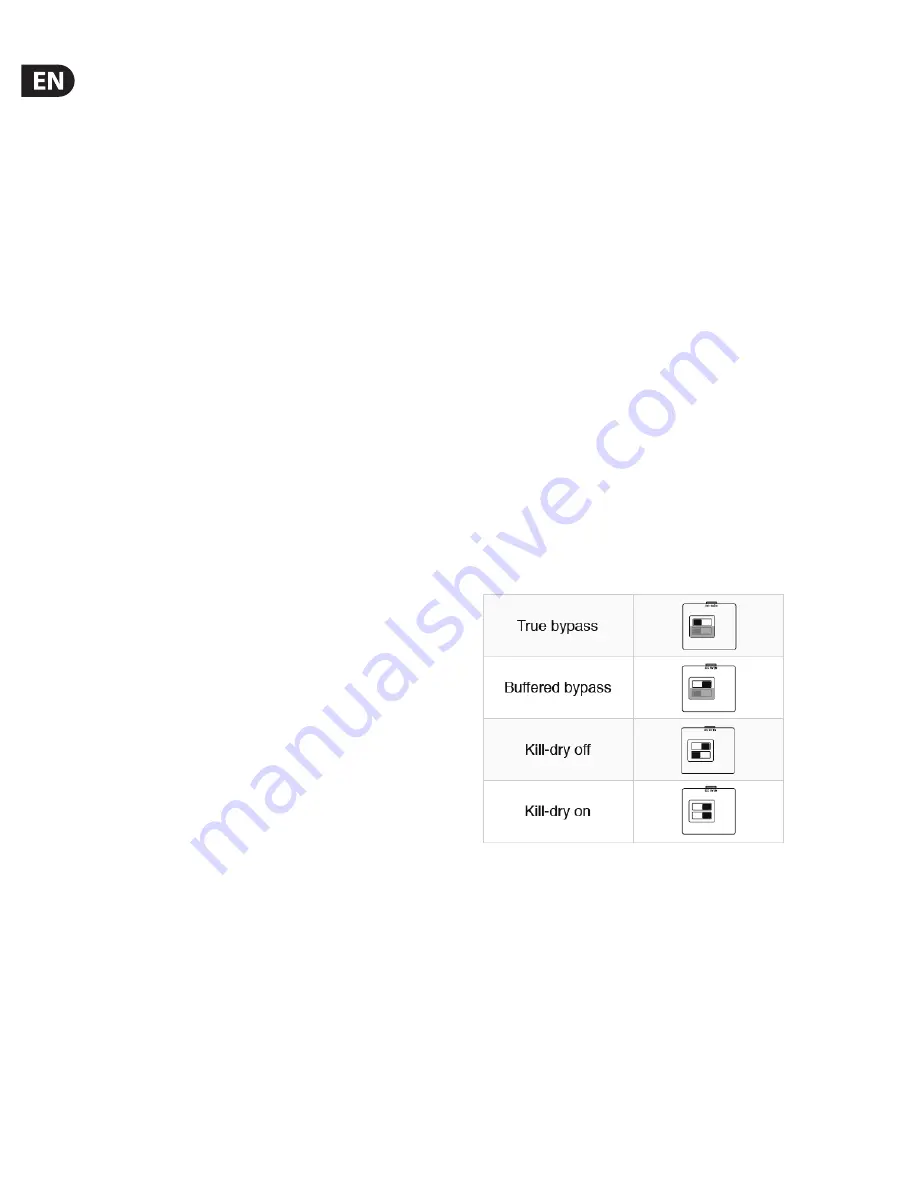
•
•
T
he
upper
D
I
P
switch
(the
one
c
l
oser
to
the
power
in
jack),
switches
between
T
rue
Bypass
mode
(defau
l
t)
and
Buffered
Bypass
mode.
T
he
other
switch
has
no
function.
•
•
Set
the
D
I
P
switch
to
the
desired
position.
•
•
Remount
the
back
p
l
ate.
6.3 Kill-dry on/off
When
you
activate
Ki
ll
-dry,
the
direct
signa
l
is
removed
from
the
peda
l
’s
output.
Use
this
mode
when
you
p
l
ace
your
T
C
El
ectronic
eff
ect
peda
l
in
a
para
ll
e
l
eff
ects
l
oop.
T
o
set
Ki
ll
-dry
mode,
proceed
as
fo
ll
ows:
•
•
Disconnect
the
peda
l
and
turn
it
on
its
back.
•
•
Unscrew
the
back
p
l
ate
of
the
peda
l
and
l
ook
for
the
two
sma
ll
dip-switches
in
the
upper
l
eft
corner.
•
•
T
he
l
ower
D
I
P
switch
(the
one
further
away
from
the
power
in
jack),
switches
between
Ki
ll
-dry
on
and
Ki
ll
-dry
off
mode.
You
can
on
l
y
remove
the
dry
signa
l
from
the
signa
l
path
if
you
have
se
l
ected
Buff
ered
Bypass
mode
using
the
upper
D
I
P
switch
(see
section
6
.2).
Ki
ll
-dry
is
not
avai
l
ab
l
e
in
T
rue
Bypass
mode.
Summary of Contents for Flashback 2
Page 11: ...11 FLASHBACK 2 DELAY User Manual...
Page 12: ......


