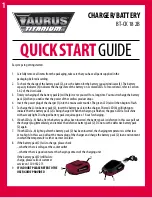
CHARGER/BATTERY
BT-CK 18 2B
QUICK START
GUIDE
Easy steps to getting started.
1. Carefully remove all items from the packaging, take care that you have all parts supplied in the
packaging before discarding.
2. To check the charge of the battery pack (2), press the button for the battery capacity indicator (3). The battery
capacity indicator (4) indicates the charge state of the battery on 3 colored LEDs. For more detail, refer to Section
3.4.2 of the User Guide.
3. Timely recharging of the battery pack(2) will help it serve you well for a long time. You must recharge the battery
pack (2) when you notice that the power of the cordless product drops.
4. Insert the power plug of the charger (1) into the mains socket outlet. The green LED (a) will then begin to flash.
5. To charge the Li-Ion battery pack (2), insert the battery pack into the charger. The red LED (b) will light up to
indicate that the battery pack (2) is being charged. When the charging is finished, the green LED (a) will shine
with a steady light. Discharged battery packs require approx. 1 hour for charging.
6. If both LEDs (a, b) flash after the battery pack has been inserted, the battery pack is defective. In this case pull out
the charger plug immediately and remove the defective battery pack (2). Do not use the defective battery pack
(2) again.
7. If both LEDs (a, b) light up after the battery pack (2) has been inserted, the charging temperature is either low
or too high. In this case, pull out the mains plug of the charger and charge the battery pack (2) in an environment
in which the temperature is either warmer or colder.
8. If the battery pack (2) fails to charge, please check
– whether there is voltage at the socket outlet
– whether there is good contact at the charging contacts of the charging unit
If the battery pack (2)still fails to
charge, please call our customer
service on 1300 922 271.
9.
IF IN DOUBT PLEASE REFER TO THE
USER GUIDE PROVIDED.
2
b
a
1
3
4
1
Summary of Contents for BT-CK 18 2B-1.5 Kit
Page 8: ...7 ...


