background image


10

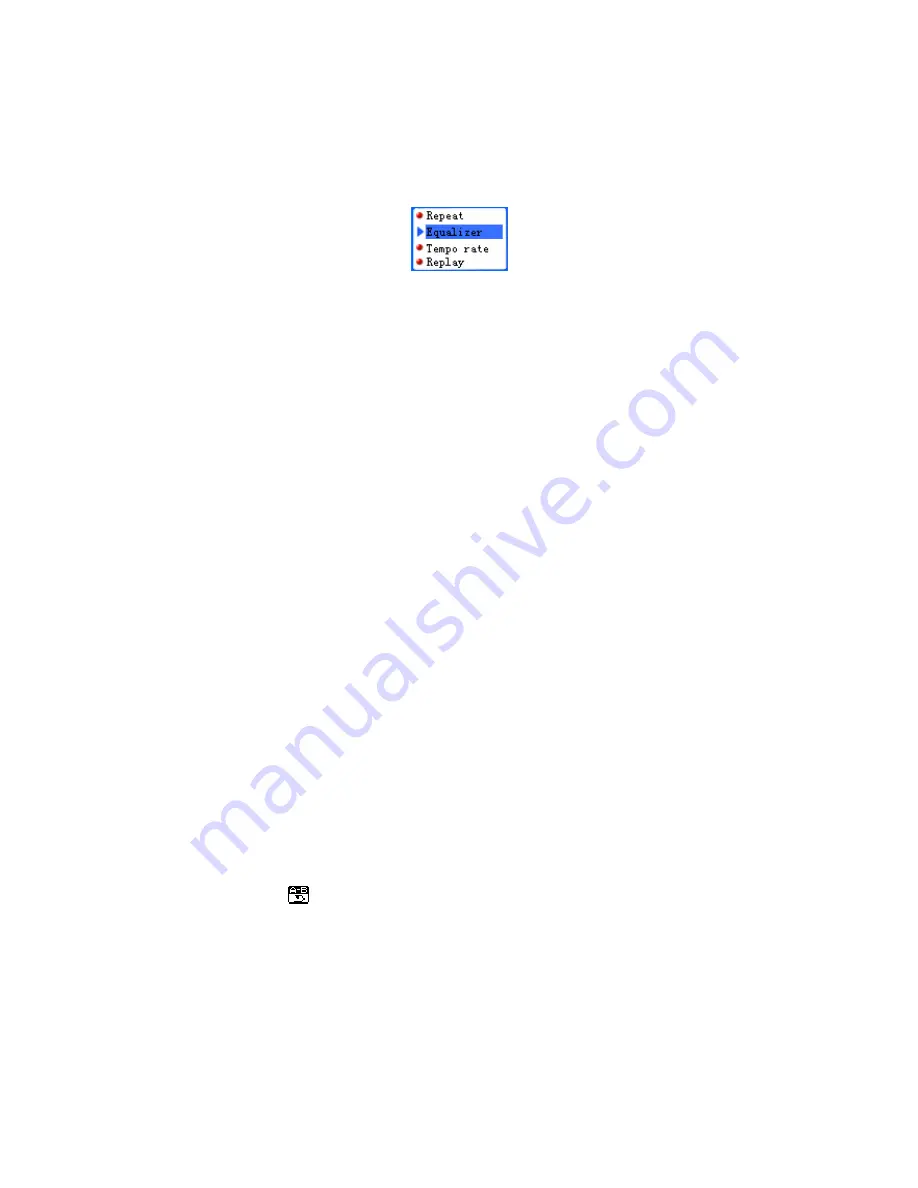
Music Options Submenu 

While music is playing, you can enter the Music Options submenu by pressing the 
MODE button. 


Music Options Submenu 

 
From the Music Options submenu, there are six option settings in which you can change: 


Repeat

: You can select between normal, repeat one, folder (play the music in the 

folder once and the player stops), repeat folder, repeat all (play music in every 
folder over and over), random and intro.   


Equalizer

:  Choose between seven EQ presets:  Natural, Rock, Pop, Classic, Soft, 

Jazz and Dynamic Bass Boost (DBB). 


Tempo Rate

:  Change the tempo that songs are played at. The tempo starts at 

zero (normal speed) and can be increased or decreased up to 8 steps. 


Replay

:  enter the A-B section playback function. (Refer to Section 3.4 for further 

instructions on A-B playback) 


Replay Times

: Select how many times to replay a selected A-B section. 


Replay Gap

:  Select the idle time in between replaying an A-B section.


3.4 Special Functions 

A-B Sectional Playback 

The A-B sectional playback can be used on any sound file. It allows you to choose a 
beginning and ending point within a song and repeatedly replay the sound between those 
two points. You can also choose between features such as how many times you want to 
replay the section and also the idle time between replaying the section. 
 

Manual A-B playback 

First, select and play the music file that you wish to choose a section from. 


While playing the song, select the “A” point by pressing the A-B button at the 
point in the music file you wish to use as the beginning of the section. The icon is 
changed to 

.


Press the A-B button again at the point in the music file to set as the “B” point—
the ending point of the section. 

 
After you select the “B” point, your player will automatically replay the section. 
Depending on your Replay Times mode, your player will replay the section anywhere 

Summary of Contents for M100

Page 1: ...us of the Music Playback menu 9 3 4 Special Functions 10 4 Recorder 12 4 1 Icons on the Voice Recording menu 13 4 2 Button Functions 13 4 3 Submenu of the Recorder Menu 14 4 4 File Formats available 14 5 Voice Playback 14 5 1 Icons in the Voice Playback Menu 15 5 2 Button Functions 15 5 3 Submenus of the Voice Playback menu 16 6 JPEG 17 6 1 JPEG Menu Interface 17 6 2 Button Functions 18 6 3 Submen...

Page 2: ...age numbers 1 1 Included in the Box z Installation CD z USB to computer cable z Tatung M100 player z User Guide z Earphones 1 2 Features y Supports MP3 and WMA music file formats y Synchro lyric capabilities listen to your music as the lyrics fly across the screen in perfect synchrony easy to learn the lyrics y Built in Microphone with easy and high quality recording y Supports MTV video file form...

Page 3: ...play Image Video File Format Image File Video File JPEG MTV Recording File Format ADPCM Sound Effects Speed Equalizer 16 levels 7 preset channels Natural Rock Pop Classic Soft Jazz and DBB Power Built in Battery Playback time full battery USB Charging time Rechargeable Lithium ion 550mA 8 hours backlight on 14 hours backlight off 3 hours System Requirements MS Windows MAC OS Linux 98 SE ME 2000 XP...

Page 4: ...ssing the MODE button To begin transferring files to your player open your computer s File Manager Your Tatung M100 should be shown as a Removable Disk under My Computer Note that if you are using a MAC it should automatically appear on the desktop Then you can now select files and copy them over onto your player While transferring files your Tatung M100 will display the Download Screen shown belo...

Page 5: ... and hold the button to lock unlock the button POWER ON Turn the power on off A B Hot Recording Button Hot recording is referencing the ability to immediately enter the Recording Menu and start recording from almost anywhere 1 7 The Standard Operation Menu The Tatung M100 interface is Menu based with each menu having its own particular function In the user guide two types of menus are referenced T...

Page 6: ... idle for over 5 seconds it will auto quit that submenu 2 Main Menu Off of the main menu you can choose between 5 major functions by entering their subsections Music Recorder Voice JPEG and Settings Main Menu Screen Press the PREVIOUS NEXT buttons to scroll through the function menus Press the MODE button to enter highlighted function menu A B button acts as a hot recording button You may press it...

Page 7: ...usic Interface Menu and select the folder the file is stored in by pressing the MODE button selecting Local Buttons Operation Long Press Lock unlock player buttons EQ Press No function Long Press Enter the recording function and start recording A B Press Enter the recording function and start recording Long Press Turn the player on off Play Pause Press No Function Long Press No Function Mode joyst...

Page 8: ... the current music file is playing at indicates the current repeat mode shown is repeat one indicates the position of the song in the album In the song currently shown it is the first song out of fifteen total indicates the current EQ setting shows the current position in the song over the total playing time of the song indicates that the current song has lyrics available refer to Section 3 4 My H...

Page 9: ...folder you wish to read from and select it by pressing the MODE button To delete a music file simply enter the delete menu by pressing the MODE button select the music file you wish to delete and then select the delete function You can also delete all the music files stored in the current folder by selecting the delete all function Buttons Operations Long Press Lock Unlock the player EQ Press Chan...

Page 10: ... replay a selected A B section Replay Gap Select the idle time in between replaying an A B section 3 4 Special Functions A B Sectional Playback The A B sectional playback can be used on any sound file It allows you to choose a beginning and ending point within a song and repeatedly replay the sound between those two points You can also choose between features such as how many times you want to rep...

Page 11: ...u are done recording your own voiceover the player will automatically begin playing the A B section followed by your voiceover You must then again press the A B button to stop playing the section Note The replay times and idle time between playing the section over and over again is dependent on the settings on the Music Options Menu Please refer back to section 3 3 for instructions on how to chang...

Page 12: ... into WAV and ACT formatted files How to Record There are two ways to start recording on your Tatung M100 player The first is hot button recording You can press the A B button from any menu to immediately enter the recording menu and start recording The only exception to this rule is if you are currently playing a sound file the A B button will begin A B playback The second method is to manually e...

Page 13: ...of the currently recording file 2004 10 29 08 56 is the date and time the file was recorded 4 2 Button Functions Buttons Operations Long Press Lock Unlock the player EQ Press No Function Long Press After finished recording press to save recorded file A B Press Start Stop recording Long Press If there is not a recording to save press to turn player off If a recorded file is waiting to be saved pres...

Page 14: ...mats available The Tatung M100 can record sound in four different formats Fine REC 32k bit rate WAV file Long REC 8k bit rate ACT file Fine VOR 32k bit rate VOR file Long VOR 8k bit rate VOR file Note that when using the VOR file format the player will ONLY record when it detects sound Once you start recording the player will not start until it detects sound The recorder will also stop the recordi...

Page 15: ...ice Menu Interface 00 00 03 the time display for playing the recorded sound 01 15 represents the order of current recorded file and the total number of recorded files in the current directory REC01 is the filename and 2004 3 15 10 23 is the date and time when the file was created 5 2 Button Functions ...

Page 16: ... by pressing the MODE button To delete a sound file simply enter the delete menu by pressing the MODE button select the file you wish to delete and then select the delete function You can also delete all the sound files stored in the current folder by selecting the delete all function Sound Options Submenu Buttons Operations Long Press Lock Unlock the player EQ Press No Function Long Press A B Pre...

Page 17: ... and intro Tempo Rate Change the tempo that songs are played at The tempo starts at zero normal speed and can be increased or decreased up to 8 steps Replay Enter the A B section playback function Refer to Section 3 4 for further instructions on A B playback 6 JPEG In the JPEG menu you can store and view your favorite photos To play a slideshow simply highlight which photo you wish to begin on and...

Page 18: ...oto By selecting Auto Play your Tatung M100 will move from photo to photo for you You will be prompted to select the duration for each photo to be displayed from 1 10 seconds Delete Here you can delete a photo file First enter the Submenu and select the Delete function You will then be prompted to select which file you wish to delete Highlight the file and press the MODE button again You will then...

Page 19: ...ting Details Clock Here you can set the time and date so your recorded files will be stamped accurately Buttons Operations Long Press Lock Unlock the player EQ Press No Function Long Press A B Press Enter the recording interface and start recording Long Press Turn the player on off Play Pause Press Exit to the main menu Long Press Exit to the main menu Mode joystick Press Enter submenu Long Press ...

Page 20: ... You can choose between 0 and 120 minutes Replay Mode Select the replay mode for the A B playback function Choose between automatic and manual Refer to section 3 4 for further instructions Memory Info View the available storage space in your Tatung M100 The top number refers to the storage space left in MB The bottom number refers to the percent of the space taken up Firmware Version View the info...

Page 21: ...21 A dialogue will then pop up to tell you that you have successfully upgraded Safely remove your Tatung M100 from the computer ...

Reviews: