TASCAM US-800
25
In this chapter, we explain how to create
low latency mixes for monitoring, including
how to use the various settings and specific
examples.
Uses
By using this unit’s digital mixer for
monitoring, inputs can be monitored with
very little delay.
For example, this is useful when a performer
wants to monitor the output of a guitar that
is connected to an input on this unit.
Ordinarily, sending the signal from the unit to
the computer by USB through an application
on the computer and then back to the unit
by USB again takes approximately 20 ms or
longer.
In this case, the performer does not hear the
sound of the guitar until approximately 20 ms
or longer have passed, making it very difficult
to play.
This unit has a digital mixer that can be used
to avoid this situation. Using this mixer, you
can mix the input signals with playback
signals from the computer and output them
from the unit.
The input signals sent to the mixer do not
get sent over USB, allowing them to be
mixed and output with very little latency. As
a result, the delay until the performer hears
the sound of the instrument is reduced to an
insignificant amount.
Moreover, the digital mixer includes faders,
pan sliders, mute and solo buttons, as well
as level meters, allowing you to tailor the
monitoring mix as desired.
Using the digital mixer for
monitoring
In this example, a guitar is playing along
with a backing track output from a computer
application. The sound of the guitar is mixed
with the playback sound of the backing track
from the application, and the mix is output
to headphones for monitoring. The guitar
is connected to the MIC/INST 1 jack and
headphones are connected to one of this
unit’s PHONES jacks.
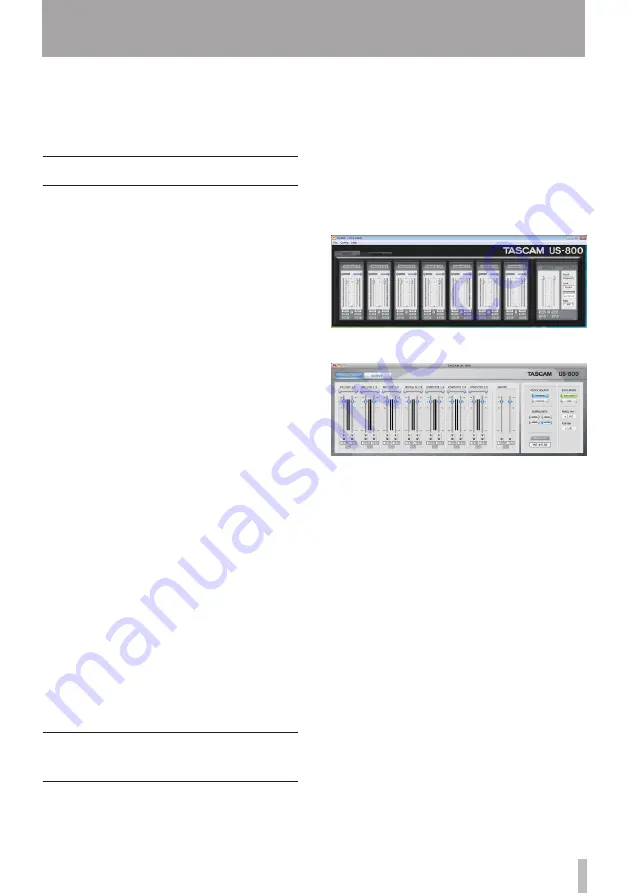
1 Open the unit’s control panel, and click
the “
MIXER
” tab to open the “
MIXER
”
screen.
Windows control panel MIXER tab
Mac control panel MIXER tab
2 Play the guitar and confirm that the
“
MIC/INST
1
” meter moves.
3 Output the sound of the computer
application to
US-800
1/2
port for
monitoring. The “
Computer
1/2
”
channel meters on the “
MIXER
” screen
should move when you do so.
4 Click the “
OUTPUT
” tab.
5 When the output tab screen opens, in
the “
PHONES
” area of the three output
sections on the left, set the output
source selector to “
Mixer
”. This sends
the mixer output to the headphones
output jacks.
Set this way, the mixed sound of the
computer application playing back and
the MIC/INST 1 input signal is sent to
the headphones.
6 – Using the mixer for low-latency monitoring


