background image

4 – Recorder

 TASCAM 2488 

User’s Guide

 45

2

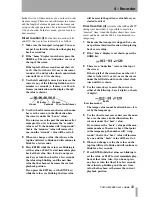
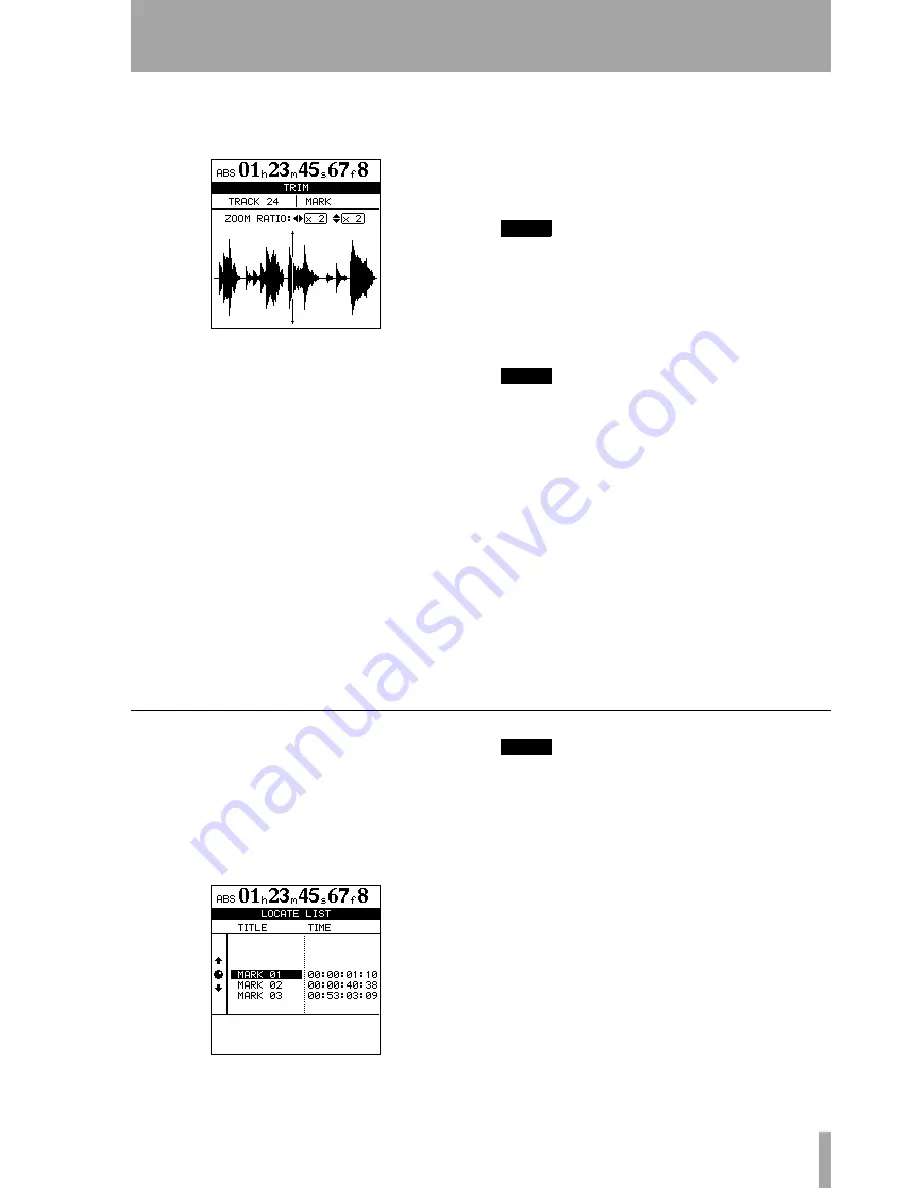
Press the 

TRIM

 key. The display shows 

TRIM


and a view of the waveform of the currently 
selected track at the active mark.

3

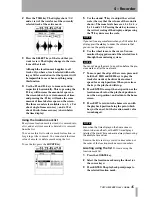
Press the 

SELECT

 key of the track that you 

want to view. The display changes to the wave-
form of that track.

Although the location mark applies to all 
tracks, if you have a track selected with noth-
ing or little recorded on it at that point, it will 
be impossible to see or hear anything using 
this function.

4

Use the 

Ó

 and 

Á

 keys to zoom out and in 

respectively horizontally. This is, pressing the 

Á

 key will increase the amount of space on 

the screen taken by a certain amount of time, 
and pressing the 

Ó

 key will make the same 

amount of time take less space on the screen. 
The three zoom levels available are: x 1, x 2 at 
about single-frame accuracy), and x 32 at 
about 10-sub-frame accuracy (shown below 
the time display).

5

Use the 

§

 and 

 keys to adjust the vertical 

scale (the way that the volume of the sound is 
shown). The zoom levels here are x 1, x 2, x 4, x 
8, x 16 and x 32. Pressing the 

§

 key increases 

the vertical scaling of the display, and pressing 
the 

 key decreases the scale.

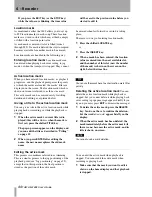
NOTE

If you can’t see any waveforms when you first enter this 
display, press the 

§

 key to zoom the volume so that 

you can see the quiet passages.

6

Use the wheel to move the cursor. You can 
monitor the jogged sound of the selected track 
through the monitoring system.

NOTE

You cannot move the mark to a position before the pre-
vious mark or after the next mark.

7

To move past the edge of the screen, press and 
hold the 

F FWD

 and 

REW

 keys to play the 

tracks forwards or backwards at normal 
speed for a rough position. When you release 
the keys, the playback will stop.

8

Press 

ENTER

 to accept the new position as the 

location mark value (the playback position is 
now the new position), and return to the home 
screen.

9

Press 

EXIT

 to return to the home screen with 

the playback position being the point which 
has just been set, but the location mark value 
is unchanged.

Using the location mark list

Every time a location mark is stored, it is entered into 
a list, and every time a mark is deleted, it is removed 
from the list.

You can use this list to select a mark for location, or 
for giving a title to a mark. You cannot edit the time 
value of a mark, or delete a mark using the list.

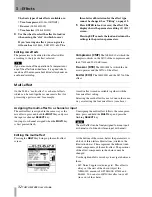
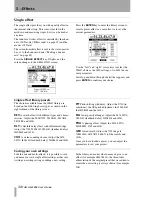
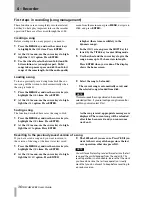
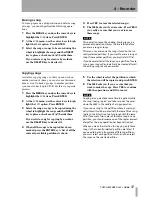
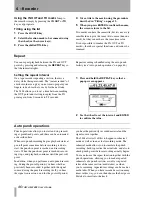
To see the list, press the 

LOCATE

 key:

NOTE

Even when the time display on the home screen is 
shown in bars and beats, or the MTC time display is 
selected, the marks’ time values are always shown using 
the absolute time values.

Items in the list are always sorted in time order, not 
the order of the location mark names or numbers.

Locating using the list 

To locate using the 

location mark list:

1

Press the 

LOCATE

 key.

2

Select the location mark using the wheel (or 
the cursor keys).

3

Press 

ENTER

. The playback point jumps to 

the selected location mark.

Summary of Contents for Portastudio 2488

Page 1: ...the appliance The lightning flash with arrowhead symbol within an equilateral triangle is intended to alert the user to the presence of uninsulated dangerous voltage within the product s enclosure tha...

Page 2: ...at plugs convenience receptacles and the point where they exit from the apparatus 11 Only use attachments accessories specified by the manufacturer 12 Use only with the cart stand tripod bracket or ta...

Page 3: ...CAUTIONS IMPORTANT for U K Customers DO NOT cut off the mains plug from this equipment If the plug fitted is not suitable for the power points in your home or the cable is too short to reach a power p...

Page 4: ...ely confined in the protective housings The label required in this regulation is shown in 1 CAUTION DO NOT REMOVE THE PROTECTIVE HOUSING USING A SCREWDRIVER USE OF CONTROLS OR ADJUSTMENTS OR PERFOR MA...

Page 5: ...7 Output selection 27 Monitoring 27 Monitor selection 27 Mono monitoring 28 Record source monitoring 28 Monitor muting 28 Soloing and toggle 29 Sub mix 29 Scene memories 29 3 Effects Mic effects 31 MI...

Page 6: ...ple 55 Virtual tracks 56 Varispeed operations pitch and SSA 57 Pitch 58 To use the set pitch SSA Slow Speed Audition 58 To use the SSA 5 Mastering Pre mastering 59 Recording the pre master 59 Exiting...

Page 7: ...r peak hold time Meter release time Shift key behavior Mixer preferences 84 Fader matching Digital input Recorder 85 User word 85 10 Specifications etc Block diagram 86 Level diagram 87 Dimensional dr...

Page 8: ...s 24 track recorder incorporates many advanced features loca tion memories rehearsal and auto punch modes undo and redo operations and virtual tracks Read this section to understand its operation 5 M...

Page 9: ...trademarks of Apple Computer All other trademarks are the property of their respec tive holders An overview of the 2488 The road map above can help you find your way around the 2488 At first the array...

Page 10: ...using a microphone this may cause acoustic feed back so you should use headphones at this time Most sound professionals recommend that you do not use headphones for monitoring all the time even thoug...

Page 11: ...acking materials For this reason we strongly recommend that you save all the packing materials that came with the 2488 in case you need to transport it in the future In addition when transporting the...

Page 12: ...key while you are looking for the next key it will stay on You can change this behavior so that the SHIFT key becomes a non latching key that is you have to press and hold it while you are pressing th...

Page 13: ...n this manual when we refer to CD R and CD RW discs we always include CD R Digital Audio and CD RW Digital Audio even when this is not explicitly stated CD R discs can be recorded once only Once they...

Page 14: ...ps clean don t touch them For the same reason don t leave the disc tray opened unnecessarily Additional notes with regard to CD R and CD RW discs There are additional precautions that you should take...

Page 15: ...will help you later when you come to do more complex work with the 2488 New song To make sure we start with a clean slate we ll cre ate a new song NOTE The 2488 is shipped from the factory with a new...

Page 16: ...ve basses active basses should use a 1 4 LINE jack at the rear of the unit Only use this front input jack for electric guitars and basses and do not plug these instruments into any other jacks 1 Press...

Page 17: ...Then turn the TRIM counterclockwise a little more If you want to tune the guitar using the 2488 see Tuner on page 35 3 Press and hold the INPUT H key so that it starts to flash While holding it down...

Page 18: ...e the sound with and without the equaliza tion 9 Press and hold down the RECORD key and press the PLAY key The PLAY and RECORD indicators above the transport keys both light and the REC key of track 1...

Page 19: ...HIFT fol lowed by the MAP key use the cur sor keys to view the mappings for tracks 13 through 24 2 Play the song to a little before the place where you want the guitar solo to start Use fader 1 to adj...

Page 20: ...n and effect facilities pro vided by the 2488 6 Press the RHSL key to enter rehearsal mode When this mode is active you do not actually record when the RECORD key and PLAY keys are pressed the RECORD...

Page 21: ...flash It is also possible to reverse the order press and hold a channel s SELECT key and press the appropriate input key An input can be assigned to more than one channel but of course a channel cann...

Page 22: ...der A mute key Solo facilities Input channels Like the 24 track channels the eight inputs are pro vided with phase digital pad gain EQ effect sends etc They are not provided with physical faders but t...

Page 23: ...lected channel s EQ settings There is also an on off soft switch provided at the upper left of the screen to allow A B comparison of the equalized and unequalized signals Press SHIFT YES to turn it on...

Page 24: ...ion to the center In the case of linked channels the pan position both of the highlighted channel and the channel to which it is linked will be centered Faders The faders cannot be set in this screen...

Page 25: ...nels EQ Digital pad gain Effect send levels and pre post position SELECT keys Record arming muting and soloing are carried out separately for each linked pair Pan and phase are linked but these can be...

Page 26: ...d the SHIFT key 2 Press the STEREO key 3 Use the cursor keys and wheel to select and adjust the parameters for the effect Note that the last parameter is an on off switch When set to OFF the dynamics...

Page 27: ...a pair of tracks for output from these terminals though NOTE When this function is on the channel and stereo faders have no effect Monitoring Monitoring is a vital part of the whole recording and pro...

Page 28: ...effects in their headphones it helps with the recording in many cases The answer is to add some effects to the channel allowing the artiste to hear the effected sound Meanwhile the sound is actually...

Page 29: ...nce mix see Making a bounce mix on page 49 1 Press and hold down the source INPUT key of an input to be assigned to the sub mix and press the SUB MIX key above the STEREO fader to assign the input to...

Page 30: ...ibrary or SAVE current set tings to the library 4 When saving use the wheel to select a setting which you will overwrite or select the new scene option to create a new library entry When loading a sce...

Page 31: ...d MICX4 EFFECT keys MICX8 located above the channels Press and hold one of these keys and then press the other one If the four mic effects multi effect setting is already selected the multi effect is...

Page 32: ...i effect is a chain of effects which can be used together as one insert effect for processing a guitar sound for example A multi effect is made available together with the four mic effect setting Sele...

Page 33: ...Y and DEPTH of this exciter effect You can also SWITCH this effect on or off in or out of the chain PIT Pitch shifter Adjust the PITCH in semitones and use the FINE setting for fine tuning Set the MIX...

Page 34: ...olumn of the library screen REV A reverb effect with different types and charac teristics Adjust the ROOM TYPE PRE DELAY REV TIME DIFFUSION and LEVEL DLY A flexible delay effect with different setting...

Page 35: ...hen a note is played the 2488 tuner displays the note closest to that note and the bars under the name show whether the actual note is more sharp the bars to the right of the center are highlighted or...

Page 36: ...enu use the cursor keys to high light the LOAD option Press ENTER 3 Select the song to be loaded The current song is automatically saved and the selected song is loaded from disk NOTE This menu reads...

Page 37: ...lso back up to CD R but this is a separate process 1 Press the MENU key and use the cursor keys to highlight the SONG item Press ENTER 2 At the SONG menu use the cursor keys to high light the COPY opt...

Page 38: ...peration If you change your mind later on you can restore this backed up version Remember that you cannot undo this operation Protecting a song When a song is protected recording is not possible the t...

Page 39: ...ame position to retake after a successful take and you want to return to the point where recording started to check the take when you are recording a number of different tracks in turn all to start fr...

Page 40: ...is difficult to hear the track you may want to monitor in mono see Monitoring on page 27 Fast forward and rewind On a tape recorder you can use the fast forward and fast rewind keys to spool through a...

Page 41: ...witch will drop out of record mode into playback mode Dropping out of record mode When record mode has been entered in any of the ways described above it is possible to drop out of the recording mode...

Page 42: ...he IN or OUT point depending on which was pressed 3 Press the SELECT key of the track that you want to view The display changes to the wave form of that track 4 Follow the instructions in Jog position...

Page 43: ...ew seconds the values stop blinking and the new time value that has been set becomes the current playback position If you press the EXIT key or the STOP key while the values are blinking the time valu...

Page 44: ...iting as explained below Giving a title to the active location mark You can give a title to the active location mark while playing back or recording or while the playback is stopped 1 When the active...

Page 45: ...r the jogged sound of the selected track through the monitoring system NOTE You cannot move the mark to a position before the pre vious mark or after the next mark 7 To move past the edge of the scree...

Page 46: ...s 1 Press and hold the REPEAT key so that a popup screen appears 2 Use the wheel to set the interval and ENTER to confirm the value Auto punch operations Punch operations allow you to start and stop r...

Page 47: ...ts have been done since then It allows you to select the takes from this punch ses sion in the same way as described later in this sec tion Checking the punch points When the punch points have been se...

Page 48: ...nue to repeat up to 99 times until you press STOP allowing you to select from a list of multi takes see Checking the take on page 48 The time between repeat takes is about one second You cannot change...

Page 49: ...on page 29 Making a bounce mix 1 Press the shifted BOUNCE key located above the STEREO fader The words BOUNCE MODE are displayed on the home screen while bounce is active 2 Select the destination Pre...

Page 50: ...DIT TRK key below the monitor controls 3 Use the wheel to highlight the track editing function you will be using and press the ENTER key 4 Select the appropriate values as described below 5 Press YES...

Page 51: ...IM key combination to enter this function easily COPY INSERT This function takes the section of a track or tracks marked by the IN and OUT points copies it and places it on the chosen track or tracks...

Page 52: ...he SHIFT INSERT key combination to enter this function easily MOVE INSERT This function takes the section of a track or tracks marked by the IN and OUT points and moves it to the chosen track or track...

Page 53: ...on the material which followed the OUT point now moved to follow the IN point Material which was between the IN and OUT points is deleted The result is therefore shorter than the original There is onl...

Page 54: ...he IN and OUT points do not have any meaning here There is only one value that you can change Src Trk Select an individual track 1 through 24 a pair of tracks 1 2 3 4 5 6 etc or all the tracks 1 24 Pr...

Page 55: ...O key 2 Use the wheel to scroll down to the step to where you want to undo here it s 11 the first retry of the original take 3 Press ENTER All steps up to and including the selected step are now undon...

Page 56: ...e stereo channel SELECT keys 13 14 through 23 24 changes between the odd and even numbered channels of that pair 3 Use the wheel to choose which virtual track will be assigned to the disk track and be...

Page 57: ...f you want to assemble a track for the whole song you could assign the three different takes of the part to three different active tracks and use the track editing functions to copy and paste the good...

Page 58: ...once again to turn off the pitch change SSA Slow Speed Audition 1 Press and hold the PITCH SSA key for about a second and release it The indicator lights and the display changes 2 If the SLOW SPEED s...

Page 59: ...tions are disabled Jog and trim are disabled Pitch control and SSA are disabled Direct location is disabled Recording is carried out as explained below Recording the pre master To record the pre maste...

Page 60: ...o the end of the master track REW and F FWD move the playback position back ward or forward at 10x 50x 100x or 1000x the normal playback speed as usual but the wind speed is not shown on screen STOP s...

Page 61: ...ing lengths of silence between tracks ranging from 0 to almost 10 seconds Remember that whichever method you use to record your CDs you can record a maximum of 99 tracks on one CD the minimum length o...

Page 62: ...n unfinalized disc before you start the process 1 Make sure the 2488 is in normal mode that is not in the master check mode or mastering mode On the AUDIO CD menu move the cursor to FINALIZE and press...

Page 63: ...to set the gap between tracks on the CD press EXIT to return to the song order screen 7 Use the and keys to move the cursor to the gaps between the songs on the CD 8 Use the wheel to set the time in...

Page 64: ...when the CD player function is first entered the track number will always be 1 The stereo meters also show the level of the audio recorded on the disc The 2488 transport controls are used to con trol...

Page 65: ...hard disk may be divided into partitions When a partition is selected it is said to be active and data from other partitions is not accessible To select a partition 1 With the transport stopped from...

Page 66: ...once again whether you are really sure you want to format the disk Press ENTER to continue with the format and EXIT to stop the process NOTE While the format operation is taking place the HD indicato...

Page 67: ...files Standard MIDI Files and backup data respectively NOTE When you perform this operation all existing data on the FAT partition is destroyed This operation cannot be undone Before performing this o...

Page 68: ...ect the 2488 to the computer The 2488 will appear as a removable disk on your computer system 3 Drag and drop the wave file s from your com puter s disk to the 2488 4 You can now disconnect the 2488 f...

Page 69: ...R NOTE Note that there is no SMF export function the 2488 cannot create or edit MIDI sequences You can repeat step 3 as many times as you like fol lowed by steps 6 through 8 as many times as you like...

Page 70: ...l directory root of a data disc with no other files on the disk Files in subdirectories cannot be imported When these files are imported they are assigned to a virtual track that must then be assigned...

Page 71: ...Select the virtual track to be exported and press ENTER 3 Select the resolution of the resulting file 16 or 24 bits The resolution of the exported data affects the size of the file 4 Press ENTER to c...

Page 72: ...g to disk Press MENU select SONG and then select SAVE 2 Press ENTER and a popup appears telling you that the song is being saved The HD indi cator lights as the song is saved The display shows the hom...

Page 73: ...use the USB connection to import and export audio files See Disk manage ment and file import export on page 65 for details The 2488 and USB Data transfer is carried out at USB 2 0 speeds but if your c...

Page 74: ...disabling USB on page 65 The 2488 will appear as a removable disk on your computer system 6 Drag and drop the song file from the 2488 to your computer s disk You can then archive it burn a backup CD R...

Page 75: ...nd then press ENTER The HD indicator flashes as the song is copied from the FAT partition to the native partition 8 When the copy is finished the song is auto matically loaded and becomes your current...

Page 76: ...h the audio inputs of the 2488 SMF The Standard MIDI File format provides a common file format allowing MIDI songs to be transferred between different sequencers and sequencing soft ware etc These fil...

Page 77: ...this fader REVERB The send level of this part to the tone gen erator s internal reverb effect CHORUS The send level of this part to the tone gen erator s internal chorus effect NOTE The reverb and cho...

Page 78: ...d the DELETE key to delete lines Tapping the tempo In addition to setting numerical values for tempos you can also tap along to the music in order to set the tempo 1 With the transport stopped at the...

Page 79: ...be a MIDI note output to an external tone generator or it can be an audio click 1 With the transport stopped from the SYNC MIDI screen select METRONOME and press ENTER 2 You can select the MODE of the...

Page 80: ...lected section is shown at the bottom of the display LENGTH if you choose a length different to the default length of the selected section the number of bars measures shows an asterisk following it NO...

Page 81: ...um kit is retained for the whole song With the PATTERN ARRANGE screen displayed press SHIFT and ENTER Twenty different kits are available for use including Latin sets famous drum machine sounds and so...

Page 82: ...by the 2488 This can be either 24 film 25 EBU TV 29D 29 fps drop frame used with NTSC color 29ND 29fps non drop also used with NTSC color or 30 NTSTC monochrome and often used for audio only work OFF...

Page 83: ...this REMOTE option allows the setting of a number of parameters connected with remote control of the 2488 MIDI IN MODE allows you to specify what will happen when MIDI messages are received The choic...

Page 84: ...ighlight the parameter and the wheel to change it TIP The KEEP setting is useful if you want a permanent record of the highest value but you cannot keep your eyes on the meters during the whole take o...

Page 85: ...TER key to confirm the assignment This assignment is not made until the ENTER key is pressed with the digital source connected and is not stored as part of the song information The 2488 can accept dig...

Page 86: ...ak Level intp Stereo Mono TRK1 2 TRK23 24 Fader intp Main Sub TRK Meter 3 Band EQ Pad Gain Insert REC SOURCE MONITOR On Mute Un Select Solo On Meter T G No Input SUBMIX Bounce Input1 8 Track Mixer x24...

Page 87: ...0 0 10 20 PRE POST 20dBu 20 10 0 10 20 0 dBFS 16dBFS DAC dBV dBu 7dBu 2dBu MONITOR OUT 9dBu 14dBu 20 10 0 10 20 0 10 20 30 dBFS 20 10 0 10 20 0 10 20 30 dBFS 0 dBFS 16dBFS DAC dBV dBu 7dBu 9dBu 20 10...

Page 88: ...20dBu MIC LINE inputs E to H 1 4 TRS connectors input H also has a GUITAR front panel unbalanced 1 4 jack see below Input impedance 4k Input level 43dBu MIC to 4dBu LINE Nominal input level 4dBu Maxi...

Page 89: ...INPUTS A to H STEREO MONITOR EFFECT SEND 20Hz 20kHz 1 0 1 0dB trim at min Noise level inputs with 150 terminator faders at nominal 20kLPF A curve INPUTS A to H STEREO EFFECT SEND 90dBV MONITOR 82dBu t...

Page 90: ...90 TASCAM 2488 User s Guide Notes...

Page 91: ...10 Specifications etc TASCAM 2488 User s Guide 91...

Page 92: ...pa CP 09810 Mexico DF TEAC UK LIMITED Phone 44 1923 438880 www tascam co uk 5 Marlin House Croxley Business Park Watford Hertfordshire WD1 8TE U K TEAC DEUTSCHLAND GmbH Phone 49 611 71580 www tascam d...

Reviews: