background image

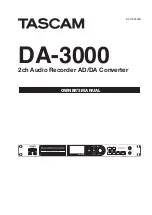
TASCAM  DA-3000

 3

IMPORTANT SAFETY INSTRUCTIONS

•  The apparatus draws nominal non-operating power 

from the AC outlet with its POWER or STANDBY/ON 

switch not in the ON position.

•  The mains plug is used as the disconnect device, the 

disconnect device shall remain readily operable.

•  Caution should be taken when using earphones or 

headphones with the product because excessive 

sound pressure (volume) from earphones or 

headphones can cause hearing loss.

•  If you are experiencing problems with this product, 

contact TEAC for a service referral. Do not use the 

product until it has been repaired.

CAUTION

•  Do not expose this apparatus to drips or splashes.
•  Do not place any objects filled with liquids, such as 

vases, on the apparatus.

•  Do not install this apparatus in a confined space 

such as a book case or similar unit.

•  The apparatus should be located close enough to 

the AC outlet so that you can easily grasp the power 

cord plug at any time.

•  If the product uses batteries (including a battery 

pack or installed batteries), they should not be 

exposed to sunshine, fire or excessive heat.

•  CAUTION for products that use replaceable lithium 

batteries: there is danger of explosion if a battery is 

replaced with an incorrect type of battery. Replace 

only with the same or equivalent type.

WARNING

•  Products with Class 

!

 construction are equipped 

with a power supply cord that has a grounding 

plug. The cord of such a product must be plugged 

into an AC outlet that has a protective grounding 

connection.


8

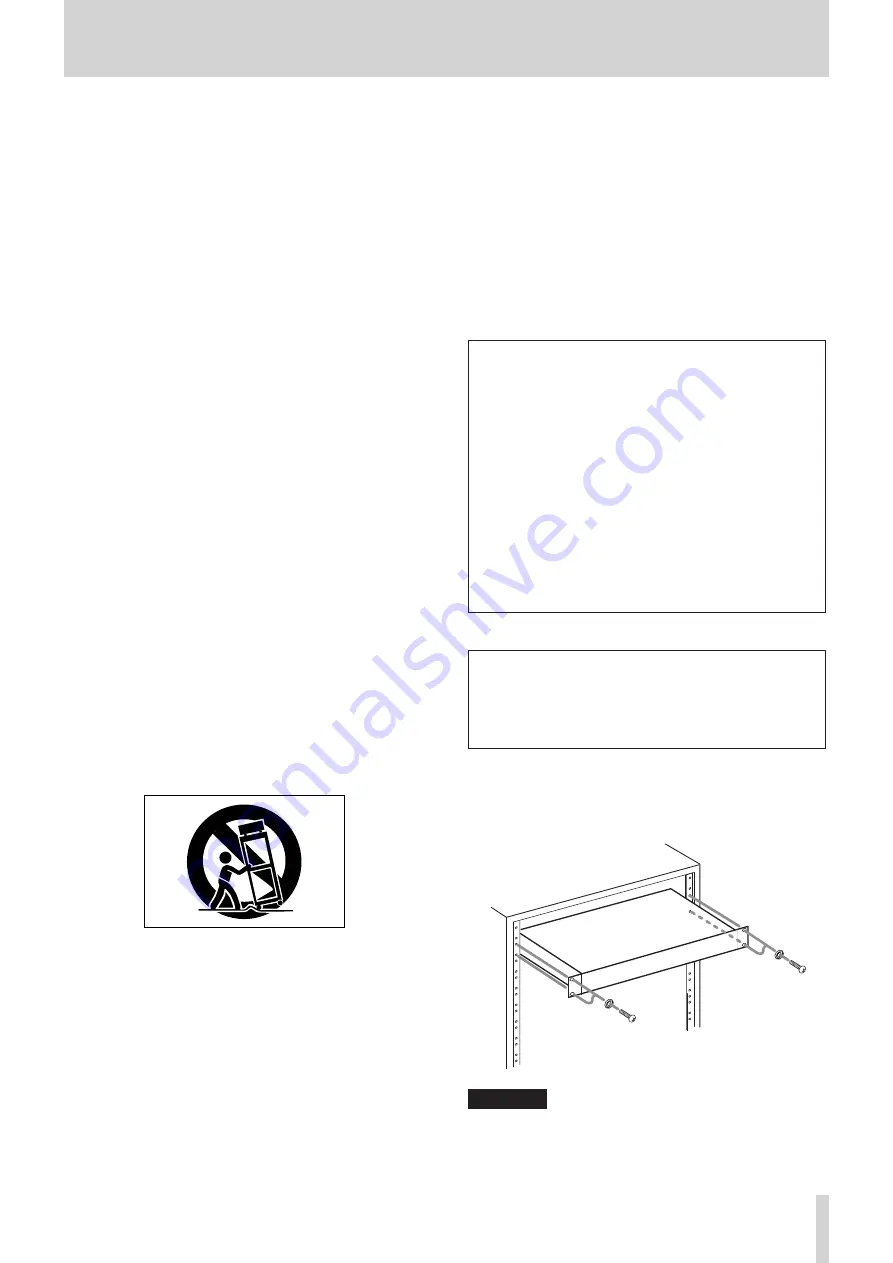
RACK-MOUNTING THE UNIT

Use the supplied rack-mounting kit to mount the unit in a 

standard 19-inch rack, as shown below.
Remove the feet of the unit before mounting.

CAUTION

•  Leave 1U of space above the unit for ventilation.
•  Allow at least 10 cm (4 in) at the rear of the unit for 

ventilation.


1  Read these instructions.

  2  Keep these instructions.

  3  Heed all warnings.

  4  Follow all instructions.

  5  Do not use this apparatus near water.

  6  Clean only with dry cloth.

  7  Do not block any ventilation openings. Install in 

accordance with the manufacturer's instructions.

  8  Do not install near any heat sources such as radiators, 

heat registers, stoves, or other apparatus (including 

amplifiers) that produce heat.

  9  Do not defeat the safety purpose of the polarized 

or grounding-type plug. A polarized plug has two 

blades with one wider than the other. A ground-

ing type plug has two blades and a third grounding 

prong. The wide blade or the third prong are pro-

vided for your safety. If the provided plug does not 

fit into your outlet, consult an electrician for replace-

ment of the obsolete outlet.

 10  Protect the power cord from being walked on or 

pinched particularly at plugs, convenience recep-

tacles, and the point where they exit from the appa-

ratus.

 11  Only use attachments/accessories specified by the 

manufacturer.

 12  Use only with the cart, stand, tripod, bracket, or table 

specified by the manufacturer, or sold with the appa-

ratus. When a cart is used, use caution when moving 

the cart/apparatus combination to avoid injury from 

tip-over.

 13  Unplug this apparatus during lightning storms or 

when unused for long periods of time.

 14  Refer all servicing to qualified service personnel. 

Servicing is required when the apparatus has been 

damaged in any way, such as power-supply cord or 

plug is damaged, liquid has been spilled or objects 

have fallen into the apparatus, the apparatus has 

been exposed to rain or moisture, does not operate 

normally, or has been dropped.

Summary of Contents for DA-3000

Page 1: ...D01185420A DA 3000 2ch Audio Recorder AD DA Converter OWNER S MANUAL...

Page 2: ...radio communications Operation of this equipment in a residential area is likely to cause harmful interference in which case the user will be required to correct the interference at his own expense C...

Page 3: ...feet of the unit before mounting CAUTION Leave 1U of space above the unit for ventilation Allow at least 10 cm 4 in at the rear of the unit for ventilation 1 Read these instructions 2 Keep these instr...

Page 4: ...eries could rupture or leak causing fire injury or stains around them Do not carry or store batteries together with small metal objects The batteries could short causing leak rupture or other trouble...

Page 5: ...ators should be disposed of separately from the municipal waste stream via designated collection facilities appointed by the government or the local authorities b By disposing of waste batteries and o...

Page 6: ...toring the input signal 24 Adjusting the input signal level 24 Setting the peak hold indicators 24 Setting the master clock 25 Setting the reference level 25 Using this unit as an AD DA converter 26 B...

Page 7: ...ames 47 Deleting playlists 47 Creating a new playlist 48 Playlist track menu operations 48 Changing the playlist track order 49 Removing tracks from playlists 49 9 Miscellaneous functions 50 INFO butt...

Page 8: ...er CASCADE function allows synchronized operation of multiple units including clock and recording playback timing synchronization Temperature compensated crystal oscillator TCXO enables high frequency...

Page 9: ...nsequences of any illegal copying performed using the recorder Precautions for placement and use The operating temperature should be between 0 C and 40 C 32 F and 104 F Do not install in the following...

Page 10: ...for playback and SD CF cards for recording Microdrives cannot be used with this unit Moreover some SD cards CF cards and USB flash drives especially older ones use slower flash memory components or sm...

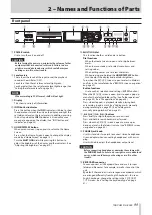
Page 11: ...elect menu items and setting values When editing names use to select characters While pressing and holding the HOME DISPLAY button turn to adjust the display and indicator brightness Turn when the BRO...

Page 12: ...pop up message is open press this to answer NO When the Home Screen is open press this to clear the level meter peak hold indicators t STOP button Stops playback and recording y PLAY button indicator...

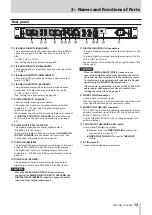
Page 13: ...2 kHz See Setting the reference level on page 25 h DIGITAL OUT AES EBU This balanced XLR digital audio output jack can output digital audio in AES3 2003 IEC60958 4 AES EBU format CAUTION When the DIGI...

Page 14: ...cursor up See BROWSE screen navigation on page 32 0 F4 button Skip to the previous mark Press when the BROWSEscreen is open to move the cursor down See BROWSE screen navigation on page 32 Home Screen...

Page 15: ...page 51 RENAME Edit folder and file names page 34 DELETE Delete folders and files page 34 DIVIDE Divide files page 37 UNDO REDO Undo redo DIVIDE operations page 38 F PRESET Restore the factory settin...

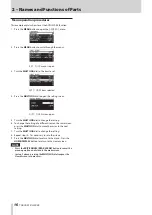
Page 16: ...Kscreen open 5 Turn the MULTI JOG dial to change the setting 6 To change the setting of a different item on the same screen press the MULTI JOG dial to move the cursor to the next setting 7 Turn the M...

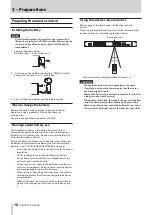
Page 17: ...ices to the same power supply line When using a power strip for example use a thick cable with a high current capacity to minimize variation in the power voltage Digital recorder or other device Clock...

Page 18: ...ion battery with the correct orientation Do not recharge the coin shaped lithium ion battery Do not heat or disassemble the coin shaped lithium ion battery or put it into fire or water Do not carry o...

Page 19: ...date and time are added to recorded files based on the unit s built in clock 1 Press the MENU button repeatedly to open the UTILITY page and turn the MULTI JOG dial to select CLOCK ADJST 2 Press the...

Page 20: ...or CF card when the unit is in use recording playing back writing data to a card etc Doing so could cause recording to fail recorded data to be damaged sudden loud noise to be output from monitoring e...

Page 21: ...n NOTE During selection press the EXIT CANCEL PEAK CLEAR button to cancel the selection and return to the menu screen 4 The name of the currently selected media appears at the top right of the Home Sc...

Page 22: ...an unexpected power interruption occurs when recording to an SD or CF card the unit has a protection function that might prevent the complete loss of all track recording data Data recorded up to about...

Page 23: ...l to select CHANNEL 10 Press the MULTI JOG dial to open the CHANNELscreen 11 Turn the MULTI JOG dial to set the recording mode stereo recording mono recording Options STEREO default MONOx2 12 Press th...

Page 24: ...o open the INPUT VOLUME screen NOTE The LEVELitem shows the input levels 3 Turn the MULTI JOG dial to adjust the VOLUMEitem which is the input signal level Options MUTE 60dB 12dB default 0 0dB CAUTION...

Page 25: ...pop up error message appears press the EXIT CANCEL PEAK CLEAR button to return to the Menu Screen and change the master clock setting If the unit cannot lock to the set master clock it will automatic...

Page 26: ...at selected on the FILE TYPE screen See Setting the recording file format on page 23 8 Press the MULTI JOG dial to confirm the setting and return to the menu screen Basic recording operations You can...

Page 27: ...matically enters recording standby Sync recording starts as soon as the level is detected Sync recording operation When the sync recording function is on and the unit is in recording standby recording...

Page 28: ...in the same way as LEVEL mode and new tracks will be created in response to the input level TIME A new track with a higher number will be created at the set time interval AUTO TRACKscreen TIMEitem val...

Page 29: ...g marks is possible but moving to and deleting those marks is not possible Moving to and deleting marks is only possible when the track is stopped in playback standby or playing back See Locating to m...

Page 30: ...the MENU button to open the REC FILEmenu and turn the MULTI JOG dial to select NAME 2 Press the MULTI JOG dial to open the FILE NAMEscreen 3 Turn the MULTI JOG dial to set the file name format Option...

Page 31: ...I JOG dial to select Shift and press the MULTI JOG dial This also switches between numbers and symbols at the same time To cancel editing Press the EXIT CANCEL PEAK CLEAR button CAUTION You can also d...

Page 32: ...rk with Press the MULTI JOG dial to open the folder or file menu pop up See Folder operations on page 33 See File operations on page 33 Press the EXIT CANCEL PEAK CLEAR button to move up one level in...

Page 33: ...the file menu pop up Turn the MULTI JOG dial to select the item that you want and press the MULTI JOG dial to execute the operation NOTE When a protected SD card is loaded the RENAME DELETE ADD P L a...

Page 34: ...ot appear when the RENAME function is being used The following symbols and punctuation marks cannot be used in names NOTE In addition to using the BROWSEscreen to select a folder or file to change its...

Page 35: ...peration Depending on the selected item MOVING or COPYING appears in a pop up and the folder or file is moved or copied After selecting MOVE After selecting COPY After moving or copying completes the...

Page 36: ...e folder menu pop up 2 Turn the MULTI JOG dial to select CREATE 3 Press the MULTI JOG dial to open the CREATEscreen 4 Input the folder name For details about how to input a folder name see Inputting a...

Page 37: ...After dividing completes the BROWSEscreen reopens NOTE When stopped you can press the EXIT CANCEL PEAK CLEAR button to return to the BROWSEscreen without dividing You cannot move to the beginning or e...

Page 38: ...el an UNDO operation press the EXIT CANCEL PEAK CLEAR button 4 Press the MULTI JOG dial to undo the file division UNDO WORKING appears in a pop up and the file division is undone After completing the...

Page 39: ...words you can efficiently prepare materials for playback on this unit Files and tracks Audio data is saved on media in files If the MODEitem on the CHANNELscreen is set to STEREO one stereo file will...

Page 40: ...with a number pad or a USB number pad you can locate to specific positions when the unit is stopped playing back or in playback standby Press the asterisk key to clear the track number and time displa...

Page 41: ...MULTI JOG dial to select whether to delete one mark or all marks in a file Options SINGLE Delete only the selected mark ALL Delete all the marks added to the current file 4 Press the MULTI JOG dial t...

Page 42: ...ccess speed differences resulting in synchronization discrepancies and other unpredictable problems We have posted a list of media that we have confirmed for use with cascade operation on our web site...

Page 43: ...g CASCADE setting Master unit Internal MASTER Slave unit DIN SLAVE 8 8 Using the master unit as the clock master for word clock synchronization Connections Use a coaxial digital cable to connect the m...

Page 44: ...rnal clock generator Settings Press the MENU button to open the GENERALpage of the menu screen Set the CLOCK MSTRand CASCADEitems as follows See Setting the master clock on page 25 See Setting master...

Page 45: ...operation speed might occur between the master and slave units Moving to marks set on a slave unit is not possible Recording to both master and slave units Synchronized recording from the beginnings o...

Page 46: ...other playlists have been created the last open playlist will be the current playlist Registering tracks in a playlist You can register tracks in a playlist In addition you can register a folder to ad...

Page 47: ...playlist name is changed the BROWSEscreen reopens CAUTION Names that contain characters other than the letters of the alphabet numbers and symbols cannot be edited the name will not appear when the RE...

Page 48: ...eopens Playlist track menu operations When a track that has been added to the playlist is selected press the MULTI JOG dial to open the pop up playlist track menu Use this menu to work with a track th...

Page 49: ...ompletion the BROWSEscreen reopens Removing tracks from playlists To remove a track from a playlist use the track menu REMOVE item This operation only removes tracks from playlists It does not delete...

Page 50: ...l cycle through showing the Home Screen the error message and the operation status indicator stays red in order Copying files between media backing up You can copy all the contents of one medium to an...

Page 51: ...en a confirmation pop up message NOTE To cancel press the EXIT CANCEL PEAK CLEAR button 3 Press the MULTI JOG dial again to restore the unit settings to their factory defaults READING MEDIA appears in...

Page 52: ...r input mode is activated automatically according to the current operation of the unit Full keyboard Keyboard key s Operation Esc key Same as the EXIT CANCEL PEAK CLEAR button F1 key Same as the HOME...

Page 53: ...dy existed Un Redo failed The REDO operation failed CLOCK LOST Switched to internal Master clock synchronization became unlocked The unit switched to its internal clock CANNOT COPY Not Enough space on...

Page 54: ...ing REC ERROR Recording stopped because an error occurred during recording REC ERROR Buffer overflow Recording stopped because a buffer overflow error occurred WRITE ERROR An error occurred while writ...

Page 55: ...e erase unneeded data to make more space or change the media e If the folder already contains a large number of entries the total number of files folders and other items change the recording folder 8...

Page 56: ...stereo jack Maximum output 45 mW 45 mW 32 load 0 1 distortion Digital input S PDIF CASCADE unbalanced Connector RCA pin jack Format IEC60958 3 S PDIF Input frequency 44 1 48 88 2 96 176 4 or 192 kHz w...

Page 57: ...105 dB or higher JEITA Playback Distortion THD N 1kHz PCM 24bit mode and DSD mode 0 003 or less BALANCED JEITA 0 001 or less UNBALANCED JEITA S N PCM 24bit mode 118 dB or higher Ref 20dB BALANCED JEI...

Page 58: ...sional drawings 465mm 483mm 44mm 1mm 31 8mm 14mm 280mm 11mm 433mm Illustrations and other depictions may differ in part from the actual product Specifications and external appearance may be changed wi...

Page 59: ...Ref Level Select Ref Level Input Source Input Volume Digital Inputs SRC SRC ON OFF I F Rec Monitor Record Tracks Track L CF Card SD Card Track R LED Meter D A XLR AES EBU XLR AES EBU Play RCA Unbalanc...

Page 60: ...MEXICO S A de C V http teacmexico net Phone 52 55 5010 6000 R o Churubusco 364 Colonia Del Carmen Delegaci n Coyoac n CP 04100 M xico DF M xico TEAC UK LIMITED http tascam eu Phone 44 8451 302511 Mer...

Reviews: