12
TASCAM BD-MP1
Button combinations and the unit's behavior
Button combination
Button press
Behavior
SHIFT
-
Simultaneous press
Changes the LOCK setting.
SHIFT
8
Simultaneous press
Confirms or selects menu items.
SHIFT
y
Simultaneous press
j
(down)
SHIFT
9
Simultaneous press
k
(up)
SHIFT
m
Simultaneous press
l
(left)
SHIFT
,
Simultaneous press
;
(right)
y
8
Simultaneous press
Displays the HOME screen.
y
9
Simultaneous press
Displays the top menu/title menu of the disc.
y
m
Simultaneous press
Selects repeat modes.
y
,
Simultaneous press
Plays back a defined section between point A and B repeatedly.
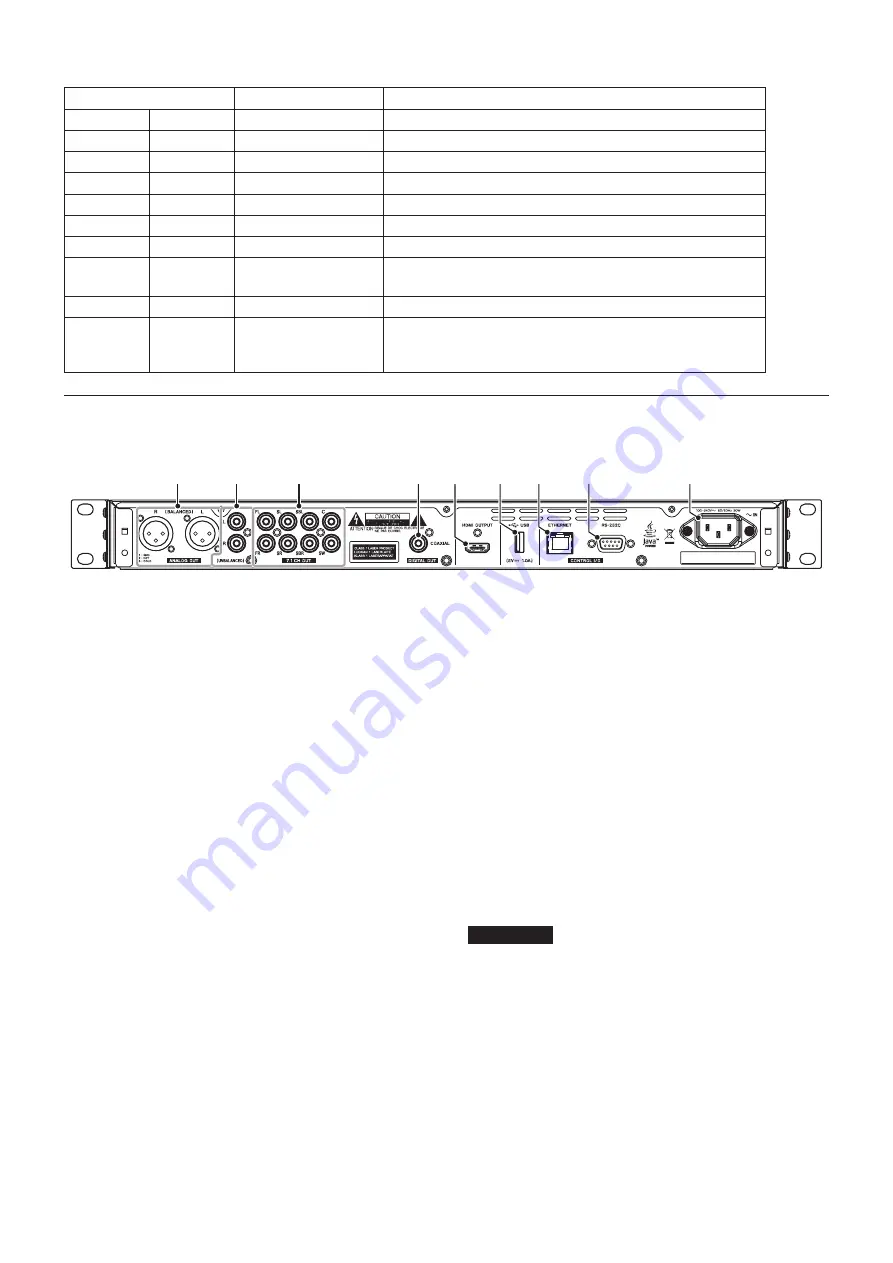
Rear panel
e
r
t
y u
i
o
p
a
e
ANALOG OUT (BALANCED) L/R jacks
These are balanced XLR analog output jacks.
These transmit audio signals to external speakers and
amplifiers, for example. Use XLR cables for connection.
r
ANALOG OUT (UNBALANCED) L/R jacks
These are unbalanced RCA analog output jacks.
These transmit audio signals to external speakers and
amplifiers, for example. Use RCA cables for connection.
t
7.1 audio out (unbalanced) jacks
These are 7.1 unbalanced RCA analog output jacks.
These transmit 8 channels of audio signals to a 7.1 surround
system. Use RCA cables for connection.
y
DIGITAL OUT (COAXIAL) connector
This is a coaxial digital audio output connector.
This transmits digital audio signals to a television. Use a
coaxial cable (75Ω) for connection.
u
HDMI OUT port
Audio/video signals are transmitted from the HDMI port. Use
an HDMI cable for connection.
i
USB port
Connect/disconnect USB flash drives here.
Audio, video and other files can be played back from a
connected USB flash drive. Moreover, this can be used to load
update files for firmware updates.
o
ETHERNET connector
This is an Ethernet port.
Use to connect this unit to a network and to control it from a
computer.
Moreover, BD-Live contents can also be accessed with an
Internet connection. Use an STP cable that is category 5e or
higher for connection.
p
RS-232C connector
This is a 9-pin D-sub RS-232C control input/output connector.
A computer can be used to control this unit by connecting to
it with an RS-232C cable.
a
AC IN connector
Connect the included power cord here.
V
CAUTION
Always use the included cord to supply power to this unit.
Use of a different one could cause malfunction, fire or electric
shock.


