background image

©Tansun Limited 2008                Part No. 042220             Issue. 1 

F o l l o w i n g   i n f o r m a t i o n   i s   o n l y   f o r   E U - m e m b e r   s t a t e s : 
 

The use of this symbol indicates that this product may not be treated as household waste. By ensuring this 
product is disposed of correctly, you will help prevent potential negative consequences for the environment 
and human health, which could otherwise be caused by inappropriate waste handling of this product. For 
more detailed information about recycling of this product, please contact your local council, your household 
waste disposal service or the shop where you purchased the product. 

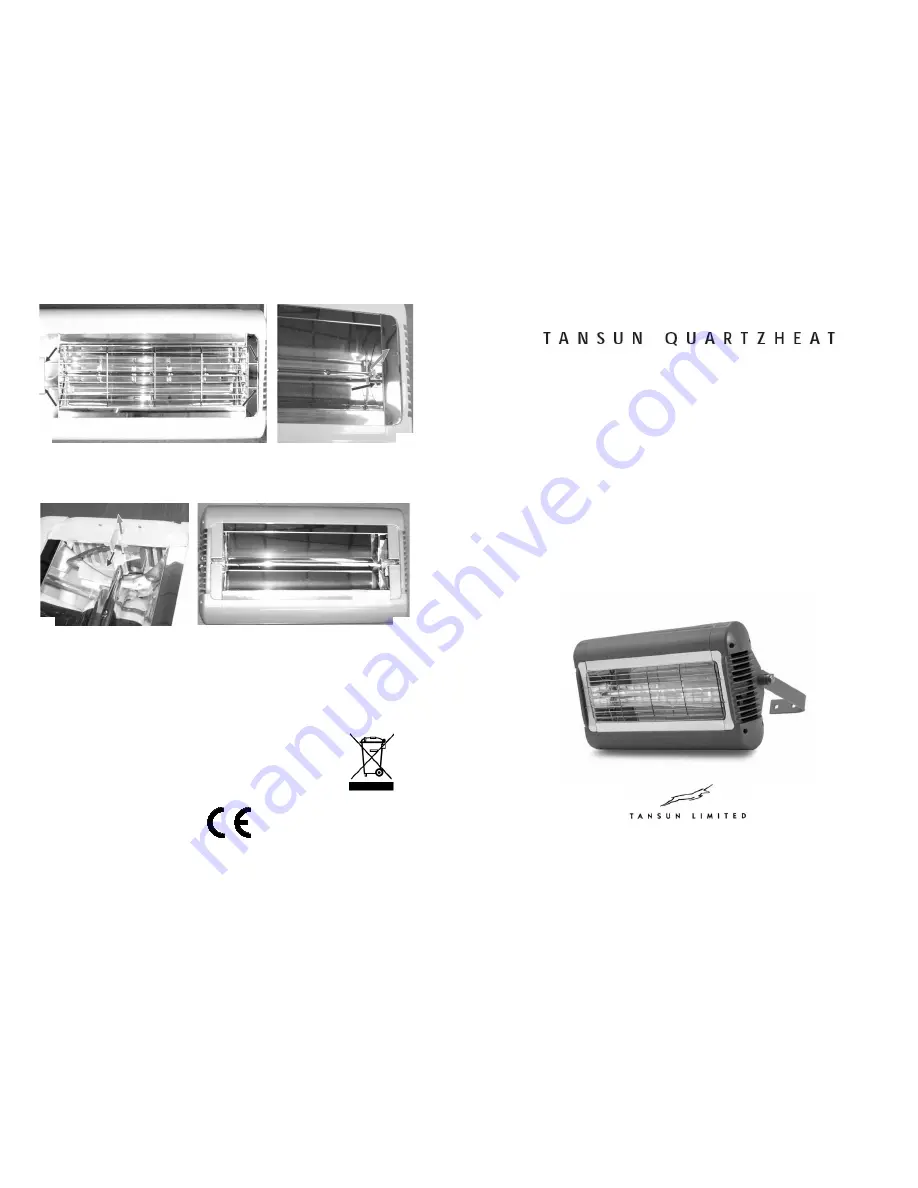
Fig. S 

Fig. T 

7. Remove the screw (Fig. T) from the side reflector and lift it up away from the heater to remove it. Repeat at opposite end to remove 
other side reflector. 
 
8.  The  lamp the  wires  should  be pulled  out  of the side  slots  and  the  lamp can  be  lifted  up completely  (Fig.  U).  The  wires  should  be 
gently pulled so they come out from behind the reflector.


9. The lamp should now be removed from the heater as shown in Fig. V. 
 
10. Refit the new lamp in reverse order ensuring that no wires get trapped and all screws are fully tightened.


Fig. U 

Fig. V 

Reference Manual 

Sorrento IP 

Single 


UK & EUROPEAN MODELS: 

SOR 210IP, SOR 210IP UK, SOR 210IP EU, 
SOR 215IP, SOR 215IP UK, SOR 215IP EU, 
SOR 220IP, SOR 220IP UK, SOR 220IP EU. 

Spectrum House, Unit 1, Ridgacre Road, West Bromwich, 

West Midlands, B71 1BW, England. 

Tel: +44 (0)121 580 6200 - Fax: +44 (0)121 580 6222 

Email: [email protected] - Website: www.tansun.com 

Summary of Contents for SORRENTO IP SINGLE SOR 210IP

Page 1: ...rew Fig T from the side reflector and lift it up away from the heater to remove it Repeat at opposite end to remove other side reflector 8 The lamp the wires should be pulled out of the side slots and the lamp can be lifted up completely Fig U The wires should be gently pulled so they come out from behind the reflector 9 The lamp should now be removed from the heater as shown in Fig V 10 Refit the...

Page 2: ...0 4 0 8 7 17 4 2 0 0 5 1 0 430 x 460 x 402 6 8 IP24 SOR 210IP x 3 230 3 x 1 0 3 0 4 3 13 0 2 5 0 5 1 0 430 x 693 x 402 10 2 IP24 SOR 215IP x 3 230 3 x 1 5 4 5 6 5 19 6 2 5 0 5 1 0 430 x 693 x 402 10 2 IP24 SOR 220IP x 3 230 3 x 2 0 6 0 8 7 26 1 2 5 0 5 1 0 430 x 693 x 402 10 2 IP24 I n s t a l l a t i o n Al l C o n f i g u r a t i o n s Warning this appliance must be connected to an earthed suppl...

Page 3: ...be wall mounted in a horizontal manner or vertical manner or hung from a ceiling from chains not supplied When wall mounting the Sorrento IP heater in a horizontal manner do not position the heater at an angle more than 90 and less than 30 as shown in Fig A When vertically mounting the Sorrento IP heater ensure the mounting surface is angled so the heater projects downwards see Fig C Do not positi...

Page 4: ...ts Always isolate the heater from the mains supply when adjusting the position 5 C e i l i n g H a n g i n g T w o S i n g l e H e a t e r s J o i n e d When two Sorrento IP heaters are joined they can be hung from a ceiling from chains Always allow the heater to cool before attempting to reposition move Never attempt to move the heater while it is switched on Observe the minimum safe distance bet...

Reviews: