6
Please refer to Table 1 for the recommended positioning of the heater with regards to minimum
distances. Do not install the heater in a corner!
Keep out of the reach of children.
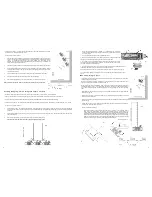
1. Securely fasten the L-shaped wall brackets to the mounting surface using both of the fixing
holes in the short part of the bracket (see Fig. L for mounting hole centres). Please refer to
Table 1 for recommended positioning of the heater. Please note. wall fixings are not
supplied. They should be selected to substantially support the weight of the installation. If in
doubt contact a professional for advice!
2. The heater assembly should be mounted with the terminal boxes at the bottom of the heaters.
3.
Fix the heater assembly to the brackets via the bolt threads on the middle heater. A serrated
washer should be placed on the threads first and the wall brackets should prise apart in order
to fit the threads in place.
4.
Place a washer and a nut on the thread on the outside of the wall brackets – both sides.
5.
Fully tighten the nut and bolts with the heater set at the desired angle.
6. Secure the supply cable so it is not resting on the body or obstructing the air-vents.
Always isolate the heater from the mains supply when adjusting the angular position.
Fig. K
Fig. L
C e i l i n g H a n g i n g - T h r e e S i n g l e H e a t e r s J o i n e d
When three Sorrento IP heaters are joined they should only be hung from a ceiling on chains - do not wall mount!
Always allow the heater to cool before attempting to reposition/move. Never attempt to move the heater while it is switched on!
Observe the minimum safe distance between the heater body and inflammable surfaces and objects when mounting.
Please refer to Table 1 for the recommended positioning of the heater with regards to minimum distances. Do not install the heater in a corner!
Keep out of the reach of children.
1. Please refer to Table 1 for recommended positioning of the heater. When hanging from a ceiling four chains of equal length and gauge
are required and should be selected with fixings that are more than adequate to hold the weight of the heater. If in doubt contact a professional
for advice!
2.
Fix the heater assembly to the chains via the hole in the centre of the joining bars as shown in Fig. M. and ensure the heater faces directly
down when hanging.
3. Secure the supply cable so it is not resting on the body or obstructing the air-vents.
Always isolate the heater from the mains supply when adjusting the position.
Fig. M
3
Fig. A
Fig. D
Fig. C
Fig. E
M o u n t i n g - S i n g l e U n i t
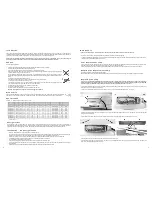
The Sorrento IP heater can be wall mounted in a horizontal manner or vertical manner or hung from a
ceiling from chains (not supplied).
When wall mounting the Sorrento IP heater in a horizontal manner, do not position the heater at an
angle more than 90° and less than 30° as shown in Fig. A.
When vertically mounting the Sorrento IP heater, ensure the mounting surface is angled so the heater
projects downwards - see Fig. C. Do not position the heater at an angle more than 45° and less than
30° to the horizontal as shown. Position the heater so the cord is exiting the terminal box pointing
down.
When ceiling hanging the Sorrento IP heater, ensure the minimum distance from the ceiling is adhered
to as shown in Fig. B.
Always allow the heater to cool before attempting to reposition/move. Never attempt to move the
heater while it is switched on!
Observe the minimum safe distance between the heater body and inflammable surfaces and objects
when mounting.
Please refer to Table 1 for the recommended positioning of the heater with regards to minimum dis-
tances. Do not install the heater in a corner!
Keep out of the reach of children.
1. When wall mounting, securely fasten the L-shaped wall brackets to the mounting surface
using both of the fixing holes in the short part of the bracket (see Fig. E for mounting hole
centres). Refer to Table 1 for recommended positioning of the heater. Please note. wall fixings are
not supplied. They should be selected to substantially support the weight of the installation. If in
doubt contact a professional for advice! When hanging from a ceiling two equal length and gauge
chains are required and should be selected with fixings that are more than adequate to hold the
weight of the heater. Again, if in doubt contact a professional for advice!
Continued over page...
Fig. B
When the electrical connection is outside, it is recommended that a waterproof
socket is used for the connection/terminal. Otherwise, the plug should be connected
to a socket indoors.
If in any doubt, please contact a suitably qualified electrician.
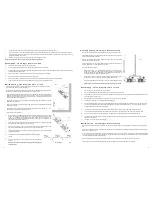
1. Unscrew the terminal box cover at the back of the heater and feed the supply cable
through the compression gland ensuring the rubber seal is on the cable.
2. Use a minimum of 1.0mm
2
H05RN-F supply cable with 2 poles and earth and sleeve
with silicon glass fibre braided (250°C) Sleeving. The live and neutral wires must be
connected to the terminal block. See Fig 1.
3. The green/yellow wire should be connected to the clamp marked with the earth symbol using a
suitable wire terminal. Fit cord grip and terminal box saddle once wired.
4. Tighten the barrel nut of the compression gland so that the rubber seal grips the cable (Fig 2).
5. To prevent water ingress, ensure that the cover is secured well by hand tightening all for screws
evenly.
N
L
Fig. 1
Fig. 2
E


