10
11
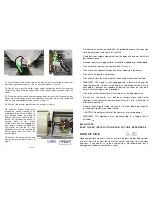
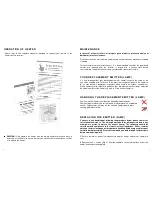
. At the far end of the emitter (lamp), the wire will be clearly visible in the emitter
wire tube so gently pull the wire (Fig. N) out of the tube until it is free.
12
. One at a time pull the emitter (lamp) holder spring clips back in the direction
shown in Fig. P and lift up the ceramic caps of the emitter (lamp) to remove it from the
heater.
13
. The emitter (lamp) should now be removed from the heater. Refit the new emitter
(lamp) into emitter (lamp) holders ensuring the ceramic caps are correctly seated and
feed the long wire through the tube (reverse of step 11).
14
. Refit the side reflector bracket/reflectors (reverse of step 9).
Fig. N
Fig. P
15
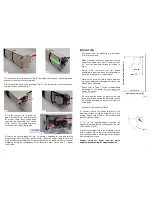
. Feed the emitter (lamp) wires
through the silcone sleeving of the
cable gland. If the wires are difficult to
pass through, loosen the gland nut
further or remove as shown in Fig. Q.
Ensure the compression washer is
p l a c e d b a c k i n t h e g l a n d
concentrically and not trapping any
wires before refitting the gland nut.
The gland nut can be full fully
tightened once you are satisfied the
emitter (lamp) wires will reach the
terminal block.
16
. Connect the emitter (lamp) lamp
wires to the terminal block (reverse of
step 5).
continued...
Fig. Q
COMPRESSION
WASHER
SLEEVE
•
Do not use an extension cord with this product because the extension
cord may overheat and cause a risk of fire.
•
Keep the mains supply cord away from the body of the heater which will
get hot during use.
•
Arrange the mains supply cord so it cannot be tripped over or damaged.
•
Do not cover or obstruct the heater while it is in use.
•
Do not insert any object through any slot or opening in the heater.
•
Do not use if a guard is not present.
•
Do not install less than the minimum mounting distance from the floor.
•
WARNING: This heater is not equipped with a device to control the
room temperature. Do not use this heater in small rooms when they are
occupied by persons not capable of leaving the room on their own,
unless constant supervision is provided.
•
Do not touch the heater when it is turned on, as the body gets hot.
•
Do not use the heater in a bathroom, laundry areas and similar
locations. Never locate the heater where it may fall into a bathtub or
other water container.
•
A heater has hot parts inside. Do not use it in areas where petrol, paint,
or flammable liquids are used or stored.
•
CAUTION: Do not spray water at the heater or into any openings.
•
WARNING: This appliance must be connected to a supply that is
earthed!
I M P O R TA N T -
S AV E T H E S E I N S T R U C T I O N S F O R F U T U R E R E F E R E N C E
R I SK O F FI R E
Keep combustible materials such as furniture, papers, clothes and curtains
at least 1.8m (6 feet) from the front of the heater and away from the sides
and rear. If the heater is to be used outside, we recommend that a
waterproof or indoor socket outlet is used.
3


